
Updated: 05/10/2024
Hi Folks! So, for Home Buying Tips: Part 1, we looked at house hunting tips and location, location, location. For Part 2 we move forward. So, you just put in an offer on a house, now what? Right? How do you know that one of the largest investments in your life WILL be a sound one? Get a Home Inspection!!!
Home Buying Tips – The Situation
YAY!!! So you just put in an offer on your perfect, old dream house…now it’s time to sit back and relax until the offer is accepted, right? Wrong? There is a little work yet to do, to ensure you are making a sound investment in a property that you know almost nothing about, except the cosmetics you’ve seen on the surface during the open house or walk-thru.
It's time to dive in and give this old house a “physical”. It's much like a life insurance company covering their bases and “checking” you out before agreeing to provide you with coverage. In both cases, the goal is to ensure the “patient” is healthy and free from major/catastrophic issues. Ignoring this step could be disastrous down the road, as you dive into projects – both physically and financially!
Home Buying Tips – The Plan (before closing)
I hate “mottos”, but yes, I admittedly have one that always plays in my head – “YOU are your own best advocate! No one else has YOUR best interests in mind except for YOU.” Ok, now that is out of the way, just remember 1) Always question everything, and 2) YOU have to live with the results after everyone else walks away – the banker, real estate agent, contractor, etc. So make sure YOU are satisfied and confident moving forward.
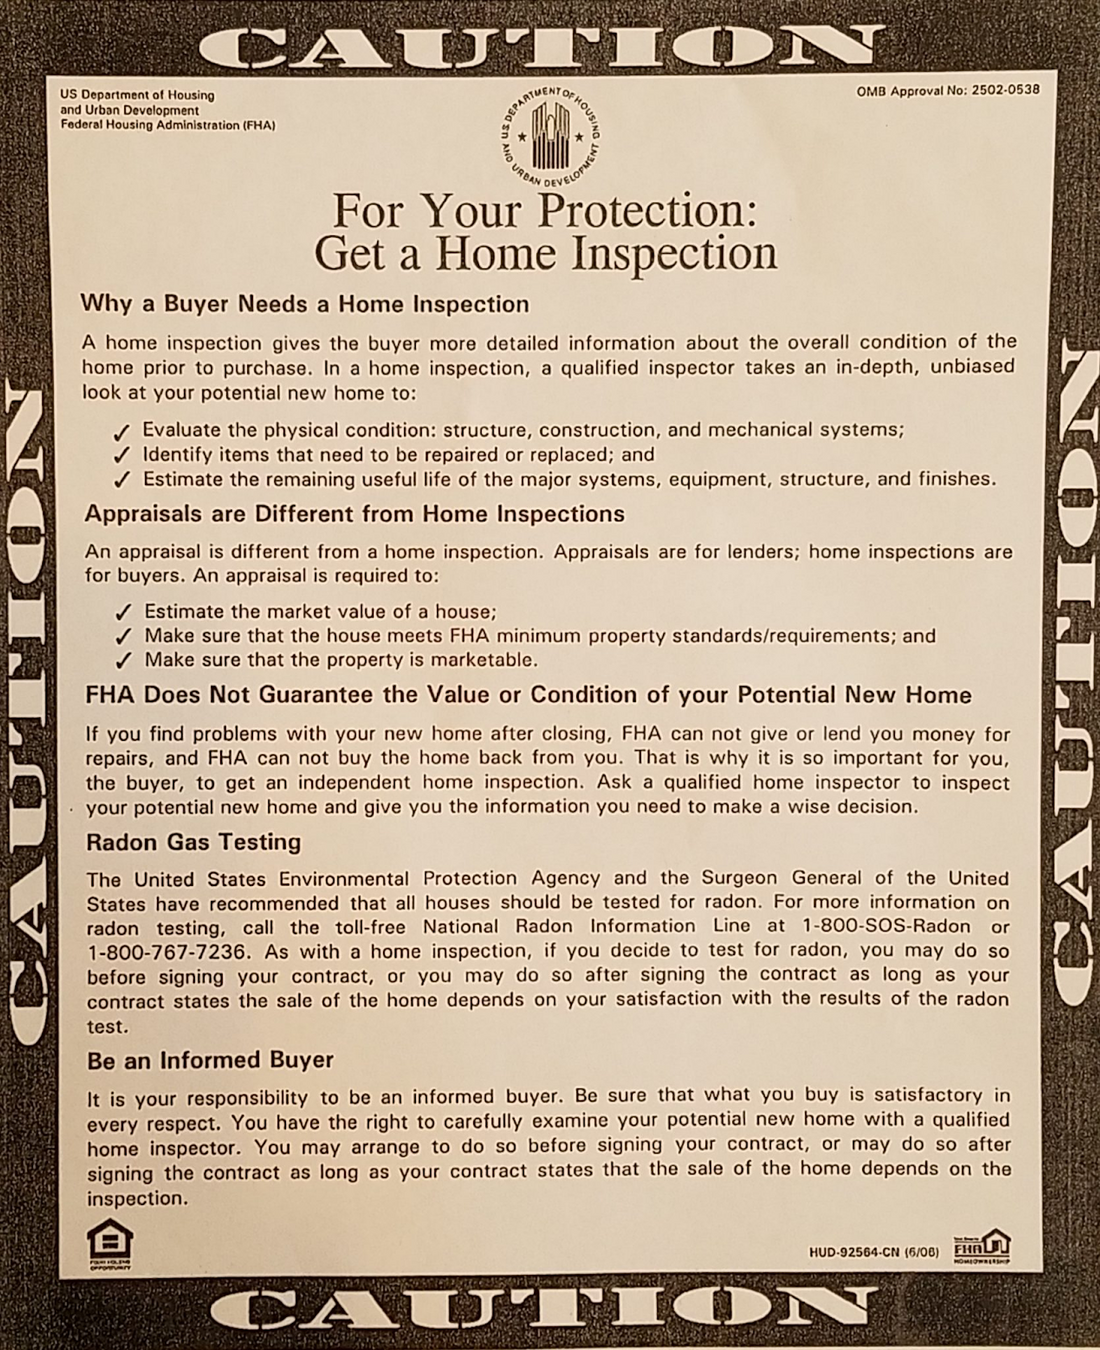
What is the #1 piece of advice you should consider when buying an old house, or any house for that matter? If you only do one thing… please, get a home inspection! At around $400-600, it can easily be THE BEST decision you will ever make! It will provide you with peace of mind, a bit of “insurance”, and all the info you will need to make a sound decision moving forward in regards to the current condition of the house!
Once you have closed on the contract/purchase, there is no going back! It. Is. Your. Problem! You lose all leverage as the “buyer” in this transaction. You need to know (early in the process) 1) what you are up against (in regards to house condition) 2) the commitment (time) it will take to fix/repair/restore it, and 3) an estimate of how much it is going to cost.
Home Inspection: The BEST Insurance Before Closing!
So we are back to the invaluable home inspection and assessing the condition of your potential new home - BEFORE CLOSING! There are many home inspection companies out there, so choose carefully! You can search locally, ask your real estate agent, or turn to the web. The example I will use here is US Inspect. A basic, in-depth inspection ($400-600) from a reputable company usually includes (if applicable):
Basic Home Inspection (~$400-600)
Tip: Be there on inspection day to learn about your new home! Major issues should not be glossed over!
Inspection should take at least 4 hours, if thorough.
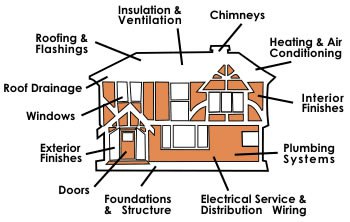
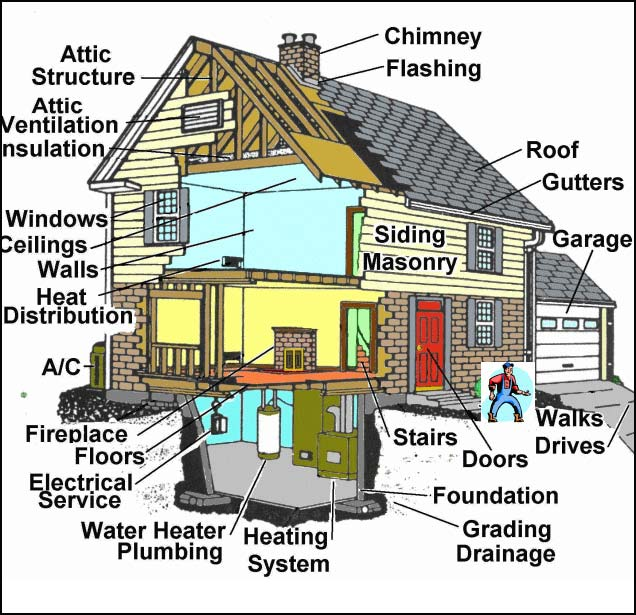
Around a dozen categories – roof, insulation, plumbing, appliances, etc.
Around 90-100 sub categories (if applicable) – chimney, foundation, gutters, water damage, electrical circuits, water pipes/pressure, and more.
Issues are usually listed as – 1) major concern, 2) safety issue, and 3) repairs.
See sample home inspection report with all the details HERE
Home Inspection: Additional Services
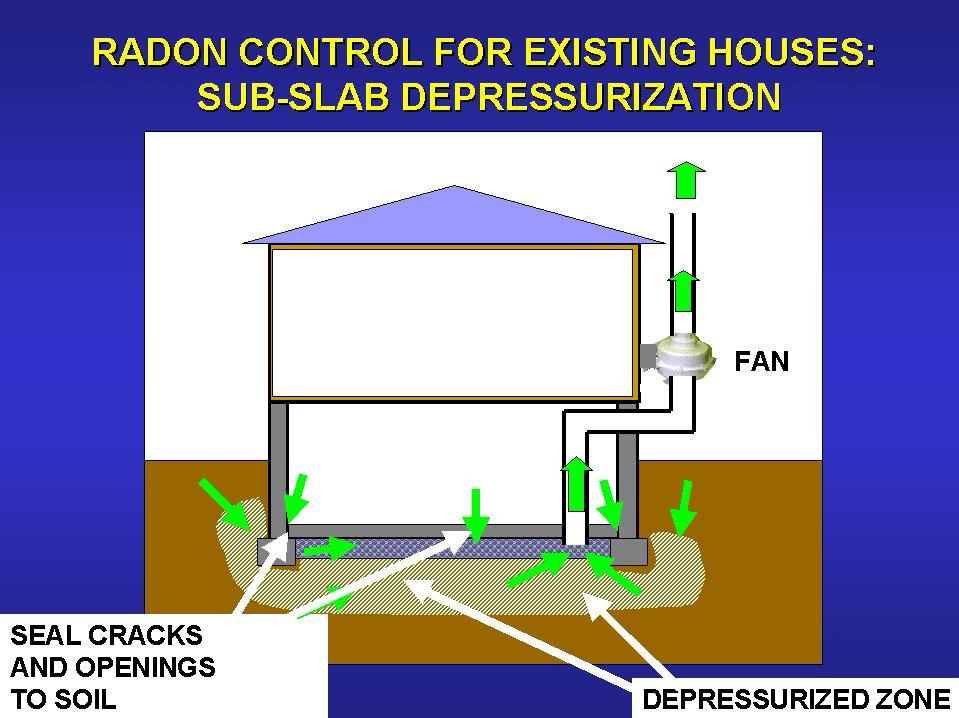
Radon (~$200)
Colorless, odorless, tasteless, and occurs randomly.
EPA Standards – mitigation at 4 pCi/l. I would want 2 or less!
Our home tested at time of inspection was: 12pCi/l !!!
Leading cause of lung cancer.
Radon mitigation systems cost ~$800-1000.
Basement floor must be completely sealed.
Long term radon testing should be considered as radon levels change with weather/ground conditions. One test, at one point in time may not be sufficient.
Active monitoring radon testers can be expensive – often $300+. The example here from Amazon is more affordable around $199. It is small, battery operated, and can be moved around the home to test all rooms from time to time. I have used this radon detector for about two years now and it's great! It’s affordable, and gives the following readings: 1 day, 7 day, and lifetime radon level readings.
***For about the price of one, paid radon test, you can buy your own monitor!***
https://wms-na.amazon-adsystem.com/panda/20070822/US/img/prime.png
Mold – (~$200-800)
Can cause minor to major health issues.
Remediation can be difficult and expensive.
Air/Water Quality
As discussed last week, some contaminated areas near industrial activity and chemical disposal, can cause toxic vapor intrusion through basement floors/walls and contaminate wells used for drinking water.
For more on water quality read What’s in Your Water? Is Tap Water Safe to Drink?
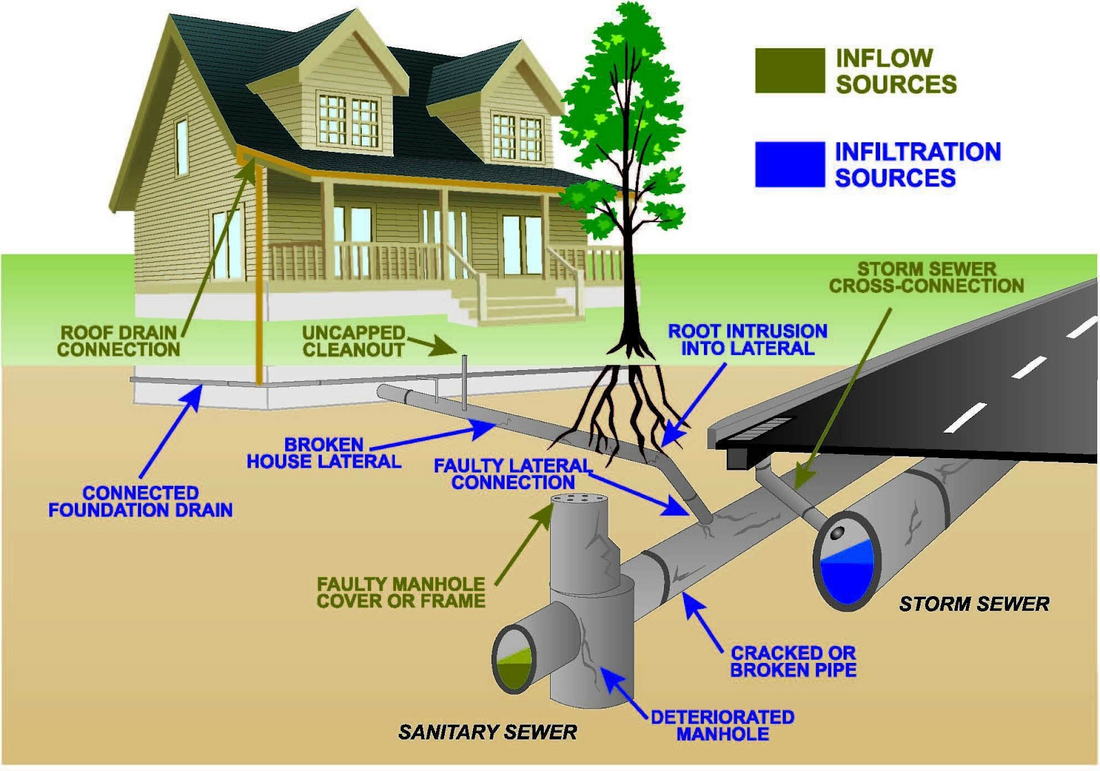
Sewer Pipe Inspection (~$200)
Previous inferior materials (like orangeburg tile) can cause premature failures.
Tree roots can grow into the sewer pipe damaging it.
Repair and/or replacement can exceed $10K in some cases, depending on the distance/length from house to the city sewer connection at the street.
See the entire list of additional services HERE.
Commitment and Time: Assessing the Repairs
- Assess the total number of issues on the report. This is where being on site for the inspection pays off! You can get informed answers to the questions below!
- Major, safety, and general repair categories: Are any of them deal breakers?
- Refer back to Part 1: What elements can/cannot not be easily changed, in regards to home conditions.
- Assess your DIY abilities vs what will need to be hired out to contractors.
- Set a scope of work: Basic repair, house flip, restoration?
- Estimated time to fix: Days, months, years? Write a rough repair plan – schedule/timeline (directly tied with cost estimates). Again, your inspector can give rough estimates!
Cost: Assessing the Cost of Repairs
In order for you to be an informed buyer, you need to be able to write a rough repair estimate, based on the home inspection report. The hard part is already done for you. Now just plug in some estimated costs.
Assess the total number of issues on the report. This is where being on site for the inspection pays off! Your inspector can throw out some rough estimates, to get you started with the cost of each repair.
Based on the estimated repair schedule you drafted, have a funding plan in place on how/when you will need funds for repair. Savings? Borrow above home cost, etc?
Path Forward: Before Closing
A home inspection report is the cheapest peace of mind/insurance that you can buy, in regards to one of the largest purchases you will make in your lifetime
Many home buyers and sellers aren’t always aware of the current condition of a home. This is why home inspections are so important.
Congratulations! You are now a more informed buyer for the property in which you are about to enter into a contract.
BEFORE CLOSING: Use the home inspection report and rough estimate you drafted to possibly negotiate a revised selling cost, based on the home’s current condition.
Conclusion
I hope this information was helpful to you in regards to the home buying process and home inspections! Stay tuned for Part 3, the final technical blog in this series: Home Buying Tips: Home Renovation Planning
Best of luck, and keep on Fixing!

For more info visit: www.myoldhousefix.com
Posts may contain affiliate links. If you use these links to buy something, we may earn a small commission (at no additional cost to you). Full disclaimer HERE.






0 Comment(s)