Updated: 05/10/2024
Let’s face it, if you own a home, especially an old one, you are no stranger to home projects, remodeling, and restoration…both large and small. This is where Project Planning comes in!
Back in my previous technical blog we touched on drafting a whole house rehab plan (after initial home inspection), and the proper order to start remodeling (outside to inside, etc), but how do you break that large set of projects down into small, manageable chunks that you can slowly start chipping away at?
Never fear, it's not as bad as you might think…so let’s get started and learn more on House Project Planning!
HOUSE PROJECT PLANNING - REFER BACK TO YOUR MASTER PLAN
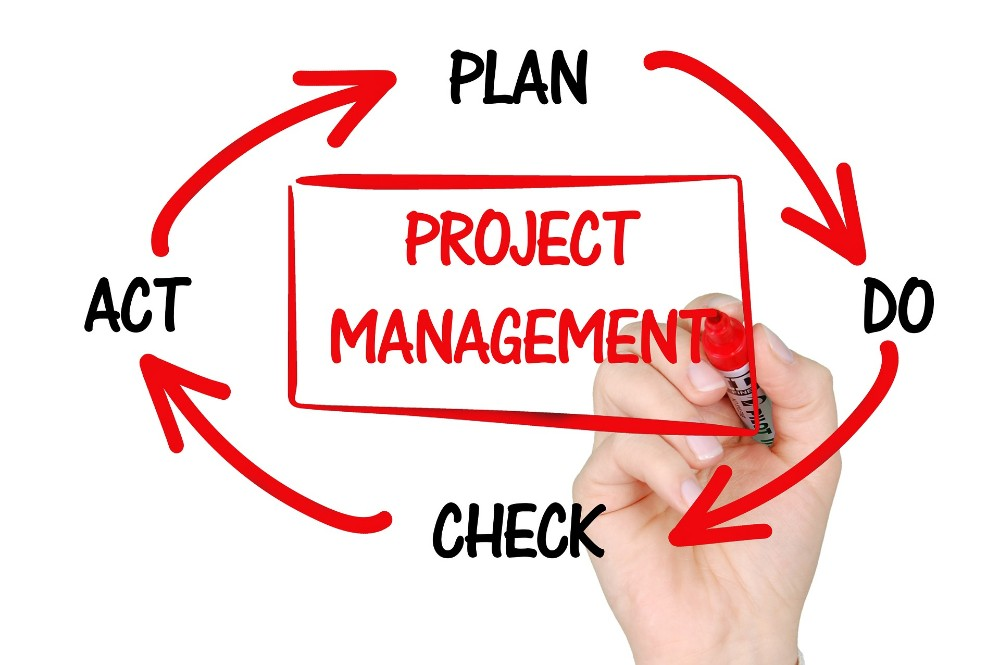
Project Management - Revisit and reassess your master plan and project order (previous technical blog) – it's a living document, and will always be changing, so don’t worry!
Is it still accurate?
Did priorities change?
Did your budget and scope of work change?
For more on the correct project order (to prevent rework), Norm Abrams, from This Old House has some additional tips and remodeling strategies here.
Each of us are different when it comes to specific tasks or projects that we are willing to take on, based on our comfort level, expertise, and DIY knowledge. There are usually three scenarios: 1) Some of us may hire out everything from start to finish, while 2) some of us may skip a general contractor, manage all the sub-contractors (electric, plumbing, etc), and even perform some of the work ourselves, and finally 3) those of us who perform all the work ourselves, from start to finish.
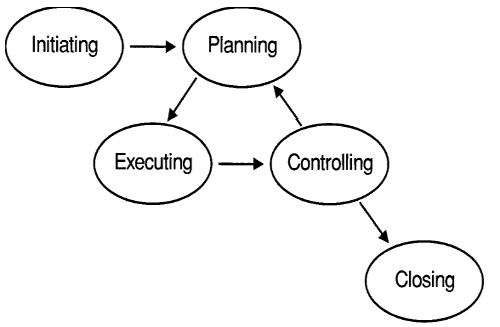
No matter which category you fall into, or which project you are working on, you’ll want to follow this basic five-step process for success…
PROJECT PLANNING 101: A BEGINNERS GUIDE TO SUCCESS
Just remember these FIVE steps, and you’ll be well on your way to mastering every project around the house in regards to Schedule, Cost, and Performance.
Basic Project Management Processes – Source, PMI.org
Let’s get started!
1.PROJECT INITIATION (Pre-planning)
This is where all your initial project ideas, brainstorming, coordination, and planning are born. This sets the direction you will be headed in.
Baseline / Inspection: What are the existing conditions, what is to be salvaged, reused, discarded?
Personal Preference / Input: What is your Vision and Mission Statement? What are your objectives, goals, priorities, needs, wants? Put a plan on paper…on purpose!
Ideas/ Brainstorming: Ask your neighbors, gather magazines clips, Pinterest, home tours, etc.
Draft Scope of Work: What is your size of the project (remodel/ complete gut job, etc). This is your initial rough draft.
Draft Design Work (concept drawings): This is your vision – On paper, easy to use design program, or hire an architect/builder.
Initial Planning Consultations: With architects, builders, sub-contractors – for scope and queue/sync with their schedules.
Always get at least THREE quotes, to ensure you are getting a fair price. Compare “apples to apples”!
Set a Draft Budget and How to Fund It: At least set a Min / Max to budget for.
Logistics: You know I like to talk about Logistics…so – PREVENT SCHEDULE DELAYS! For a major project, such as kitchens and baths, try to know what major appliances, fixtures, tubs, sinks, etc you will use ahead of time, to:
Ensure all items will work with your design – interact, physically fit, and function together.
Ensure long-lead time or special order items will arrive on time for the execution phase.
See Dry Run / Mock Up below (#2 PLANNING).
2.PROJECT PLANNING
This is the phase where you take your Draft Scope of Work and write your final plan of action – the who, what, where, when, and why!
Major Item Selection: As discussed in step one, we need to finalize the list of major items to be used – cabinets, sink, fridge, stove, vent hood, dishwasher, etc. This will enable everything to be planned and properly integrated together.
Final Design Work and Drawings: Final concept and/or construction drawings. Again, on paper, an easy to use design program, or from an architect/builder.
If you are good with Sketch-Up or Microsoft Powerpoint, you should be fine with a design program like Home Designer Suite 2019, click HERE for more details. The download will set you back about $100, and you’ll be up and running in about 15-20 minutes! For review and video, CLICK HERE.
It’s much safer to see a real-life, 3-D rendition and be able to make changes, rather than find out at the end, that you hate the design.
Design your project for ease of maintenance/cleaning, upkeep, and low operational costs (life cycle costs).
For architects, builders, and contractors, ask questions about materials, quality, how hard is it to clean, did they prime all 4 sides of your trim or siding so it doesn’t rot, etc. YOU are YOUR OWN best advocate! As the customer, you are the boss. Do what makes you happy, not what may be the easiest route for the contractor. Caveat: Compromise is always an alternative, as it is in everyone’s best interests to have a good working relationship.
Final Planning Consultation, Mechanical Plans, and Details: Whether you hire a contractor or not, it’s time to finalize the Electrical, Plumbing, HVAC, and Ventilation – Duration of work to be performed and the cost associated.
Special Tools/Equipment: Identify any special tools and/or materials that will be needed (especially if you are doing the work).
Set a Final Budget and Fund It: With at least 20% for contingencies. You WILL have surprises, existing items to bring up to code, etc.
Set a Final Schedule: Start/finish, trades work (if you hire out any work), associated inspections* – * Don’t forget about permits and city approvals (if applicable). Inspections, permits, and City design reviews WILL add additional time, especially if a Historic District review of your plan is required!
Logistics: Make sure all major, long-lead, and special order items have been ordered. Know when they will arrive! Also, make sure everything works together in the final design – will that Lowes sink cabinet hold a 180-pound farmhouse sink…probably not!!!
Dry Run / Mock up: Take the information that you have on hand to date (measurements, dimensions, sink, stove, tub, paint colors, etc) and try to mock up the space BEFORE the full demolition. This will give you a sense of how everything will fit and finish together. Besides, you really don’t want to paint 15 different samples of blue on your new walls or new cabinets! Do it now on the OLD materials!
At a minimum, map out your NEW layout on your OLD walls. Go ahead and locate/mark your studs, where new electrical outlets, vents, vent hoods, appliances, etc need to be located. This will help your layout plan go easier with less issues like a stud being in the way of a light, etc!
Remember to ask questions about EVERYTHING…now is the time, before its too late!
3.PROJECT EXECUTION
Here is where it all comes together…all the hard work and time that you put into building a GREAT plan, will now pay off!
Project Kickoff Meeting: One last sanity check before the dirt or drywall flies!
Run over all the project details one more time, to ensure nothing is overlooked.
Ensure all schedules, contractors, material, supplies, special tools, and equipment are on site and available.
Time to Execute (projects vary, generic guide below):
Demolition
Post-Demolition assessment
Carpentry/Framing
Kitchen cabinets/Final measurements
HVAC
Electrical
Plumbing
Fire caulking/blocking
Rough Inspection
Insulation and Inspection
Plaster/Drywall
Paint
Cabinets & Fixtures
Doors & Surrounds
Cleaning
Flooring
New Trim & Finish work
4. PROJECT MONITORING / CONTROLLING
This is where you will be following up to ensure the project is running smoothly and items/elements/tasks are being completed on time.
Project Progress vs Plan: Is the planned work being completed according to schedule for each element, trade, or milestone (electrical, plumbing, etc).
Snowball Effect – Every day of schedule slip can impact all other trades/contractors, thus your schedule slips to the right (lengthens).
City Inspections: Pass/Fail/Rework
Corrective Action Plans: If needed. Plan for “Murphy’s Law”. What can go wrong, will go wrong. No project is problem-free!
Quality Control: Is the project being completed in accordance to scope, contract, and/or exact project specifications?
5. PROJECT CLOSOUT
This is where the project is coming to a close, and you are just tying up loose ends.
Final Inspections: City, contractors, sub-contractors, etc.
Final “Punch list”: based on the final inspections, are there any tasks/items that need additional attention, rework, etc.
Final Function Check: To make sure everything is operation ok, no leaks, etc.
Final Documentation: Paperwork, billing, payments, invoices, etc.
Final Clean Up: Final wrap up for cleaning and removing protective covers from floors, countertops, etc.
Return Leftover Items and Materials: You usually have a small wind w for returns whether its a Big Box store and even less from an online purchase. Assess what is needed for spares and return the rest.
Lessons Learned: Take what you learned, BOTH good and bad, on to the next project, so you learn from your mistakes.
If you would like to read more on the basic processes of Program Management, CLICK HERE for additional info from Program Management Institute (PMI.org).
Congratulations…your project is complete!!!
You have now earned your unofficial Project Management Professional (PMP) credential!
WANT TO LEARN MORE ABOUT PROJECT PLANNING AND PROJECT MANAGEMENT?
Think Like a Backpacker!
What??? Why???
“Any hike is a project because it is a temporary endeavor undertaken to create a unique result”
“Backpacking is the ultimate exercise in project efficiency. Why? Because every decision made has an immediate, measurable, and lasting impact on the likelihood of the trip’s success. Every item chosen to carry adds to the burden.”
(PMI, 2004)
Read the entire PMI article HERE
PROJECT PLANNING CONCLUSION
Every project is temporary and should have a defined start and finish.
ALWAYS have a plan! If you aim at nothing …you will hit it every time, so be prepared!!!
All project details interact with each other, both directly, and indirectly, so understand those interactions and relationships.
When in doubt, simplify the project or separate into smaller projects to keep from being overwhelmed and/or seek advice and assistance from professionals, friends, family, and neighbors.
Never stop learning!!!
JUST REMEMBER…YOU CAN DO THIS!!!
Best of luck, and keep on Fixing!

For more info visit: www.myoldhousefix.com

Posts may contain affiliate links. If you use these links to buy something, we may earn a small commission (at no additional cost to you). Full disclaimer HERE.


0 Comment(s)