
Updated: 05/10/2024
Who’s ready for more Vintage Kitchen Remodel design and details? Step 2 will discuss kitchen planning, remodel details, and logistics that are rarely planned and thought about, so you don’t want to miss this installment!
KITCHEN REMODEL STEP #2: KITCHEN PLANNING & PRODUCT SELECTION
Vintage Kitchen Remodel: Step 1 set the stage for our vision and direction….now it’s time to continue on to Vintage Kitchen Remodel: Step 2. This is our “main” planning phase, where we will finalize all plans, details, and the scope of work.
This is the phase where we take the Draft Scope of Work and write the final plan of action – the who, what, where, when, and why!
After this step is complete its “pencils down” for any additional or major kitchen design changes – except for unplanned circumstances that may pop up along the way. So let’s dive in!
Draft Kitchen Design Layout
First, before we start the final planning…a little interactive Q & A…
Q: What is the #1 starting point [above] in our draft kitchen design (the long wall and the short wall), in regards to planning the layout and location of things? In other words, which basic kitchen items are the most important starting/reference points, and why? The sink? Window? Stove? etc?
A1: (long wall) – The Window/Sink centered together is the starting point. The plumbing stays, etc, so this one was easy. Next, the refrigerator has to go against the far wall, so everything else just falls in between. DONE!
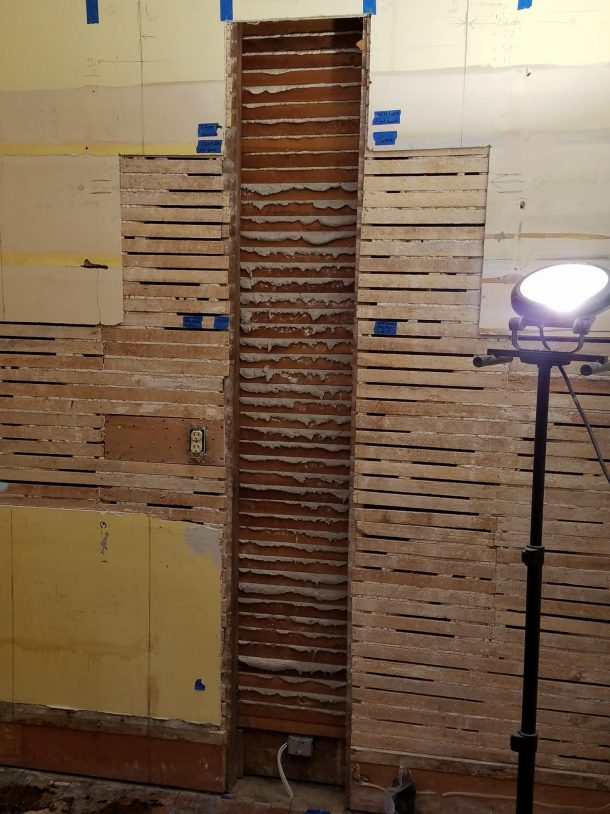
A2: (short wall) – The stove in the center, right? Nope! This one is a bit harder. Believe it or not, the starting point is the Range Hood w/ Remote Blower and not the stove. Why? Because this is an interior wall and the range hood will vent outside…SO NOW WE HAVE A PROBLEM!!! We will need to run the fan duct/pipe inside the wall stud cavity that is the closest to the center of the short wall. SEE VENTILATION PLAN BELOW FOR DETAILS.
Wall Stud Cavity for Range Hood Duct
KITCHEN PLANNING - RENOVATION HOMEWORK & AGENDA
Homework from Vintage Kitchen Remodel, Step 1 and agenda.
- Major Items: Sink, Refrigerator, Stove, Range Hood, Dishwasher, Cabinets, etc.
- Final Kitchen Design Work and Drawings: Layout, floor plan, and kitchen cabinets.
- Final Planning Consultation and Mechanical Plans: Electrical, Plumbing, HVAC, Ventilation, etc – NOTE: appliance hook up locations impact this plan.
- Special Tools and Equipment.
- Set a Final Kitchen Remodel Bugdet.
- Set a Final Kitchen Remodel Schedule.
- Kitchen Logistics
- Dry Run/ Mock Up
- Expectation Management: Alternate Kitchen Plan
KITCHEN PLANNING - PRODUCT SELECTION
You will need to know all of the major items and appliances, as they need to integrate seamlessly with your cabinet design…so, there are TWO scenarios with different pros and cons:
- Custom Cabinets: Select all the major items and appliances, then design the cabinets around them [more flexible cabinet design and exact fit, especially if you have very specific custom appliances in mind]. $$ – $$$$
- Stock Cabinets: THE OPPOSITE – Select your cabinets to fit your space (might not be an “exact” fit based on standard/fixed dimensions), and then select standard-sized major items and appliances that will work well together less flexible cabinet design and fit for your space, but open to more standard-sized appliance options]. $ -$$
For alll the major items below, I have a complete list of all the items, info, details, and reviews so you can source the same or similar "specs" in your local areas.
Visit the MOHF Kitchen Resource Page.
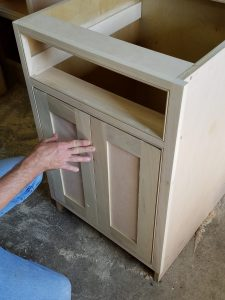
- Kitchen Cabinets: Custom/Local, Drouillard & Sons
- We opted for custom cabinets and selected all the appliances up front, as there were specific major items and appliances that we wanted.
- “Shaker-style”.
- “Built-In” & “Panel Ready” Features (Fridge, dishwasher, etc).
- Door features: Solid wood, beadboard features (at fridge, sink, and range hood), and open-framed (glass or metal mesh) for the small upper cabinets.
- Hardware: House of Antique Hardware
- Polished nickel knobs and handles
- Countertops: Custom/Local, Drouillard & Sons
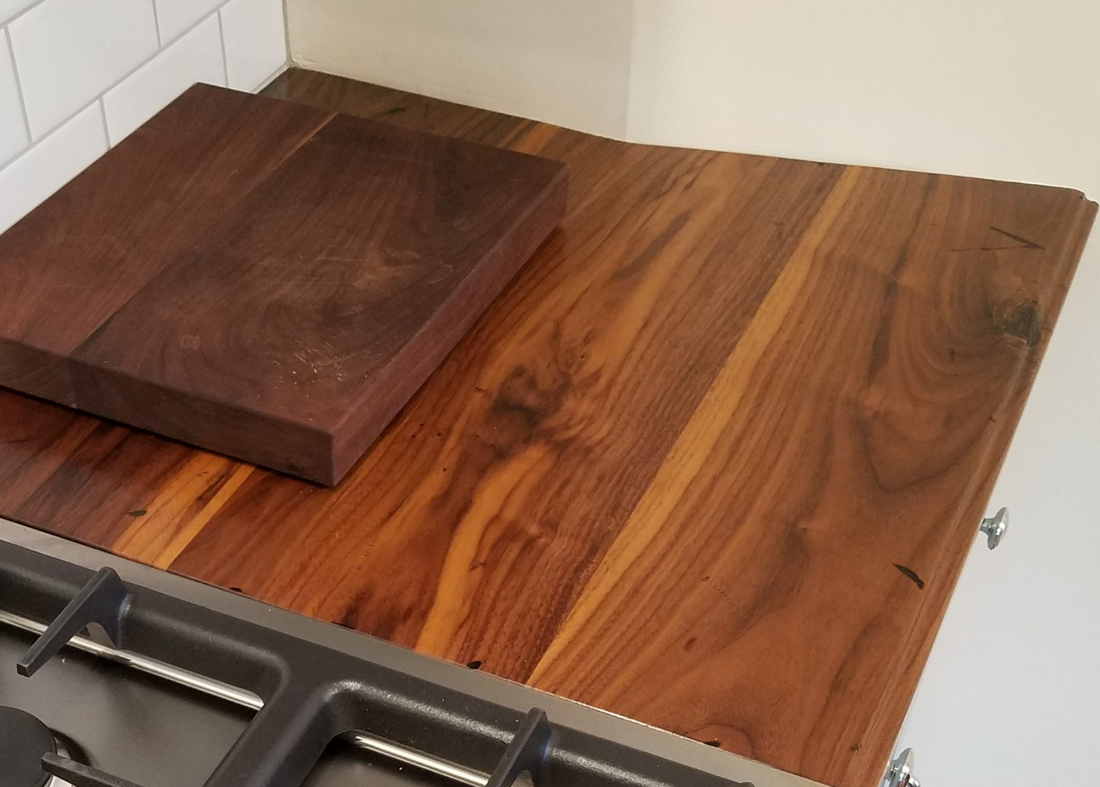
- Custom built, similar available at Lowes.
- Material – Black Walnut, distressed.
- All 6 sides sealed/finished with 6 coats of Waterlox sealer/stain.
- Custom glass protection panel for espresso machine side.
- A similar version of the Black Walnut Countertop is available at Lowes
- Make sure they seal ALL sides with 4-6 coats of Waterlox!!! Refer back to the countertop installation blog for more info.
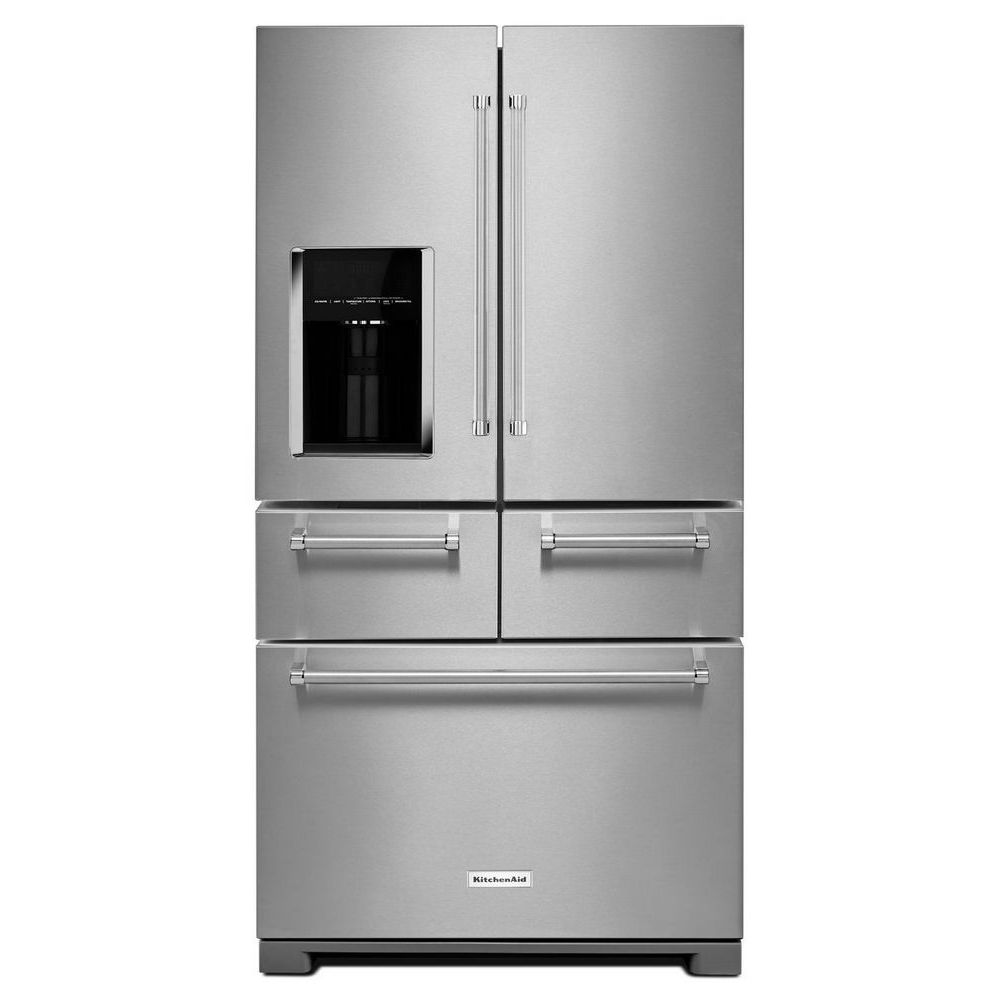
- Refrigerator: KitchenAid – 36 inch width.
- We had to have this fridge! It was “fringe” at first sight, lol. Full disclosure, and to be honest…none of the refrigerators we looked at completely wowed us…and we looked at dozens. But this one came close! It is pretty large, so that’s why we wanted a built-in look with a panel and deep custom cabinet to hide it.
- NOTE: We ended up very disappointed with the quality and durability from the first unit. KitchenAid had to replace with a 2nd unit due to repeated mechanical failures. The 2nd unit is 2 years old with no issues to date.
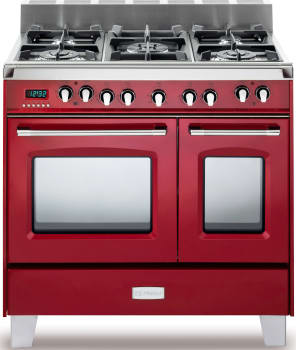
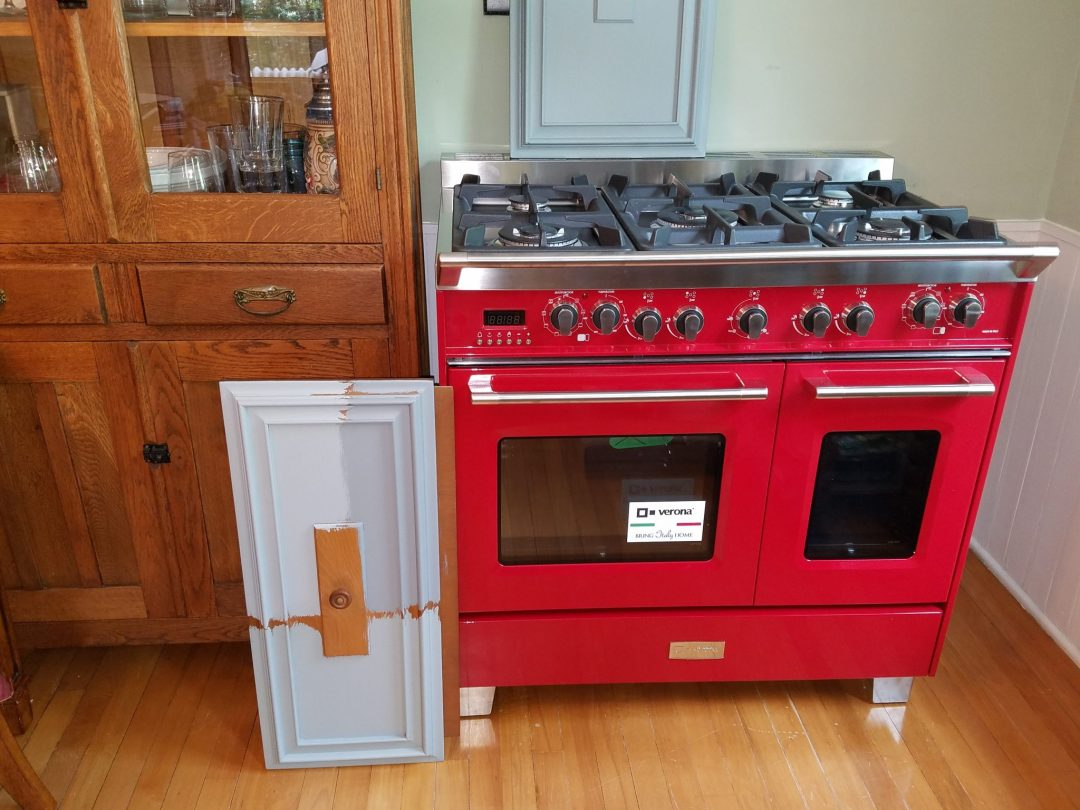
- Stove/Range: Verona Classic in Red – 36 inch width
- This one was tough too! We wanted a dual oven, but our max width was 36 inches…so this was the only option. We wanted a dual oven, so we could use the small one for warming dishes (we hate it when side dished/plates get cold during a large dinner), and it is also less wattage than our toaster oven – bye bye toaster oven, and hello more countertop space!
- Verona available at Amazon and AJ Madison
- For more info/reviews: See the MOHF Kitchen Resource page
- Complete Verona Catalog
- HOUZZ Verona Forum thread
- NOTE: this Verona "Classic" model has since been discontinued, but similar models are still available.
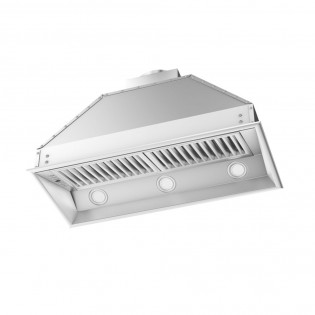
- Range Hood: Z-Line – 34 inch wide, 16 inches deep
- I’ll be honest…you can pay $500 to $5000 for a range hood. We just opted for a decent one from Build.com that will be easily serviceable from the cabinet service door, because it’s not “if” it will tear up it’s “when“…with either option here. This one is also a “remote” blower hood (can mount blower in attic, basement, crawlspace for almost silent operation… read more on this below at Ventilation Plan.
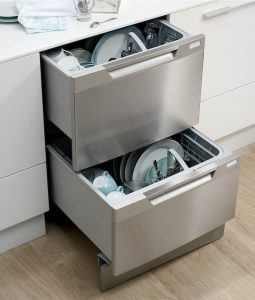
- Dishwasher: Fisher & Paykel DishDrawer – Standard 24 inch wide opening.
- What is better than one dishwasher…TWO dishwashers!!! Never put up dishes again (if you don’t want to) with this 2-in-1 model. They also come with a “panel ready” model for custom cabinet drawer fronts.
- Kitchen Sink: Rohl/Shaws Original 30″ Farmhouse Sink – 30 inch wide.
- This fireclay farmsink is a stunner!!! Besides it having a few issues (read the review here), it was love at “first sink”! Long story short, there really was no other alternative sink that we would consider, the Rohl/Shaws just has that look! It's all about trade-offs.
- Note: our sink did have issues with the glazing and "spider cracking". It was replaced under warranty and the issue is said to be rare by Rohl.
Espresso Machine: Rocket Appartamento
- Height – Need sufficient “under cabinet” clearance.
- Heat, water, and coffee ground protection for the countertop.
- Coffee Grinder: Baratza Vario
Want to see the full list of items used in the farmhouse kitchen remodel?
Visit the MOHF Kitchen Resource Page.
KITCHEN PLANNING - FINAL DESIGN & DRAWINGS
Ok, now we ARE making progress! We have all the big items out of the way… so now it’s time to finalize the kitchen design, floor plan, and layout! This will be the final concept and/or construction drawings – on paper, an easy to use design program, or from an architect/builder – refer back to House Project Planning 101, if needed.
Refer back: Kitchen Design Guide to Heights and Dimensions
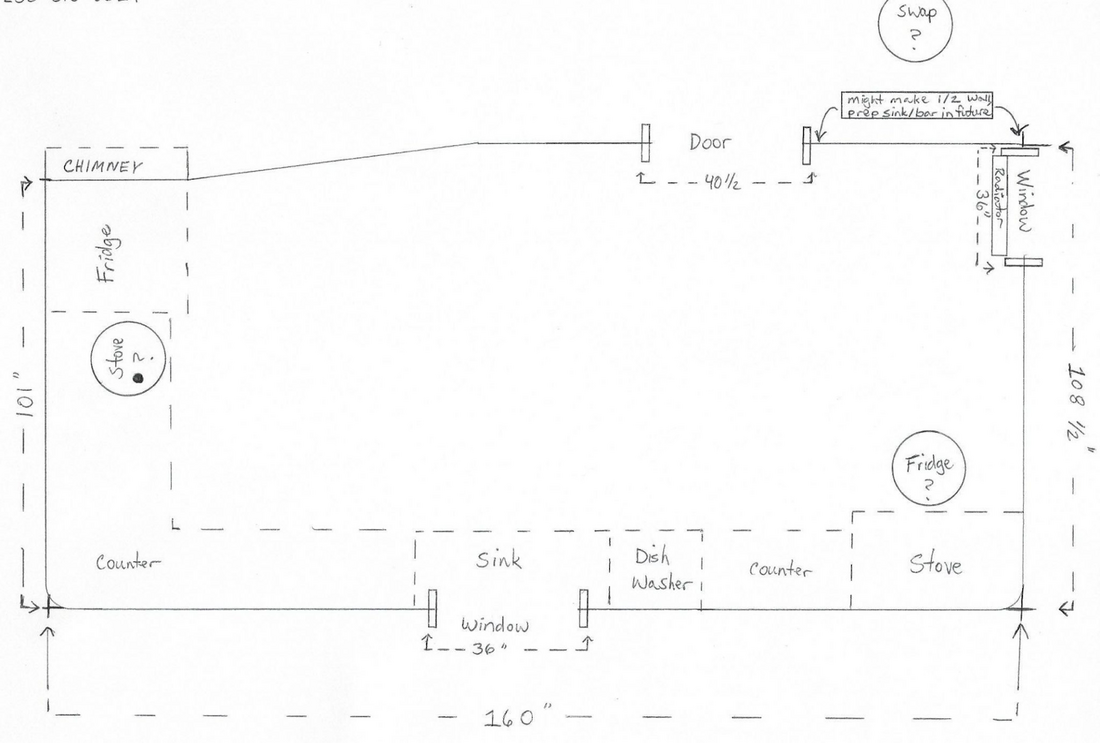
Drawings/Planning (on paper).
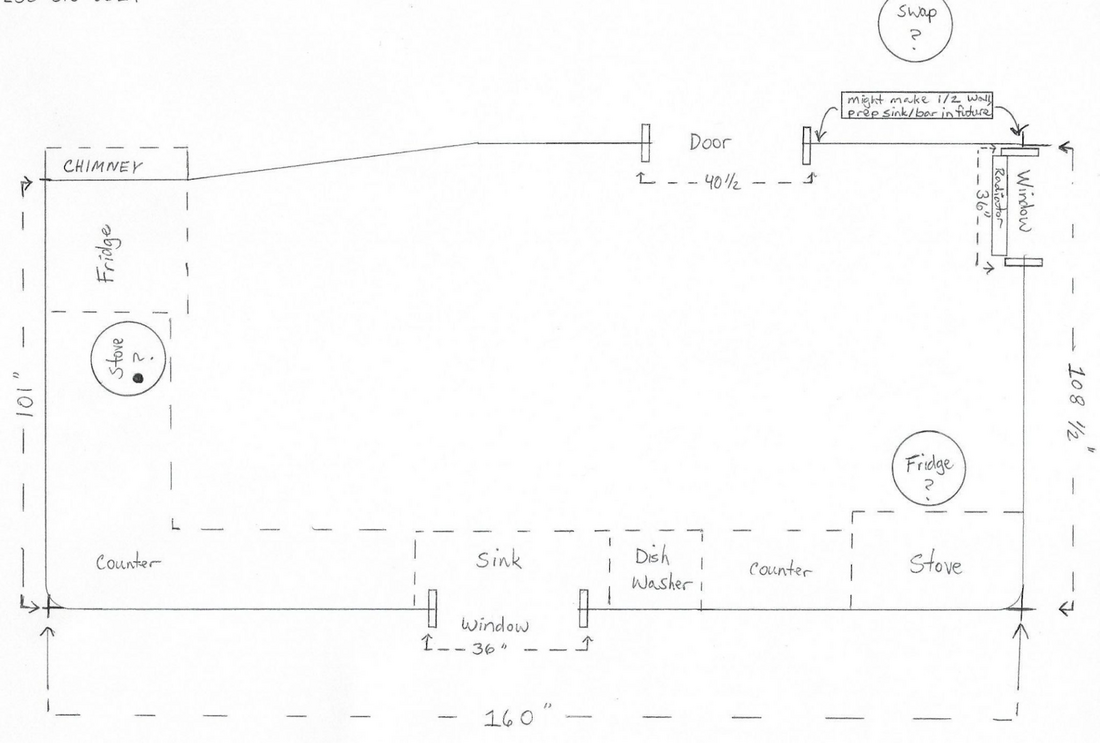
Our rough sketches on paper.
Perform a Cabinet Load Plan: Every item you have OR will have in the new kitchen (cups, plates, silverware, containers pots, pans, etc) will need a home! Make sure everything that needs to be stored has a home!
Efficient storage solutions video (this video is great!) – Kitchen Organization Goals LINK.
Additional Kitchen Resources – READ THESE:
Read This Before You Remodel A Kitchen – This Old House
Something Old, Something New for a Gut Kitchen Redo – This Old House
6 Kitchen Design Mistakes to Avoid for a More Sophisticated Space – Dering Hall
The (Don’t Get Burned) Kitchen Remodeling Guide – This Old House
Kitchen Layout – Rough Sketch
Design Program / Architect and/or Builder
Use a computer design program like Home Designer Suite 2019, click HERE for more details. OR For review and demo video, CLICK HERE.
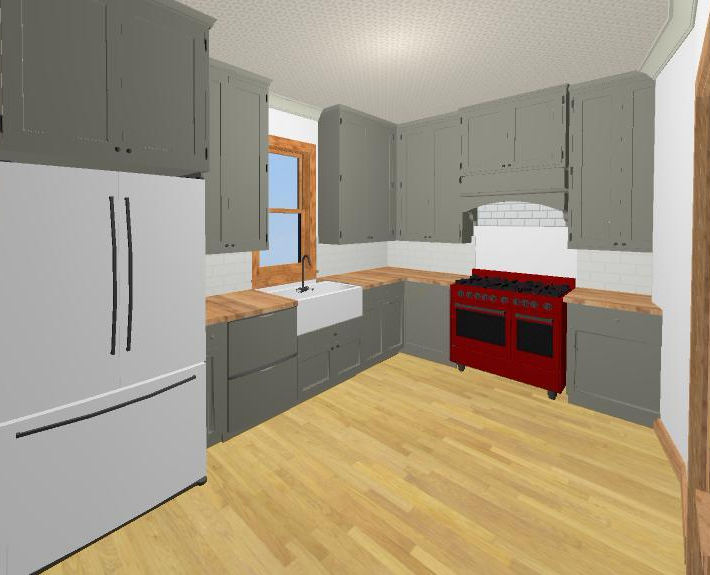
It’s much safer to see a real-life, 3-D rendition and be able to make changes, rather than find out at the end…that you hate the design.
Design your project for ease of maintenance/cleaning, upkeep, and low operational costs (life cycle costs).
For architects, builders, and contractors, ask questions about materials, quality, how hard is it to clean, etc. YOU are YOUR OWN best advocate! As the customer, you are the boss!
Final Kitchen Design Layout
FINAL KITCHEN PLANNING CONSULTATION, MECHANICAL PLANS, AND DETAILS
Whether you hire a contractor or not, it’s time to finalize the Electrical, Plumbing, HVAC, Ventilation, etc – Duration of work to be performed and the cost associated.
Custom Cabinets
Cabinetmaker will probably take rough dimensions at this point and revise after demolition is complete.
Lighting
Polished nickel finishes.
Hanging pendent light over the sink.
Semi-flush schoolhouse light (ceiling centered).
Light over pantry opening.
Upper/lower/ and task LED cabinet lighting – 4 circuits.
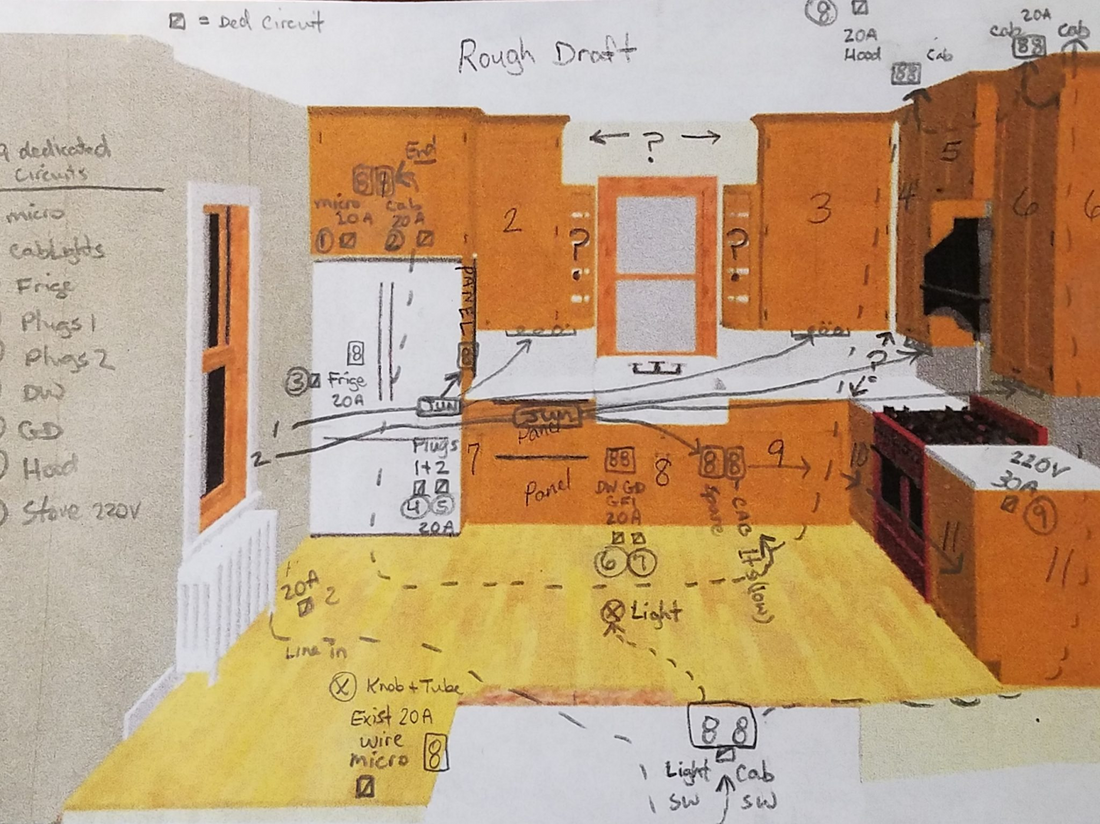
Electrical (we ran 10 new dedicated/individual circuits). The goal – To have minimal receptacles and switches that detract and clutter the back splash, so we are hiding them and/or integrating into the cabinets/countertop. This will create that seamless, simple, timeless look.- CHECK OUT THE BLOG and VIDEO TUTORIAL HERE
Final Electrical/Lighting Plan
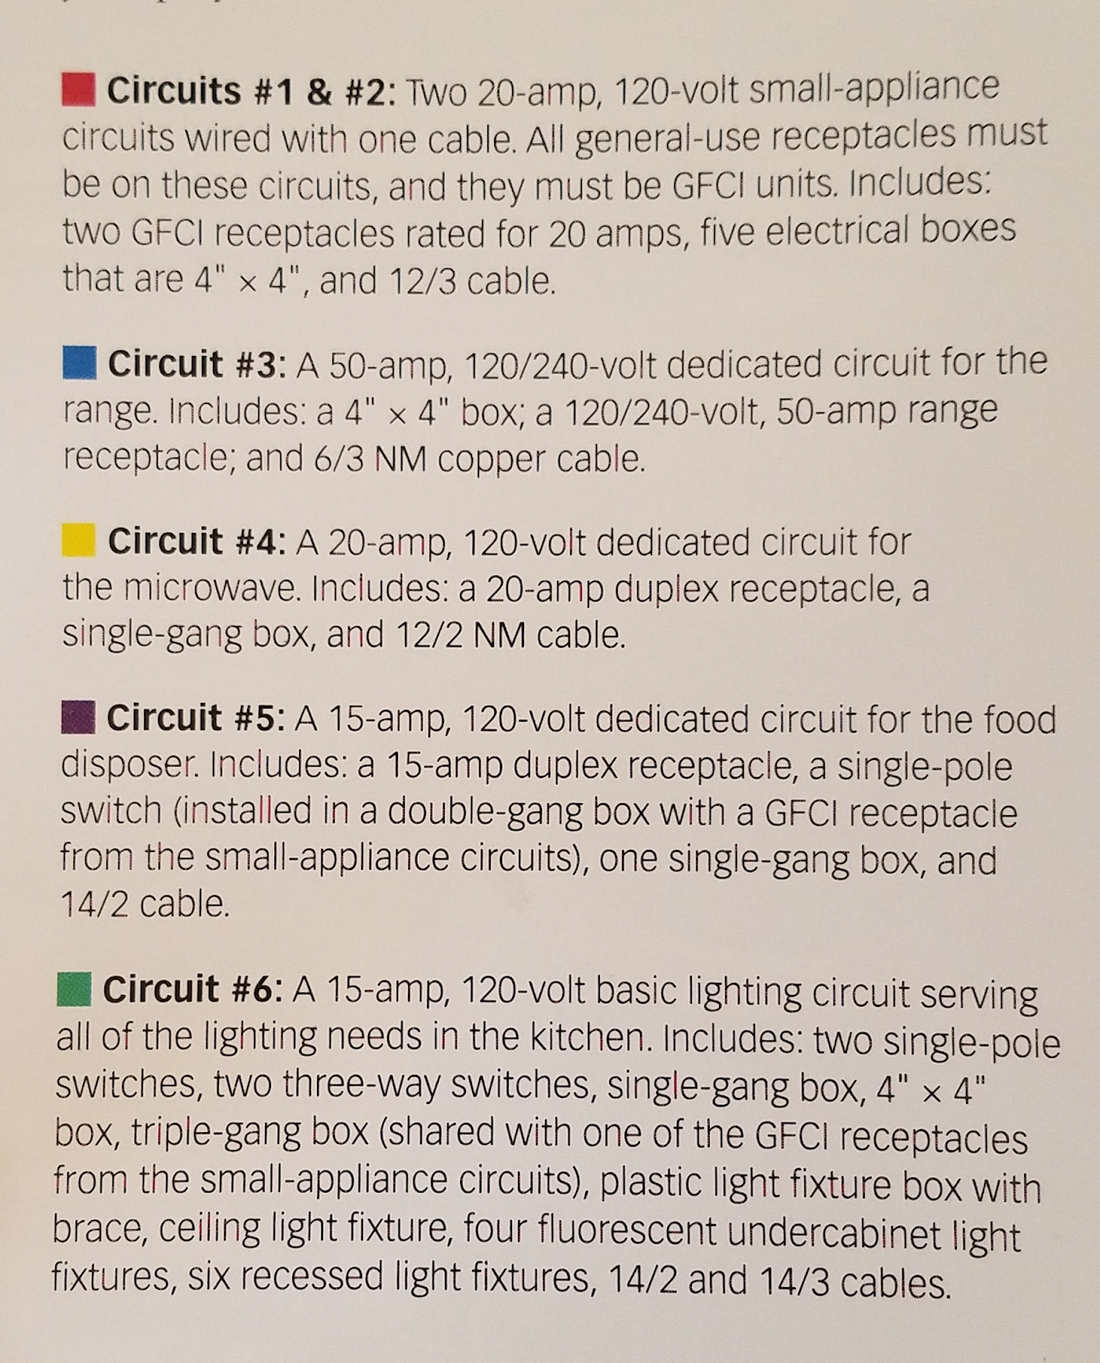
Wiring – Code Requirements
#1 & #2: Small-Appliance Circuits, 20A, GFCI Breaker
Countertop appliances / plug-ins
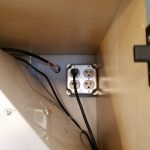
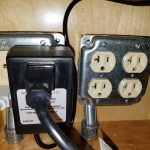
Mount modified plug strips under cabinet aprons.
#3: Range/Stove, 30A
Dual fuel (gas top/elec. ovens).
Only requires a 30A circuit.
#4 & #5: Microwave, Microwave (alternate) 20A, GFCI
One for the pantry, alternate over frige cabinet.
#6: Garbage Disposal, 20A, GFCI
Inside the sink cabinet.
Air switch on countertop
#7: Dishwasher, 20A, GFCI
Inside the sink cabinet.
#8: Range Hood w/ Remote Blower – 20A
Inside the vent hood cabinet.
#9: Basic Lighting Circuit, 20A
Overhead lights on one switch.
Cabinet/task lights on one switch.
#10: KitchenAid Refrigerator: 20A
Plug behind the fridge.
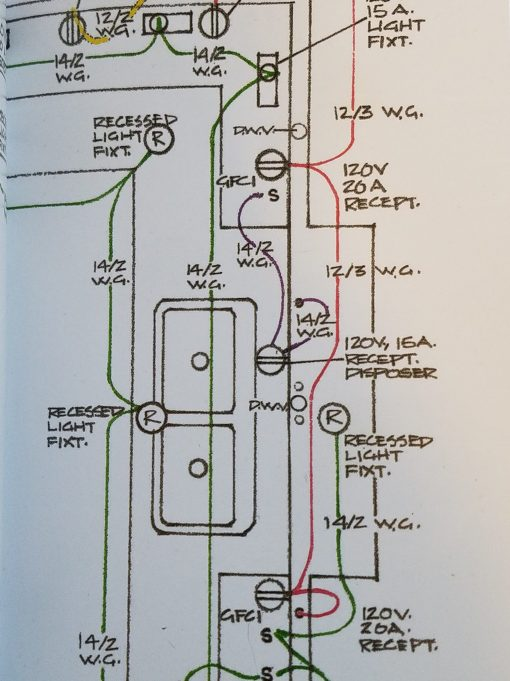
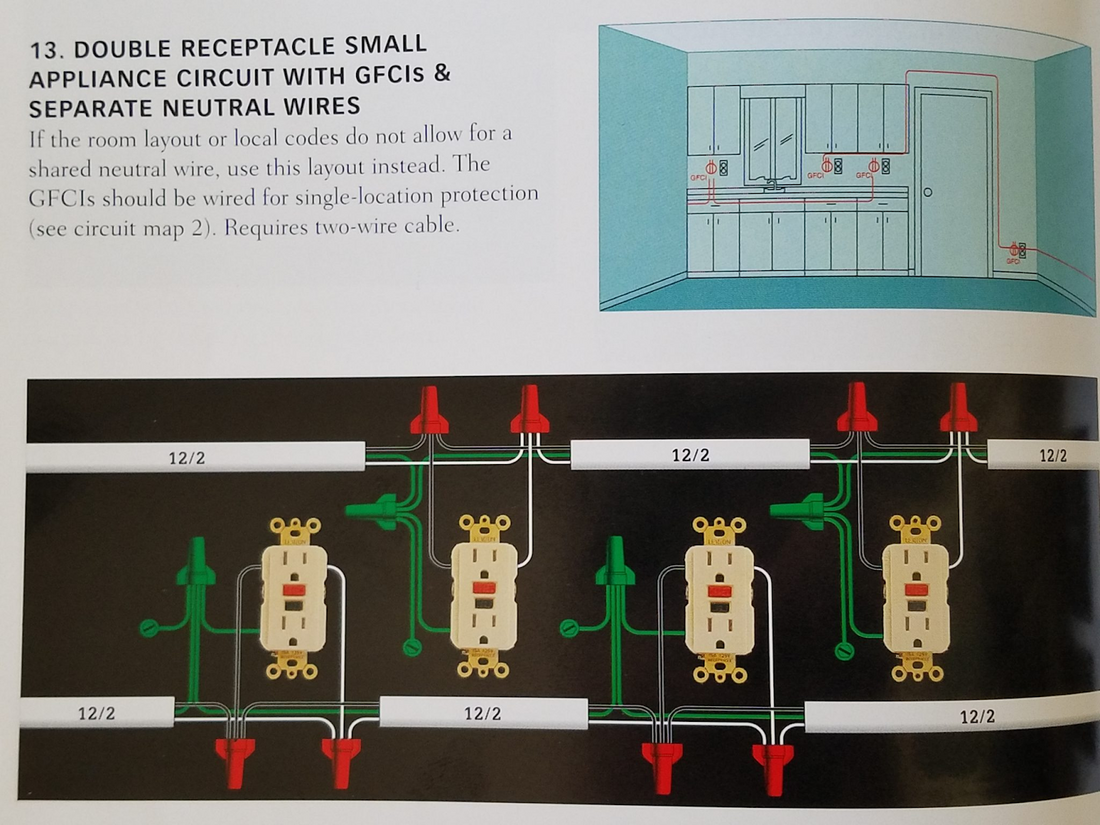
Wiring Diagram Example
Range Hood – 20A DW / GD / Cab Lts / Spare – (3) 20A Cabinet Lights/Spare – 20A
- NOTE: I did upgrade (maybe a bit overkill) to all 20A / 12 ga. wire dedicated circuits (no appliance shares a circuit with another), for this remodel project.
- NOTE: Stay safe! Always follow basic electrical codes and safety procedures, know your limitations, and consult a professional if in doubt.
- Looking to brush up on your electrical skills (like I did), Black & Decker has a book with excellent color wiring diagrams and info, The Complete Guide to Wiring, 7th Edition. I just taught myself…it's more intimidating than difficult! It’s the best $20 education I ever received! See the review and more, HERE.
- $ SAVINGS TIP: Are you handy at electrical, but unsure about code requirements? Instead of paying an electrician $3000+ to rewire, pay them for 1 hour on the front end (review your plan), and 1 hour after the rough electrical is complete (to make sure it meets code and is correct).
The Complete Guide to Wiring – B & D
Plumbing & Fixtures
The plumbing for the farmhouse kitchen remodel is fairly straightforward.
The sink and cabinet will stay centered with the window (long wall). So the rough plumbing stays, and we just need to make the new connections at the sink/garbage disposal/dishwasher.
Add one cold water line for the pot filler over the stove.
Relocate the ice maker water line to the other side of the kitchen.
Farmhouse Sink Bridge Faucet: Perrin & Rowe
Polished nickel
Soap Dispenser: Perrin & Rowe
Polished nickel
Garbage Disposal Air Switch: Amazon
Polished nickel, push button (on countertop)
Garbage Disposal: American Standard
Air switch activated
Pot Filler: Signature Hardware
Polished nickel
Mount centered when folded against wall
Mounts a few inches higher than your tallest pot
Stove: Natural gas service line must be moved from east wall to west (short) wall for new stove location.
Want to see the full list of items used in the farmhouse kitchen remodel?
Visit the MOHF Kitchen Resource Page.
Sink Faucet Sink Plumbing Pot Filler
Floors:
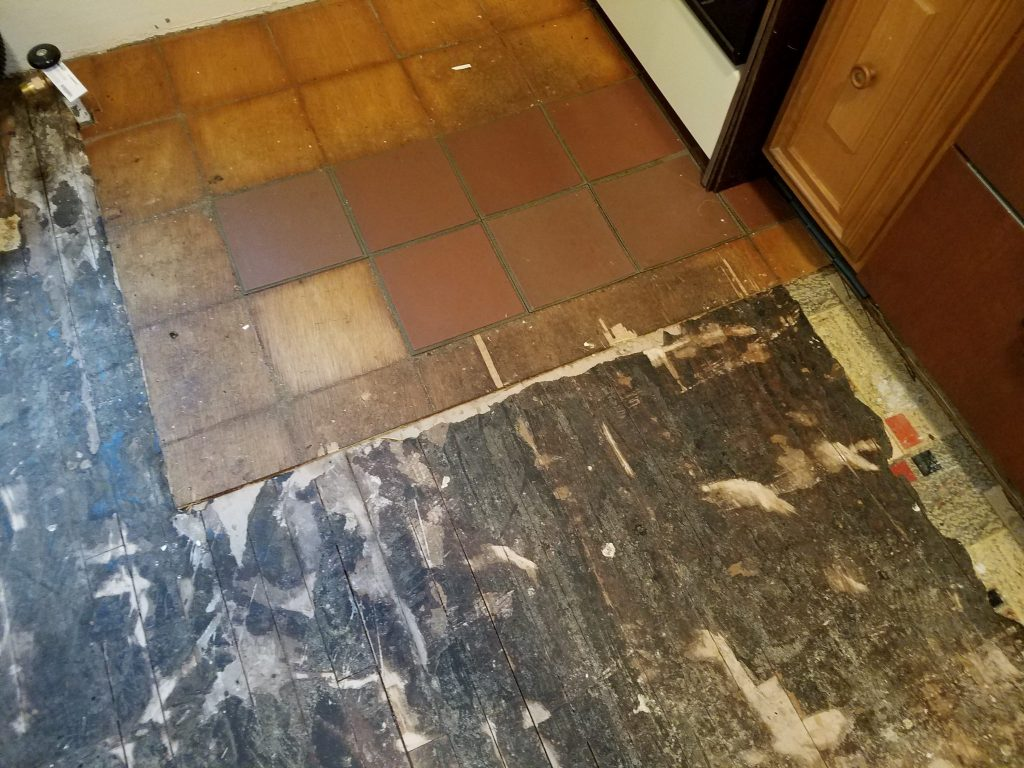
After some exploration of the kitchen floor prior to demolition.
We found that the original maple floors are hiding under the peel and stick linoleum tiles.
The initial plan is to sand and refinish the maple floors, if they can be saved – STAY TUNED!
HVAC/Ventilation (Range Hood)
Guidelines: The hood should be as wide as your stove (we have a 36″ stove), at least half as deep as the cook top (cook top is 24″ deep), and located 30-36″ above the countertop / cooking surface.
Due to cabinet requirements on each side of the stove we are just a bit under the width (36″). The closest size Z-Line Range Hood available is 34.5″ wide, by 16″ deep – Close enough!
Range Hood Logistics: If you know me by now, you know I love to talk about logistical impacts! So here is an important one! Remember the vent hood talk at the beginning during Q & A? The stove and rage hood will be located on the short (interior) wall, so we have two options for venting outside through the exterior wall.
Standard Hood – With louder fan in kitchen, pipe/duct running out the TOP of the hood assembly, and through all the small upper cabinets (rendering them useless), and out the exterior wall.
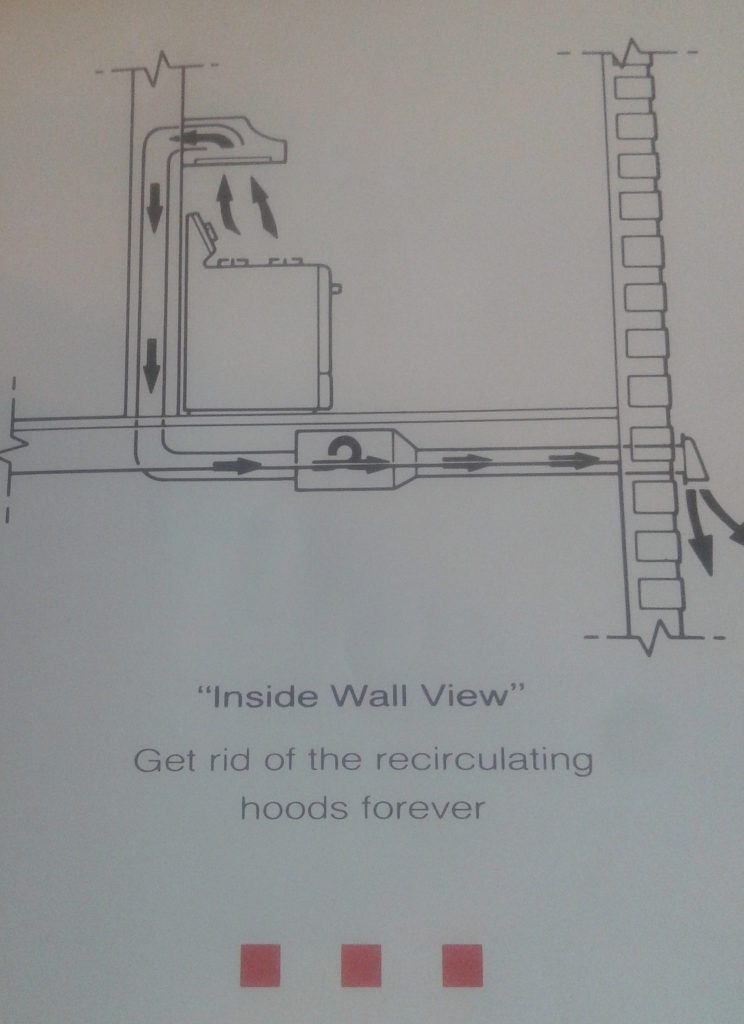
Remote Blower Hood – Quieter option! With fan/blower motor mounted remotely outside the kitchen area (basement/attic,etc). Pipe/duct is run out the BACK of the range hood assembly, inside the wall cavity, and out an exterior wall via the basement or attic (see diagram). The result? A much quieter kitchen and ALL cabinets can be used for storage! WE WILL UTILIZE THIS OPTION!
Diagram: Range Hood with Remote Blower
KITCHEN PLANNING - SPECIAL TOOLS AND EQUIPMENT
Identify any special tools and/or materials that will be needed (especially if you are doing the work).
- Specialty tools for plumbing, electrical, etc.
- Special equipment – Pipe threaders, carpentry tools, etc
- Rental equipment – Floor sanders, edgers, etc
SET A FINAL PROJECT SCHEDULE
Factor in and inquire about City, Historic Commission, etc design reviews and associated approvals. This could be a few days, or a few months. Contact the city early before final plans are finished*.
Set a desired start and finish date.
Based on contractor feedback (if applicable), draft the start, duration, and finish times for all trades work to be performed – Demolition, Carpentry, Plumbing, Electrical, HVAC, etc. Plan for some overlap.
Build in buffer/slack time for delays. There will be delays!
Factor in associated City permits and inspections inspections*
* Don’t forget about permits and city approvals (if applicable). Inspections, permits, and City design reviews WILL add additional time, especially if a Historic District review of your plan is required!
VINTAGE KITCHEN PLANNING - RENOVATION AND LOGISTICS
As you know by now, I like to focus on the Logistical impacts. They can literally make the difference between a good and a great kitchen! So let’s plan for greatness!
Revisit the kitchen cabinet load planning, Kitchen Organization Goals , and the range hood installation above – those are great examples.
Revisit the kitchen layout, how you will use it, and how will flows. Is the design and layout efficient, OR will you be running laps all around the kitchen chasing pots, pans, the milk, and the trash can? Put things close to where they are needed. This is very important!
Double check all appliances and major item integration – Does it all work together?
Appliances come with instructions on rough areas where service lines, power cables, gas lines, etc need to run, mounted, and located.
Read all of your equipment/appliance instructions and installation guides BEFORE the work starts, so you can be informed and to make sure your contractor is installing correctly.
For example, farmhouse sinks, due to weight and lack of faucet mounts, need special sink cabinets to hold the extra weight, with a large access area in the back for plumbing provisions. Additionally, the faucet/fixtures mount through the countertop (holes drilled).
Rework = more $$$. Do your homework!
Remember to ask questions about EVERYTHING…now is the time, before its too late!
KITCHEN PLANNING - RENOVATION PLAN "DRY RUN"
Take the information that is on hand to date (measurements, dimensions, sink, stove, tub, paint colors, etc) and try to mock up the space BEFORE the full demolition. This will give a sense of how everything will fit and finish together. Besides, you really don’t want to paint 15 different samples of blue on your new walls or new cabinets! Do it now on the OLD materials!
At a minimum, map out your NEW layout on your OLD walls. Go ahead and locate/mark your studs, where new electrical outlets, vents, vent hoods, appliances, etc need to be located, etc. This will help your layout plan go easier with less issues like a stud being in the way of a light, etc!
Once everything is ripped out, you lose a lot of reference points and ability to gauge space, size, and scale.
For example, above we discussed range hood mounting height at 30-36″ from the counter top/cook surface. Lower is better for maximum air extraction, especially with a smaller/weaker fan, BUT…if you are 6 feet tall, it will definitely need to be in the 34-36″ range, unless you want to be staring at it/bending under it while cooking.
Update your final plan as needed.
KITCHENPLANNING - RENO EXPECTATION MANAGEMENT
Kitchen demolition IS coming SOON and therefore we need a plan on how we are going to continue to refrigerate, prepare, and cook our meals, and how to clean the dishes! This is a REAL problem, unless we plan to eat out for each meal for the next few months. With some rough planning, assume the following:
Kitchen downtime – Best case, 3 months. Worst case, 6 months. Be prepared.
Need an alternate, dedicated cooking and prep space.
Need to relocate the refrigerator.
Need alternate storage space for everything currently stored in the kitchen, unless it is being discarded. Keep a few essentials and pack the rest away for now.
THE KITCHEN RENOVATION BACKUP PLAN – WE GOT A LITTLE CRAZY
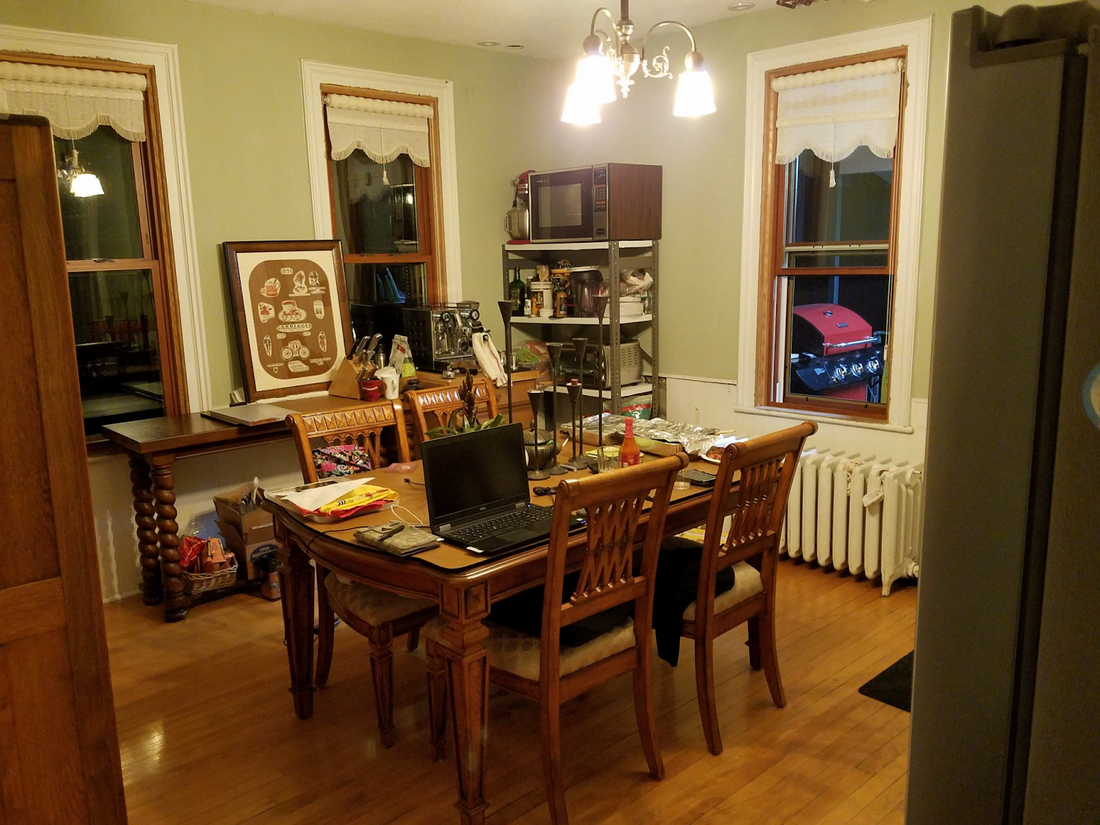
We only have one other source of water…and it’s on the second floor bathroom – NOT GOOD! We decided that we could set up an alternate kitchen in the dining room and on the back porch!
Umm…yeah we did!!!
Dining Room
Relocated the new refrigerator with ice/water hook up.
Microwave
Toaster oven
New espresso machine/grinder – coffee and on demand boiling water.
Back Porch
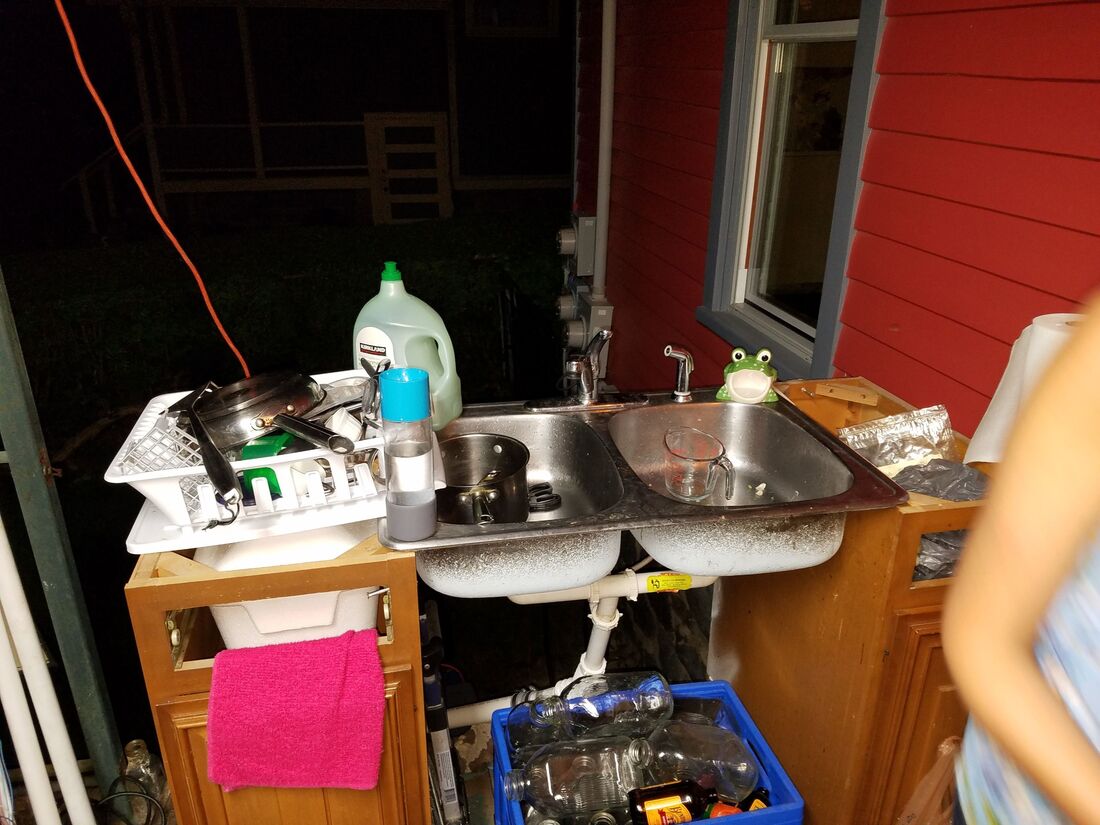
Gas grill for cooking.
Outside sink – Took two old kitchen cabinets and propped up the old sink between them. Installed a splitter on the outside water spigot, and plumbed up the old sink with a PCV clamped drain pipe.
Strung up the new LED task lighting for outdoor work light.
Dishwasher – Oh yeah, you can still have a dishwasher if you have a sink close to your washing machine. I installed another spigot splitter at the washing machine hookup, and ran the drain into the basin sink beside the washer in our basement. BAM!!!
NOW… WE HAVE A PLAN…
NOW… WE HAVE AN ALTERNATE KITCHEN AND LOCATION SET UP …
THE PLAN IS FUNDED AND ALL MAJOR AND LONG LEAD ITEMS AND APPLIANCES SHOULD ALREADY BE ORDERED, OR ON ORDER.
CHECK WITH YOUR CABINETMAKER AND ALL CONTRACTORS AND PROVIDE THEM WITH ANY CUSTOM INFORMATION AND/OR THE ACTUAL ITEMS (like range hood – for its custom cabinet, panel-ready dishwasher info/dimensions, special accommodations for farmhouse sink, etc). – THIS IS VERY IMPORTANT TO ENSURE EVERYTHING FITS.
NOW…IT’S TIME FOR DEMOLITION OF THE OLD KITCHEN…STAY TUNED FOR
– Vintage Kitchen Remodel: Part 3 – Demo and Assessment
Best of luck, and keep on Fixing!

For more info visit: www.myoldhousefix.com

Posts may contain affiliate links. If you use these links to buy something, we may earn a small commission (at no additional cost to you). Full disclaimer HERE.










0 Comment(s)