
First of all, if you are planning a kitchen remodel, then you have probably had to consider many kitchen backsplash ideas. Unfortunately, most kitchen backsplash designs have one thing in common, that you definitely want to stay away from, if you really want that vintage, clean, uncluttered look! Keep reading and find out how to hide those kitchen backsplash plugs and switches!
Kitchen Backsplash Ideas – Disasters
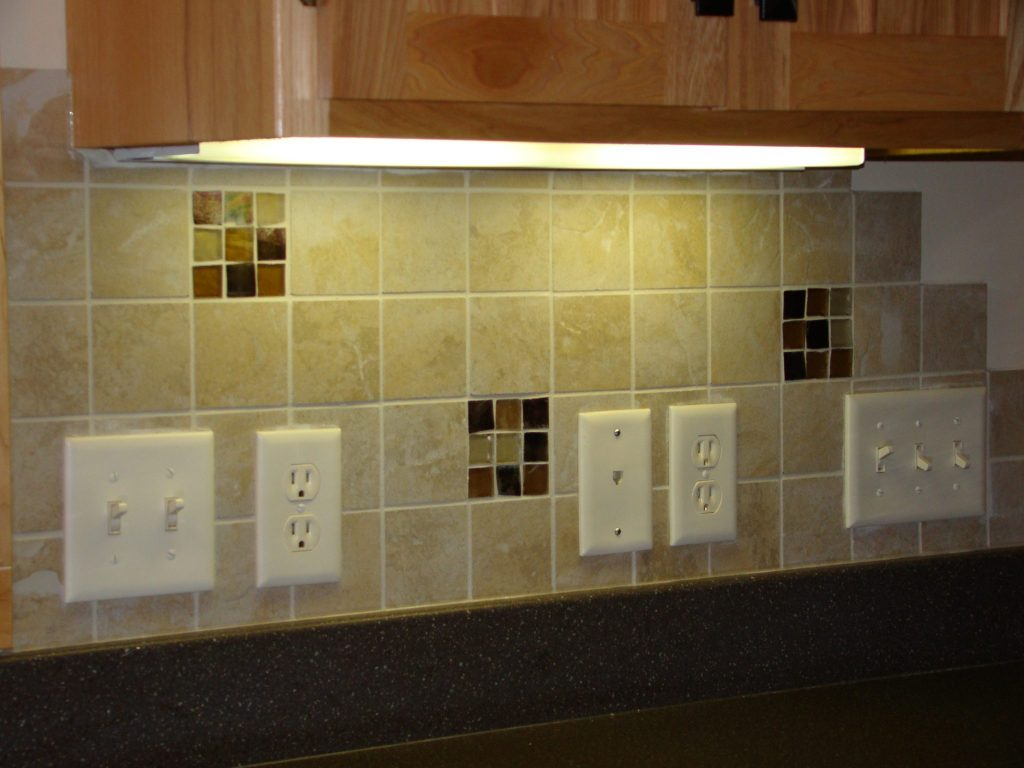
The Problem
Ok. So you spent a lot of time and money planning and designing your new kitchen backsplash, so the last thing you want to do is clutter it up with a wall full of plugs and switches. That’s not good!
Never fear! My Old House”Fix” will outline the three easy steps to let your kitchen backsplash “shine” without all the clutter!
Kitchen Backsplash Ideas – The Fix
We’ll outline kitchen backsplash ideas, in three easy steps that you can take to de-clutter your backsplash, and decrease tile installation time, by eliminating most of the cuts (usually around switches and plugs):
1) Planning ahead 2) Install under cabinet power strips 3) Relocate the electrical switches.
Let’s get started!!!
Step 1: Kitchen Backsplash Ideas -Planning
Plan Ahead
First of all, have a plan! Know ALL locations for kitchen plugs and switches – Overhead lights (including sink), task lighting, under cabinet lighting, and garbage disposal.

Know all locations for wiring (including wall exits), in conjunction with cabinet installation/heights.
Furthermore, make sure you meet the minimum requirements for kitchen electrical code requirements, per the National Electrical Code (NEC) – see previous blog on kitchen remodel electrical plan .
Finally, try to know all the lighting and electrical fixtures up front and early. Because this will aid planning and integrating with the cabinets and cabinet design – see previous blog on kitchen pre-planning.
For more kitchen backsplash ideas and tips, when it comes to plugs and switches, refer to our friends over at This Old House!
Materials Needed for Power Strip Install
We used 4ea, 3- 4ft. Power Strips (with 12 outlets)
½” metal conduit connector
Solder and flux
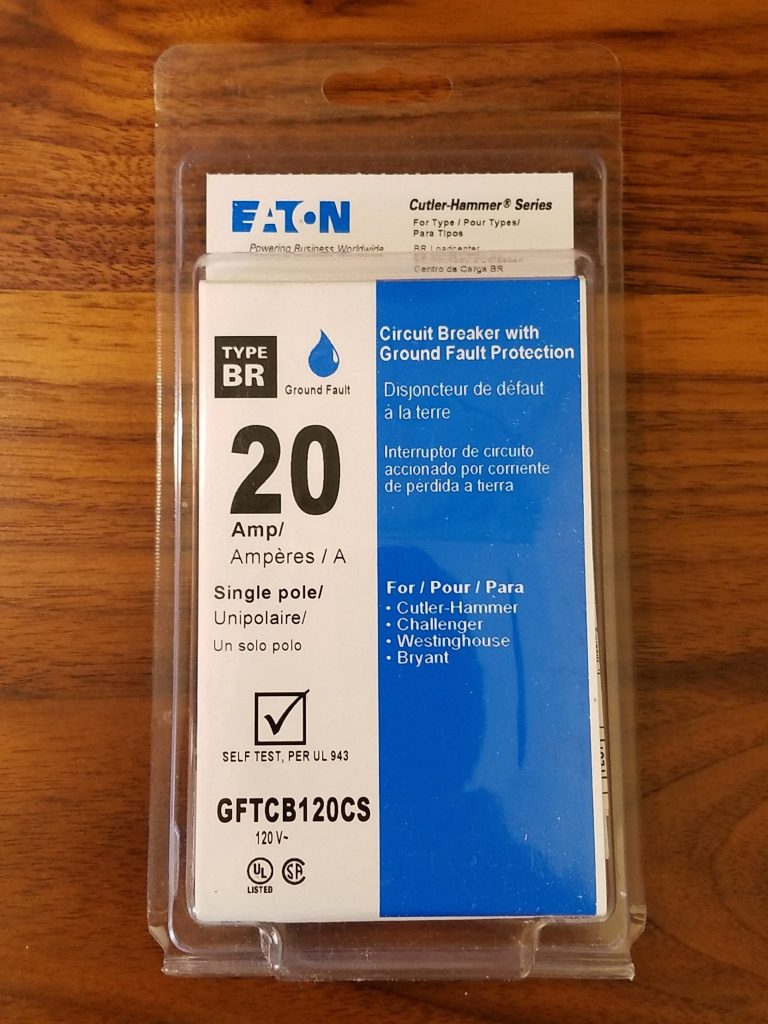
2ea, 20A GFCI breakers
¾ round plastic plug (if applicable)
Tools Needed for Power Strip Install
½” hole saw
Drill
Hacksaw/metal saw
Soldering iron
Wire cutters/strippers
Adjustable pliers
Mounting screws (your lengths will vary based on plug strip brand and cabinet construction – see below, and measure carefully).
Screwdriver

Step 2: Kitchen Backsplash Ideas – Electrical Plugs
Custom Under Cabinet Power Strips
Hardwire under cabinet power strips, so they are hidden from view, behind the lower cabinet apron.
Know the height inside your apron cavity vs the height of power strip, to ensure it is hidden by the apron.
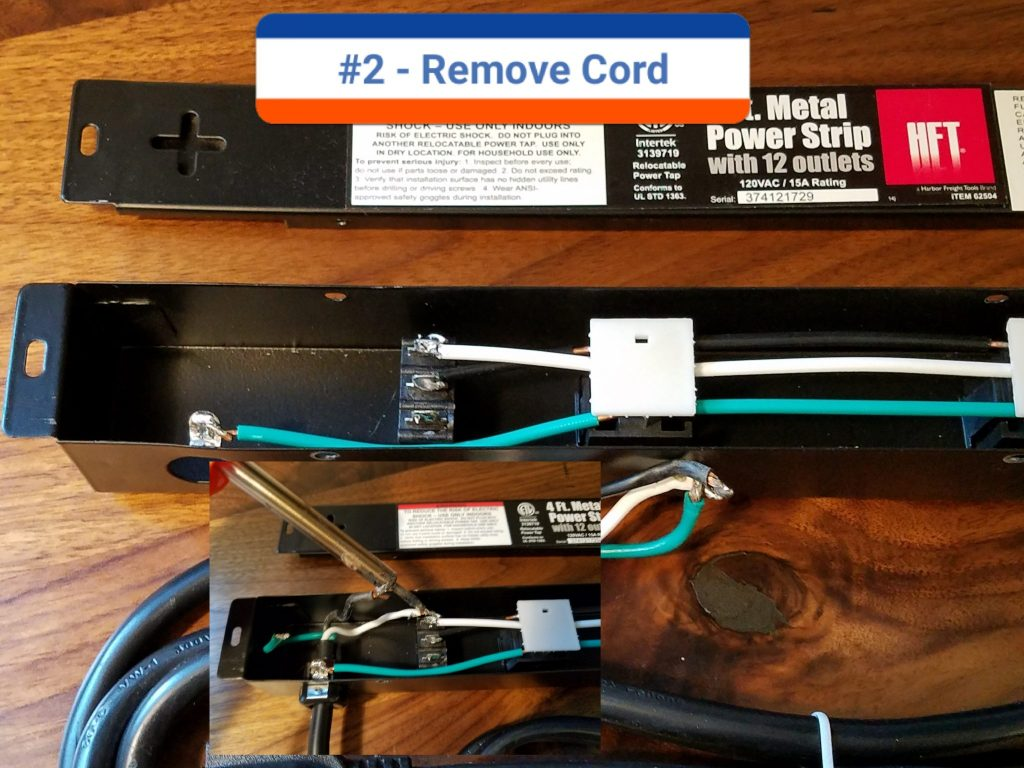
Remove the screws and rear cover from the power strip.
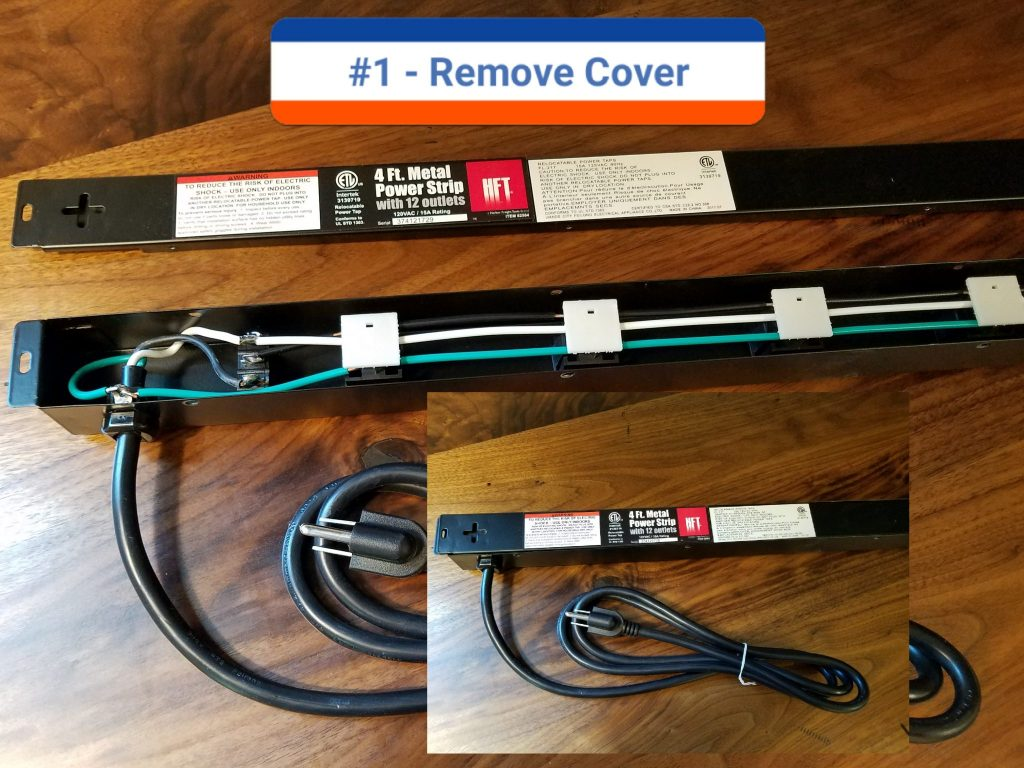
Remove power cord (with soldering iron) from the power strip overload switch panel.
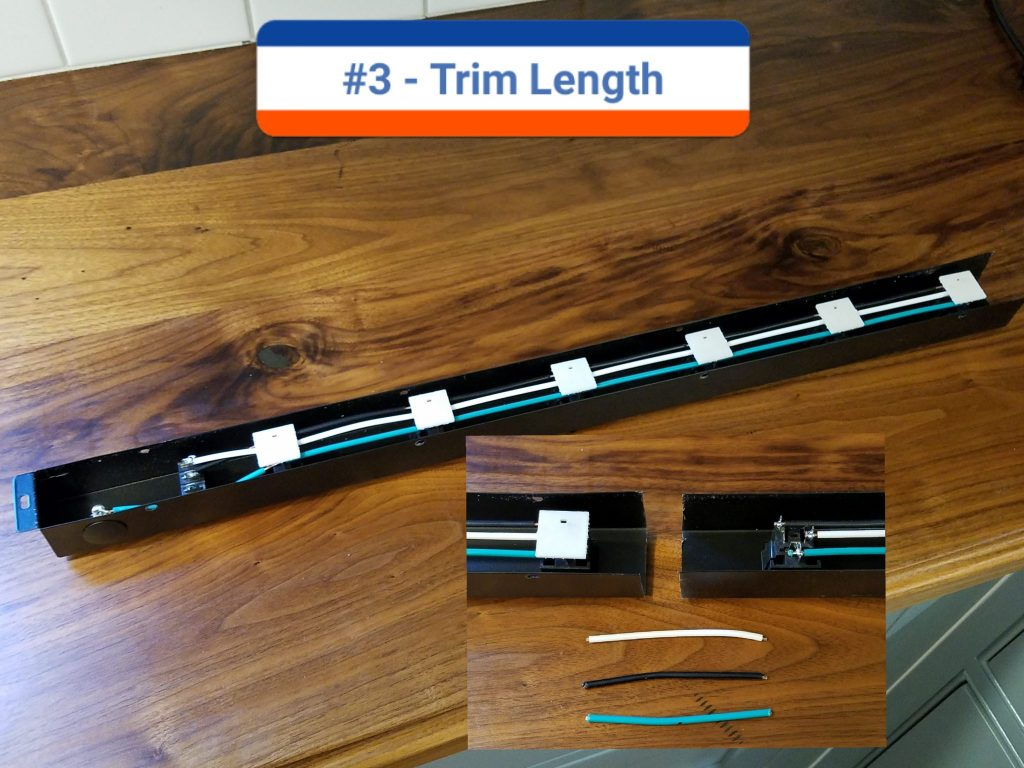
Trim the power strip frame to custom length. This works best if the rear cover is re-installed, for rigidness. NOTE: Make the cut between plug receptacles, and leave enough for the end cap!
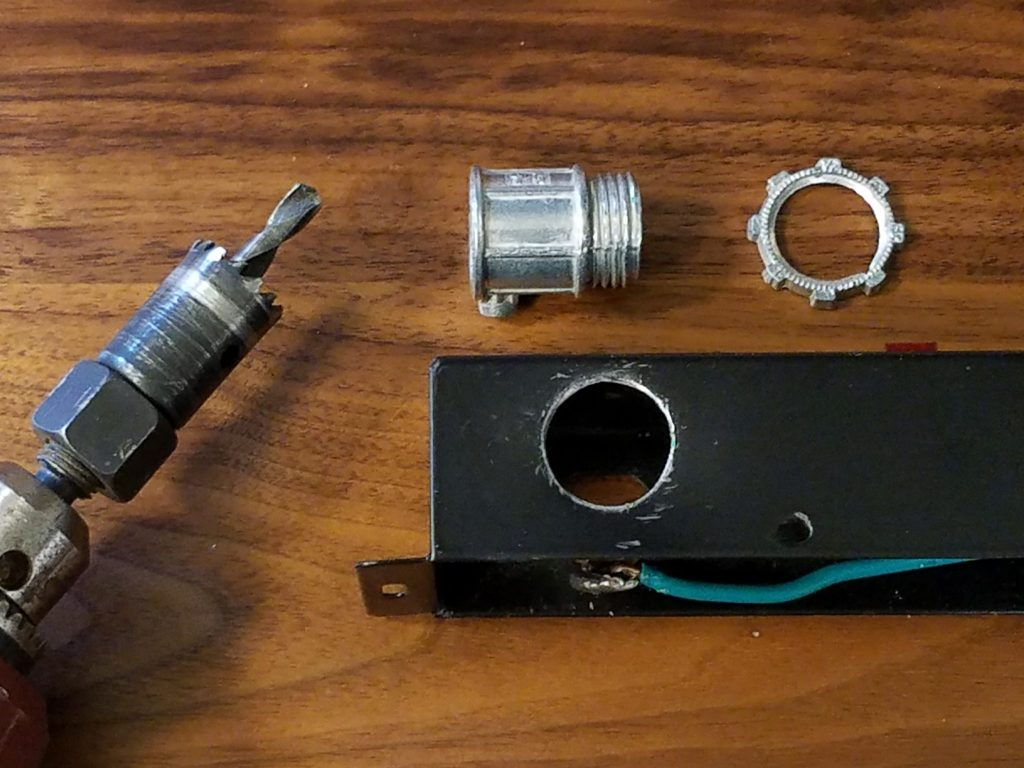
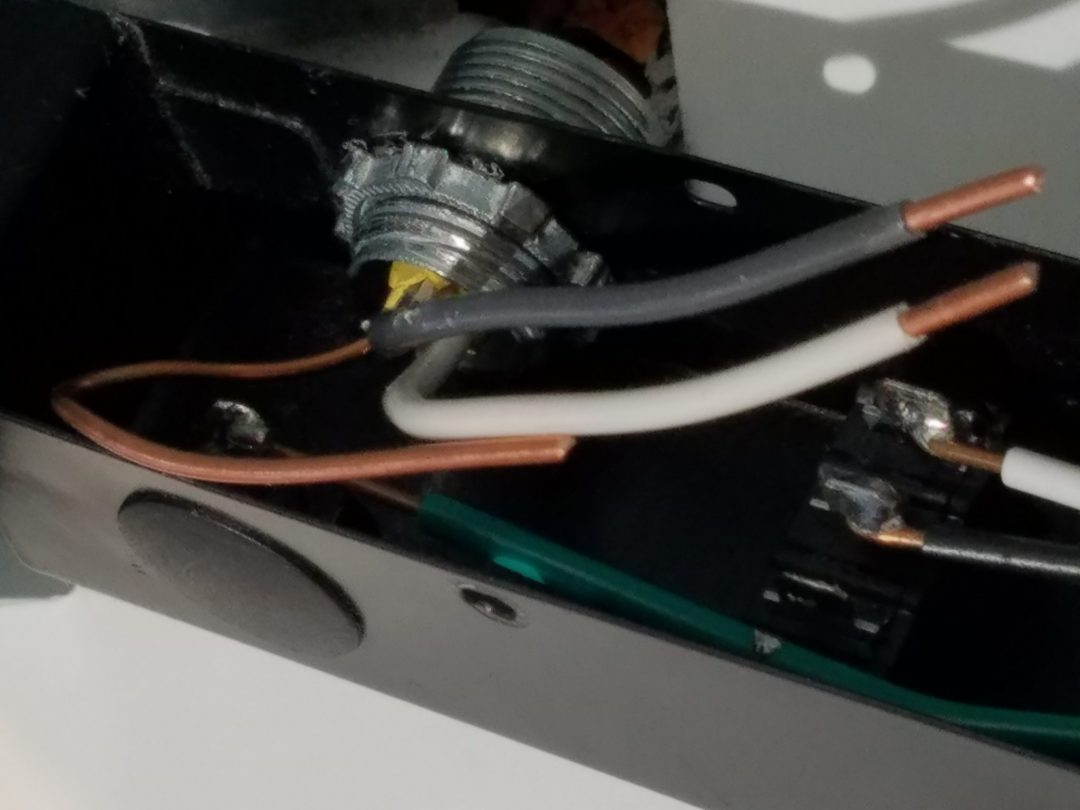
Drill ½” hole in side power strip case – therefore, enlarging the existing hole, or drill new hole on opposite side, based on your wire location where it exits the wall (left or right).
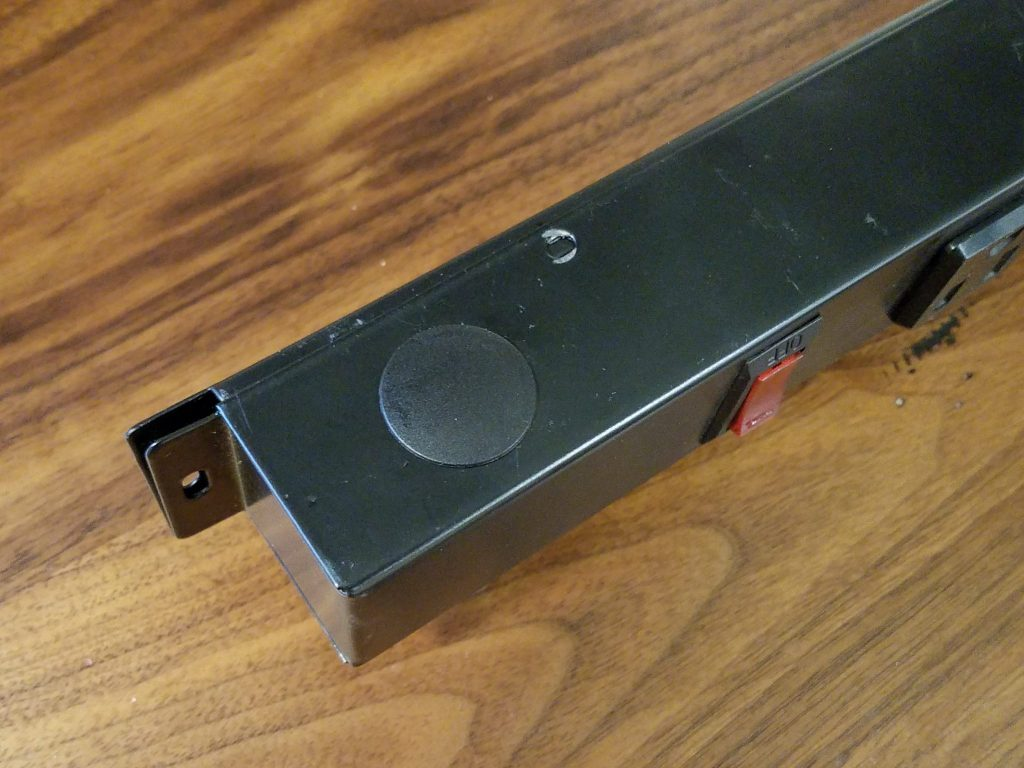
Plug the unused, original power cord hole (if applicable), with a ¾” plastic plug
Feed wire through the power strip case, trim wire, solder wire back to the overload switch panel (same locations that the discarded plug connected to), and re-install rear cover.

Install plastic end cap on “cut end” of power strip frame (came with power strip as end protection).
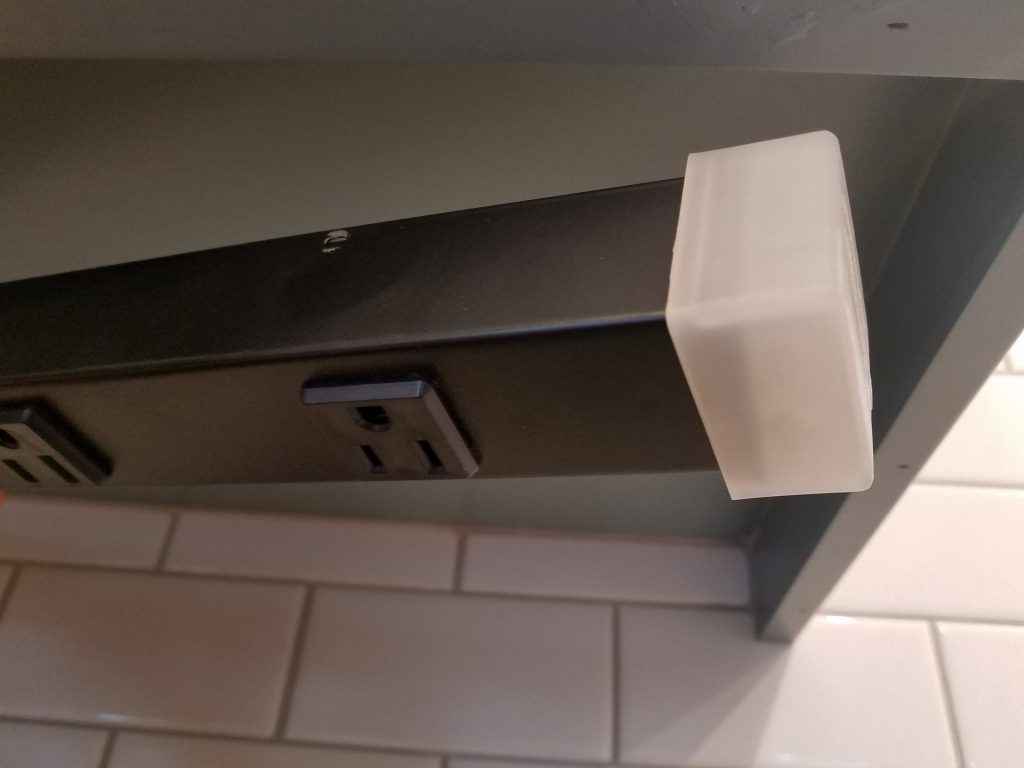
Mount power strip to underside of kitchen cabinet (screw in each end). NOTE: Ensure screw is sufficient length, as not to penetrate through the bottom, and into the cabinet!
IMPORTANT: To meet NEC and GFCI requirements, also make sure you have TWO separate, 20A GFCI breakers at the service panel, to feed two banks of power strips (we have an L-shaped kitchen layout).
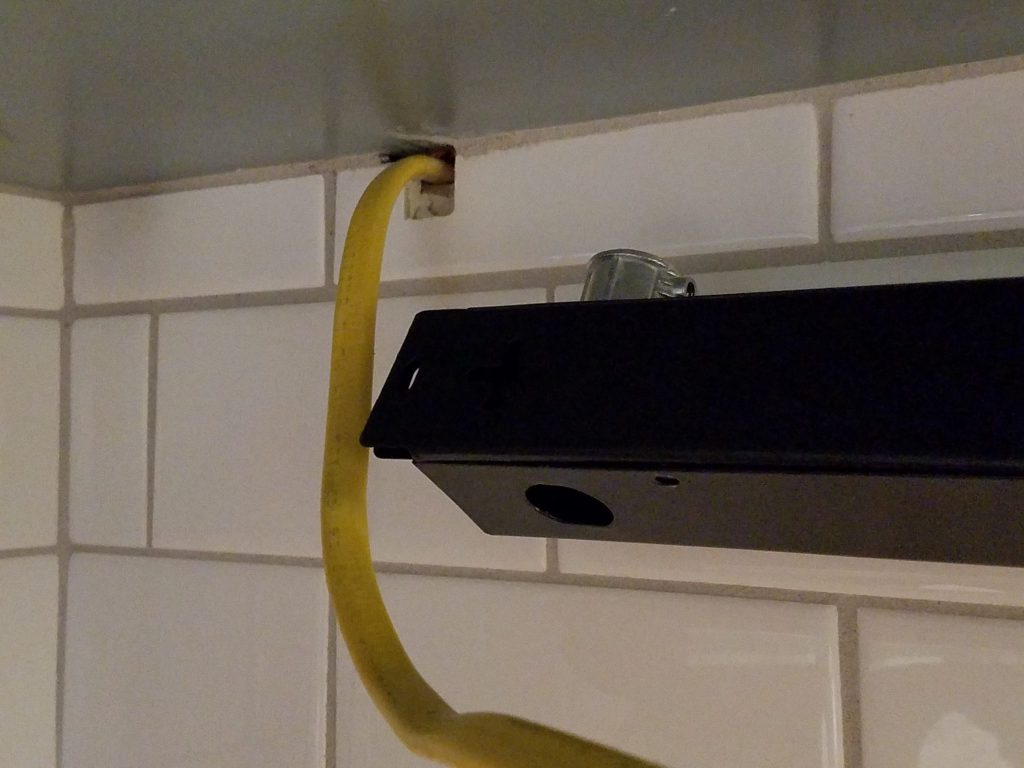
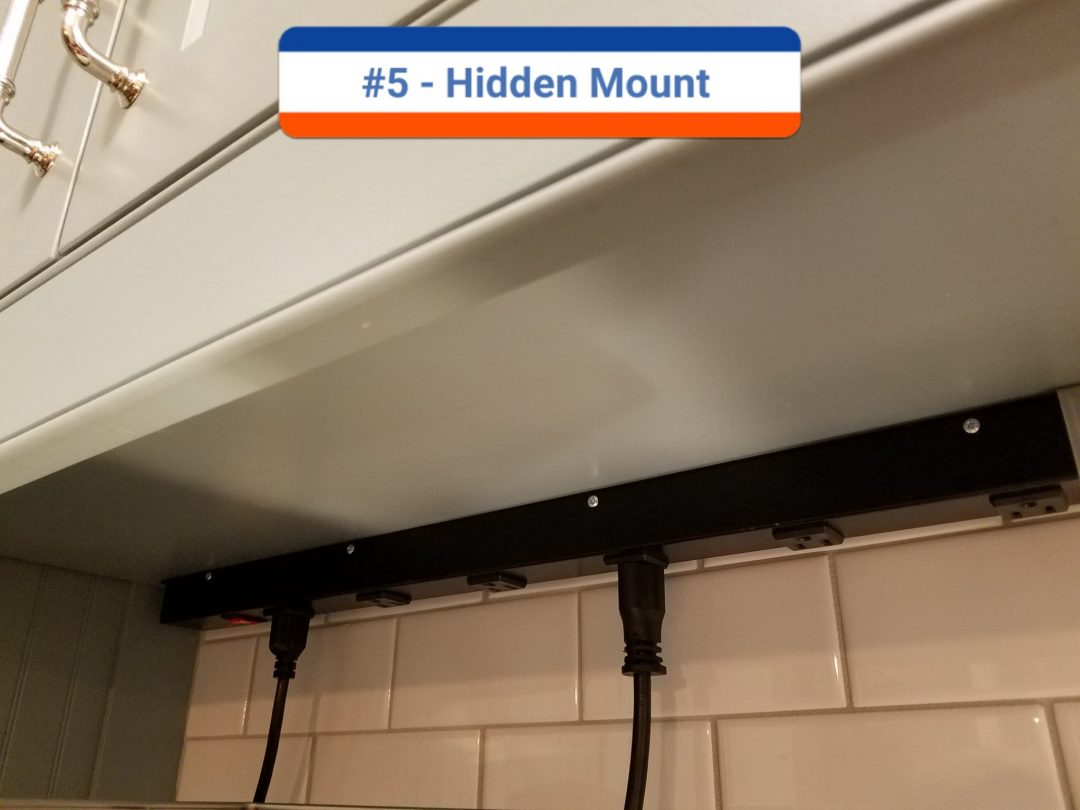
The Reveal – Under Cabinet Power S
trips
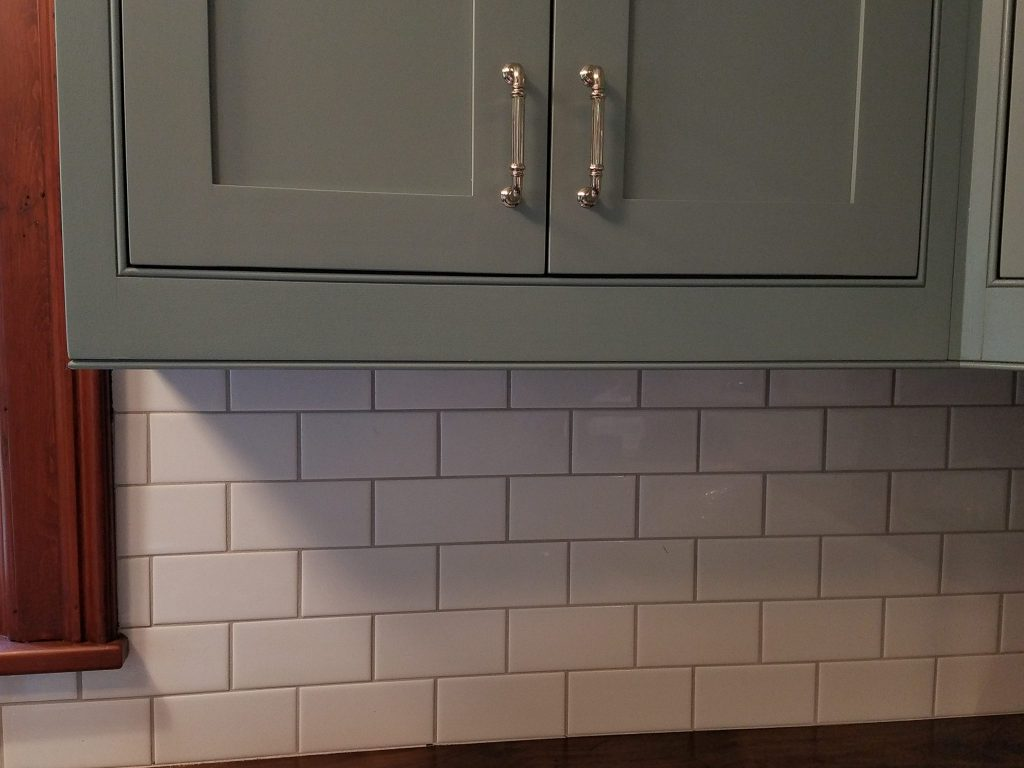
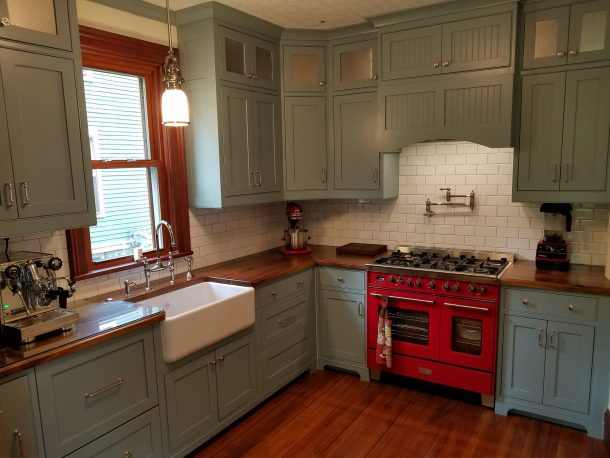
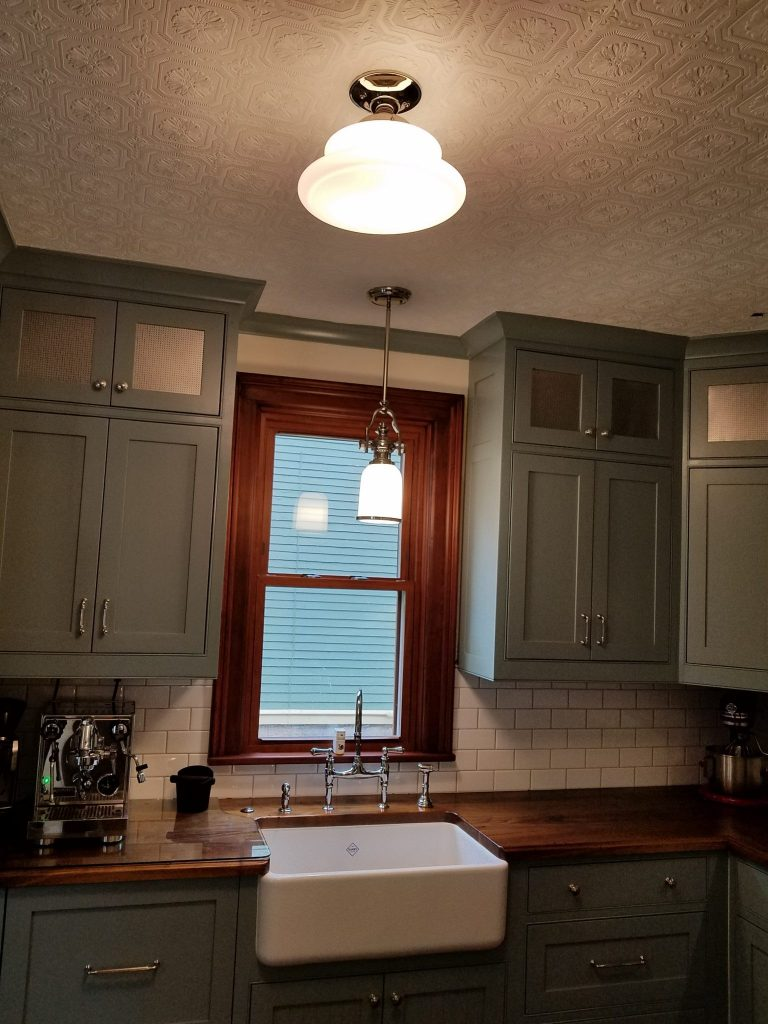
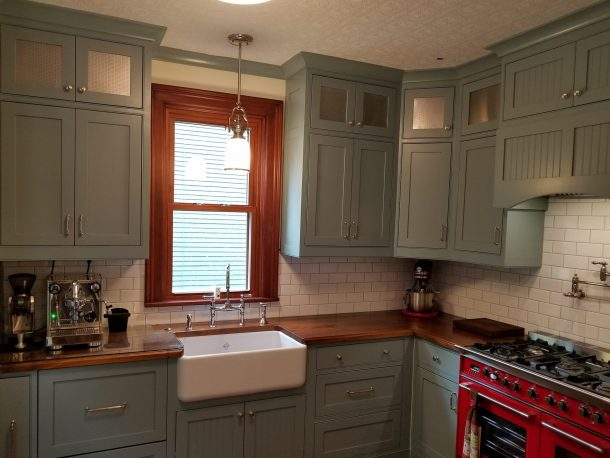
Kitchen Backsplash Design w/o Cluttered Wall Plugs
As a result of the new power strips, countertop appliances can be conveniently plugged in, virtually anywhere along the countertop!
Additionally, as your appliances and layouts change, your electrical plugs don’t have to – you are always covered!
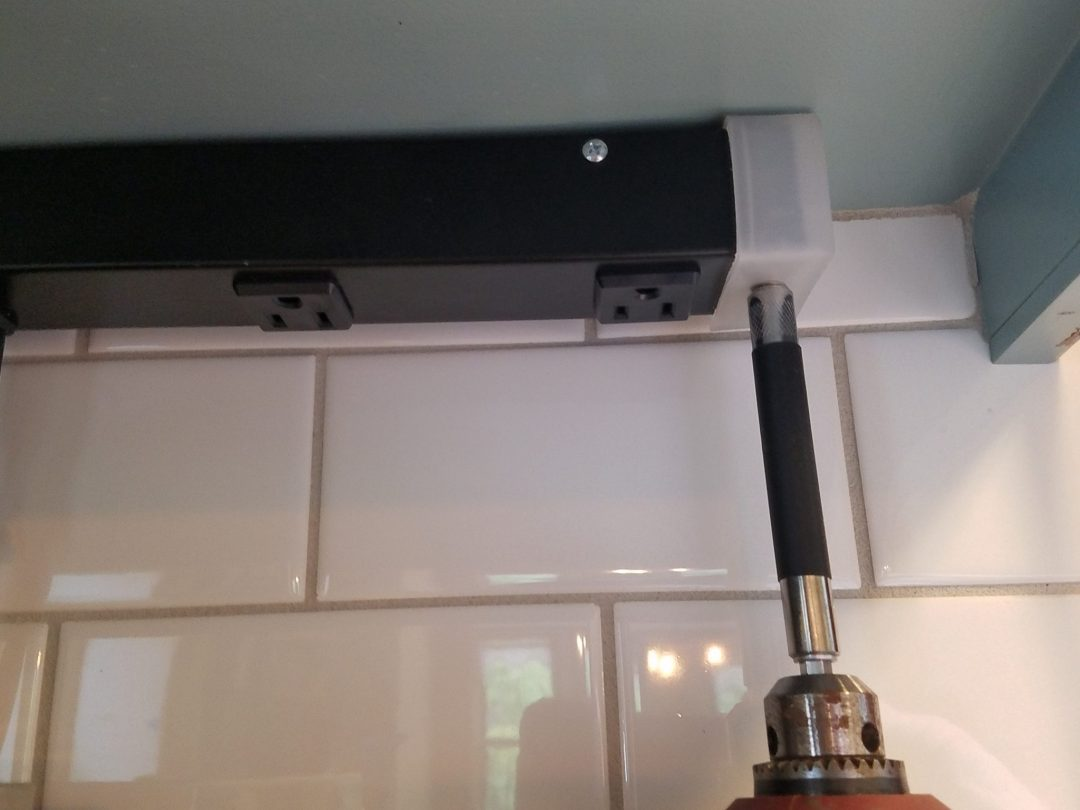
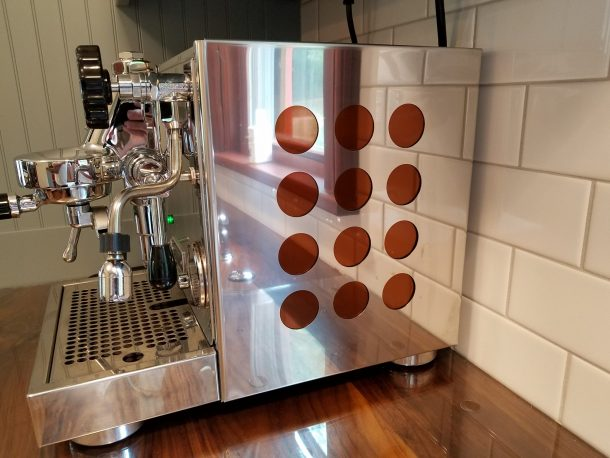
Plug receptacles are conveniently available, and at every 4”.
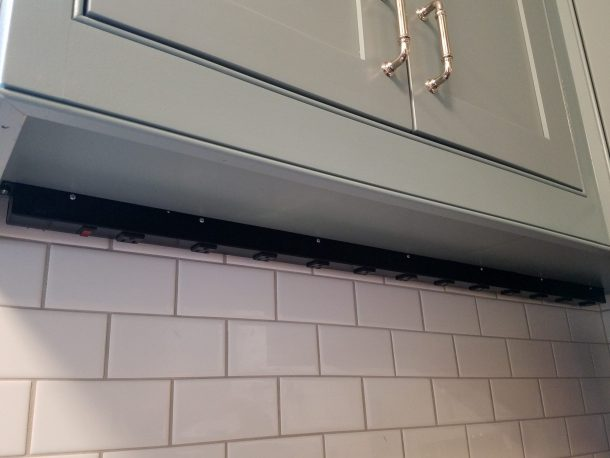
Appliance plugs insert overhead, and are mostly hidden by the appliance.
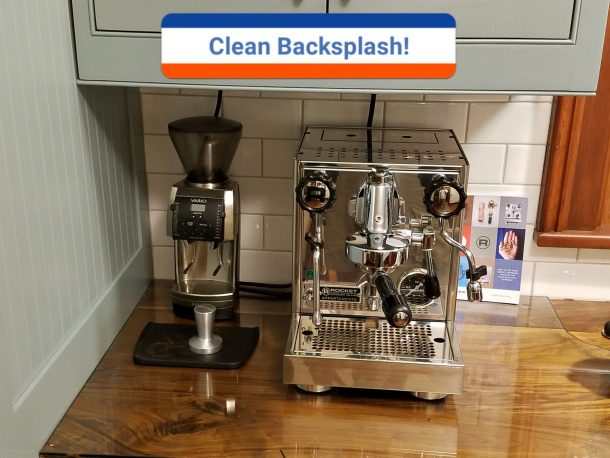
Due to the elimination of the backsplash receptacle and plug, countertop appliances can sit closer to the rear wall, freeing up a bit of countertop space (always follow manufacturer guidelines for proper appliance spacing).
Step 3: Kitchen Backsplash Ideas – Relocate Those Electrical Switches!
Overhead Lighting (including sink)
Try to consolidate all overhead lighting to one, maybe two switches.
Locate the switch at the kitchen point of entry.
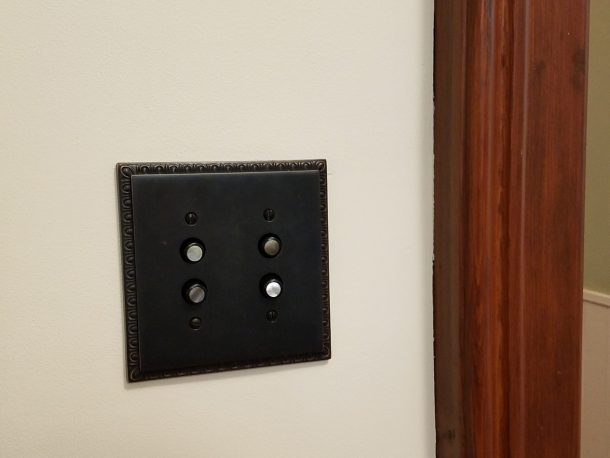
___ Left Switch – All Cabinet/Task Lighting ___ ___Right Switch – Overhead/Sink Lights ___
Task/Cabinet Lighting
Similarly, just like the overhead lighting, try to consolidate the switch(s).
Locate the switch at the kitchen point of entry.
Above all, this will eliminate yet more electrical switches at/around the cabinets, backsplash, and task lighting.
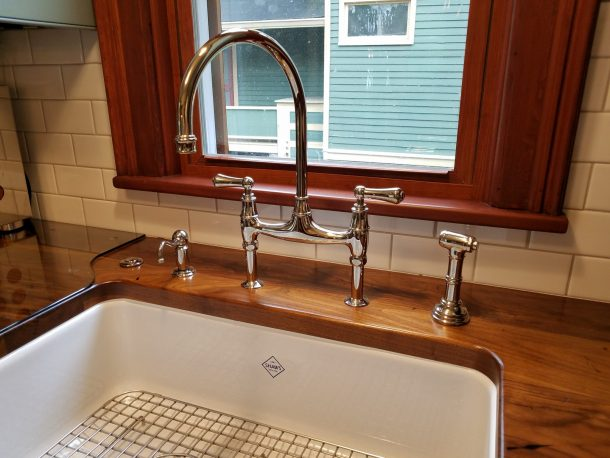
Garbage Disposal
Again, unfortunately, the power switch is usually located on the backsplash.

This one is a trade-off, but an alternate location is the kitchen countertop, as shown here (air switch button on left).
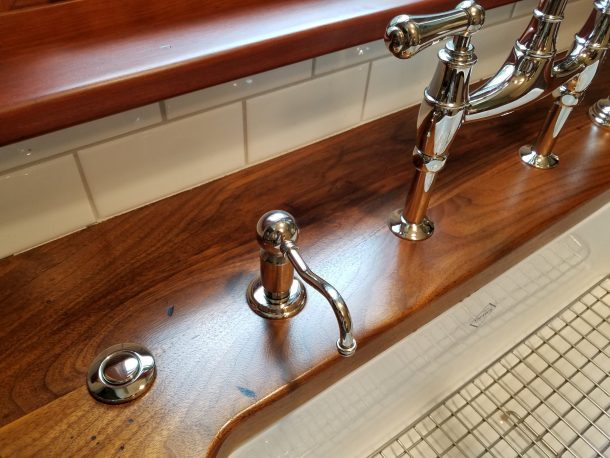
See previous kitchen remodel blog for air switch installation info.
Conclusion
This technical blog will help complement your kitchen remodel design, especially if you are looking for that vintage, uncluttered look in regards to many plugs and switches – that are usually associated with kitchen designs and remodels.
Therefore, at the end of the day, it all comes down to personal preference, and weighing the pros and cons of overhead vs backsplash mounted plugs and switches.
Finally, whatever you decide, happy kitchen remodeling to you all!!!
Best of luck, and keep on Fixing!

For more info visit: www.myoldhousefix.com
![]()
Posts may contain affiliate links. If you use these links to buy something, we may earn a small commission (at no additional cost to you). Full disclaimer HERE.


0 Comment(s)