
Updated: 05/11/2024
The topic is concrete steps and stone (wing) wall restoration for your Old House, so don’t miss these 12 vital steps to cement your porch restoration success! Read on to learn more…

Background
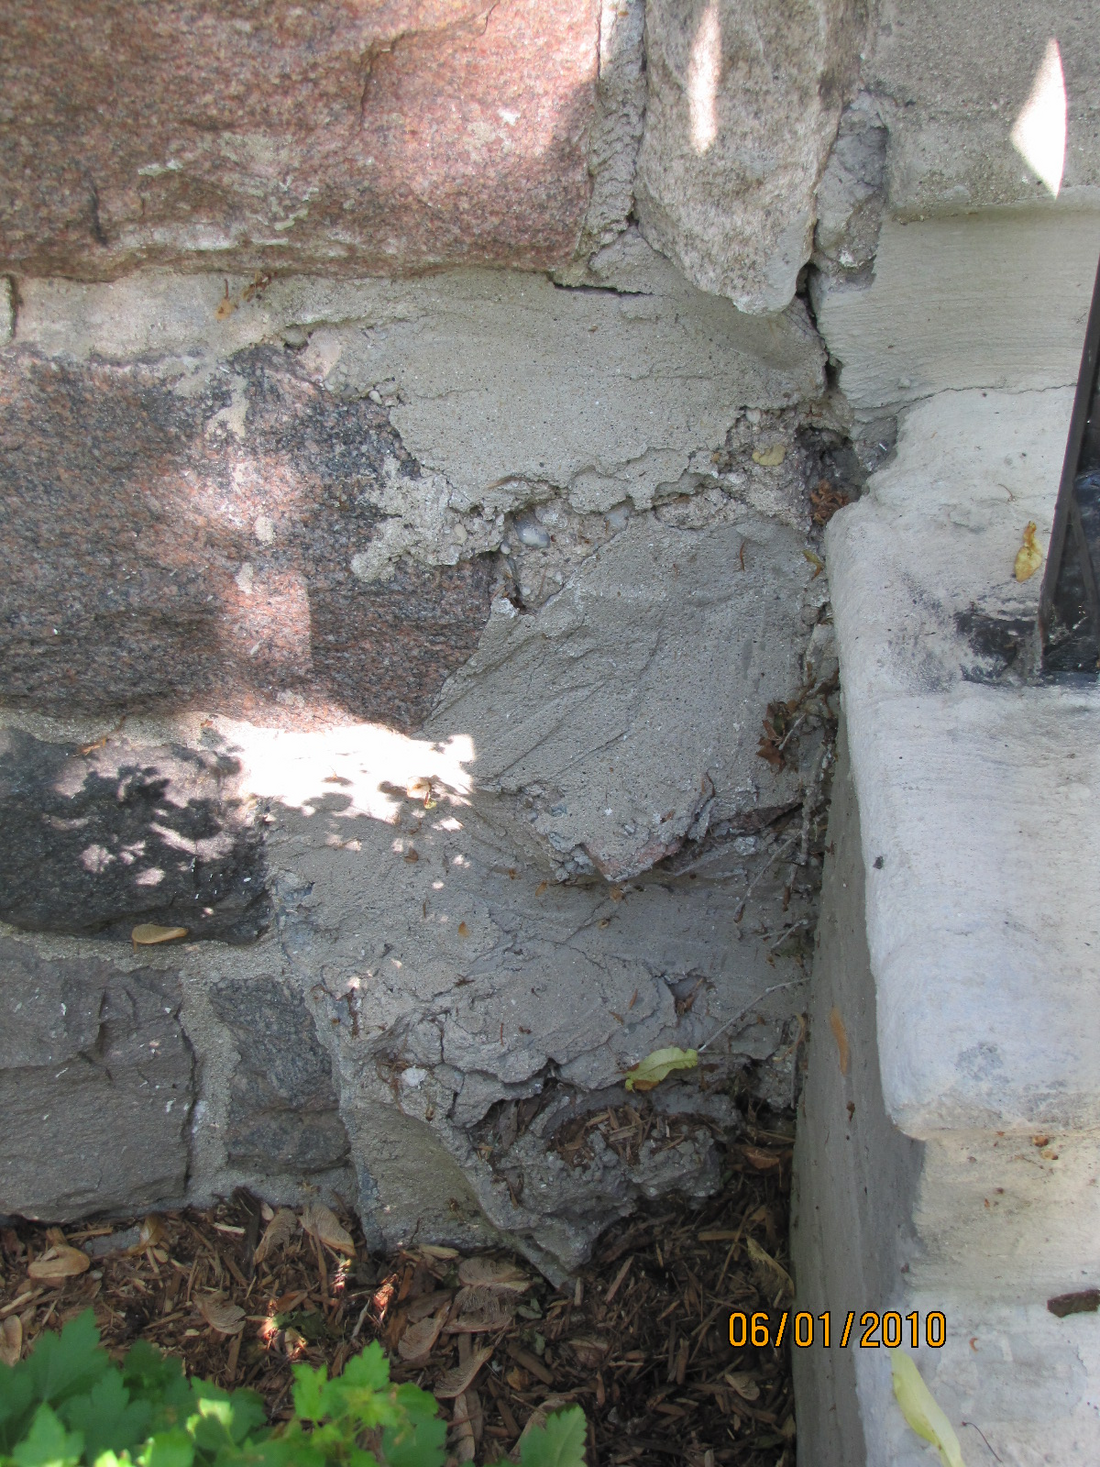
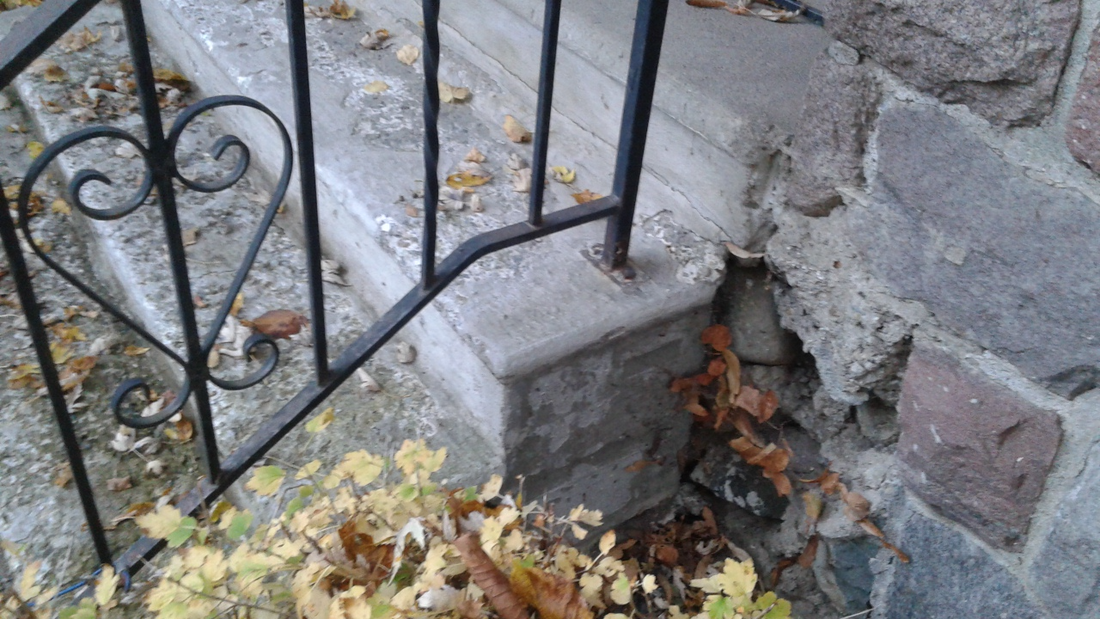
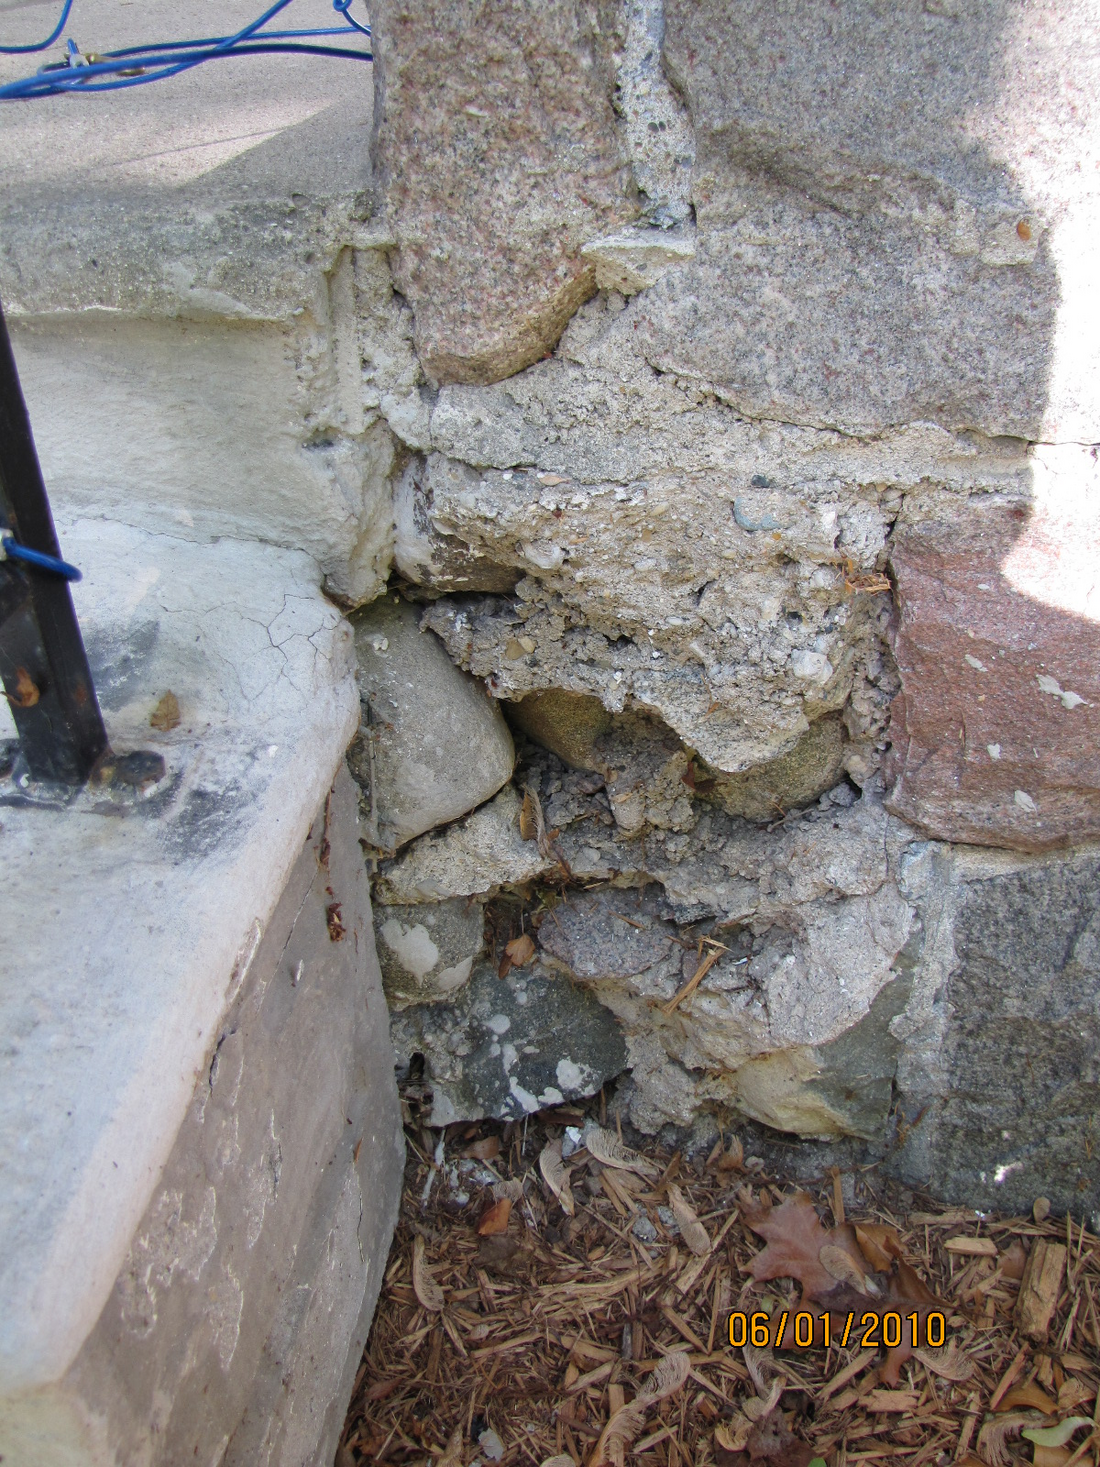
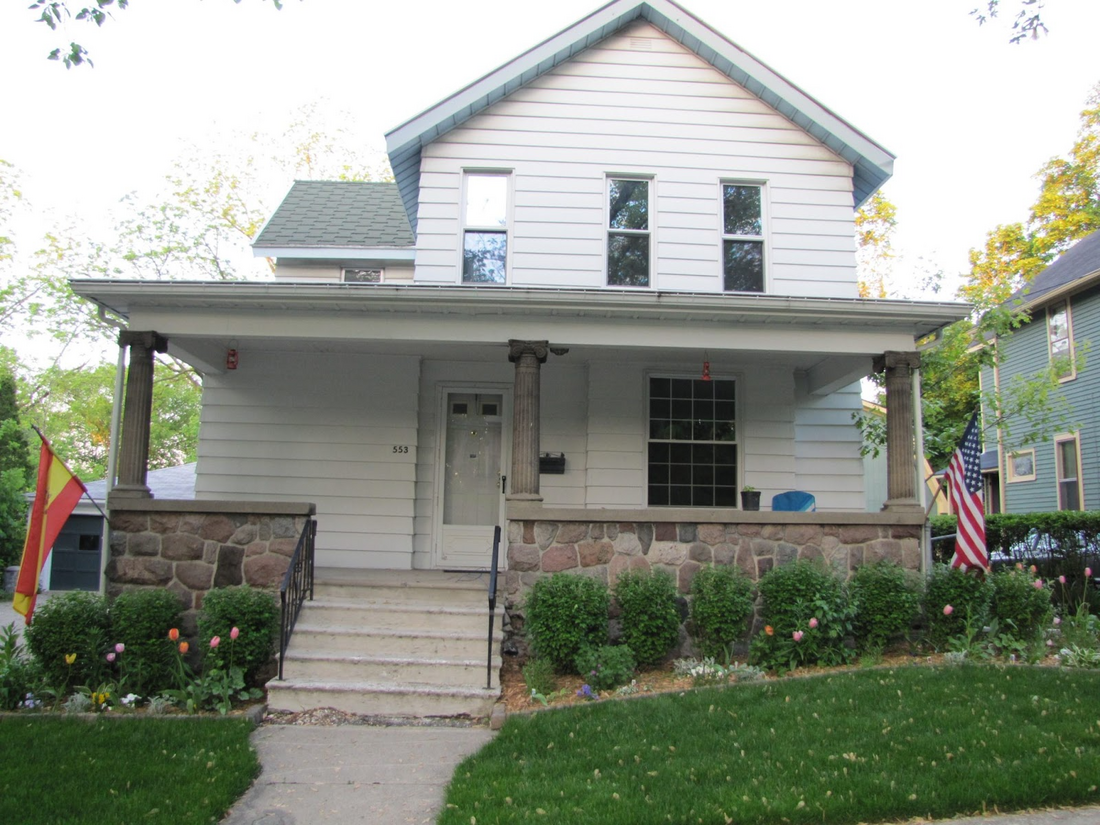
Ok, now usually when we think of concrete steps and stone, we just assume that it is pretty much indestructible and will last forever, right? No historic preservation needed here, right? Well, in many circumstances, this does not seem to be the case, as evidenced by our crumbling concrete steps, and the mysterious disappearance of our granite stone (wing) walls, topped with concrete caps.

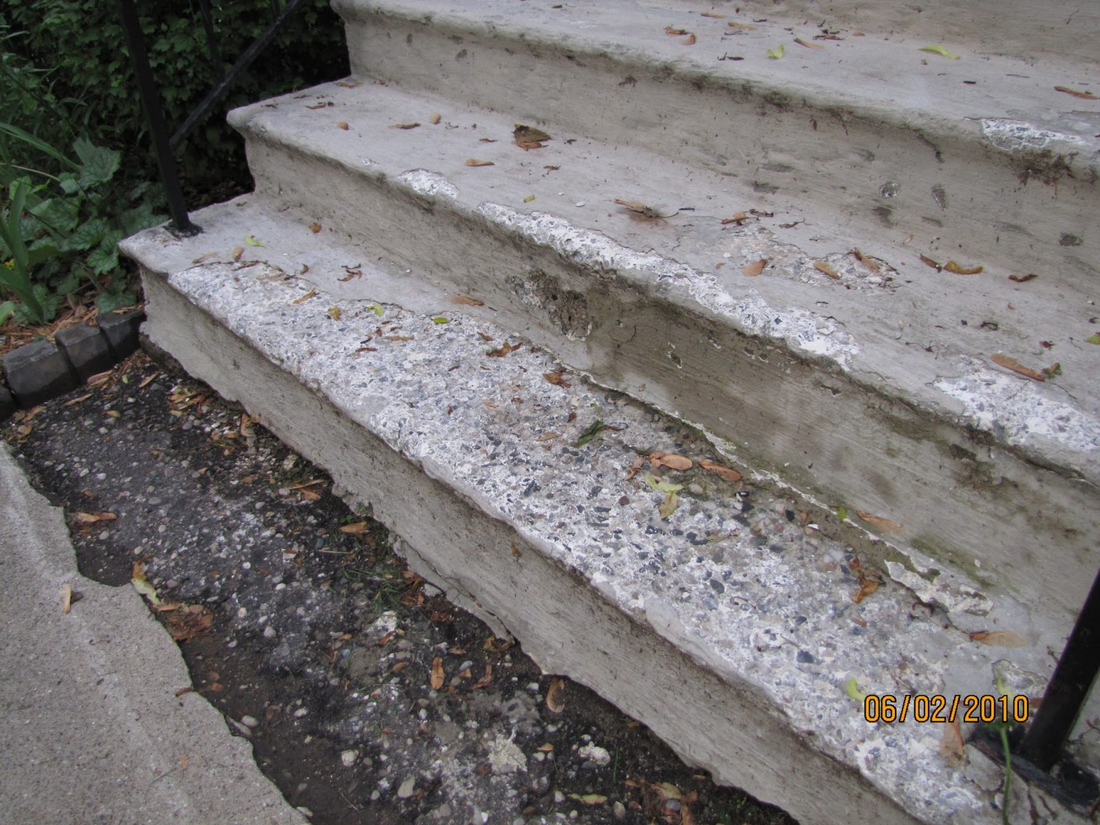
Additionally, I’m almost certain that concrete formulas have changed since 1927! As seen below, how often do you see newer concrete last 91 years in a northern, snow, salt filled sidewalk environment? I’d love to hear your thoughts/explanations for this!

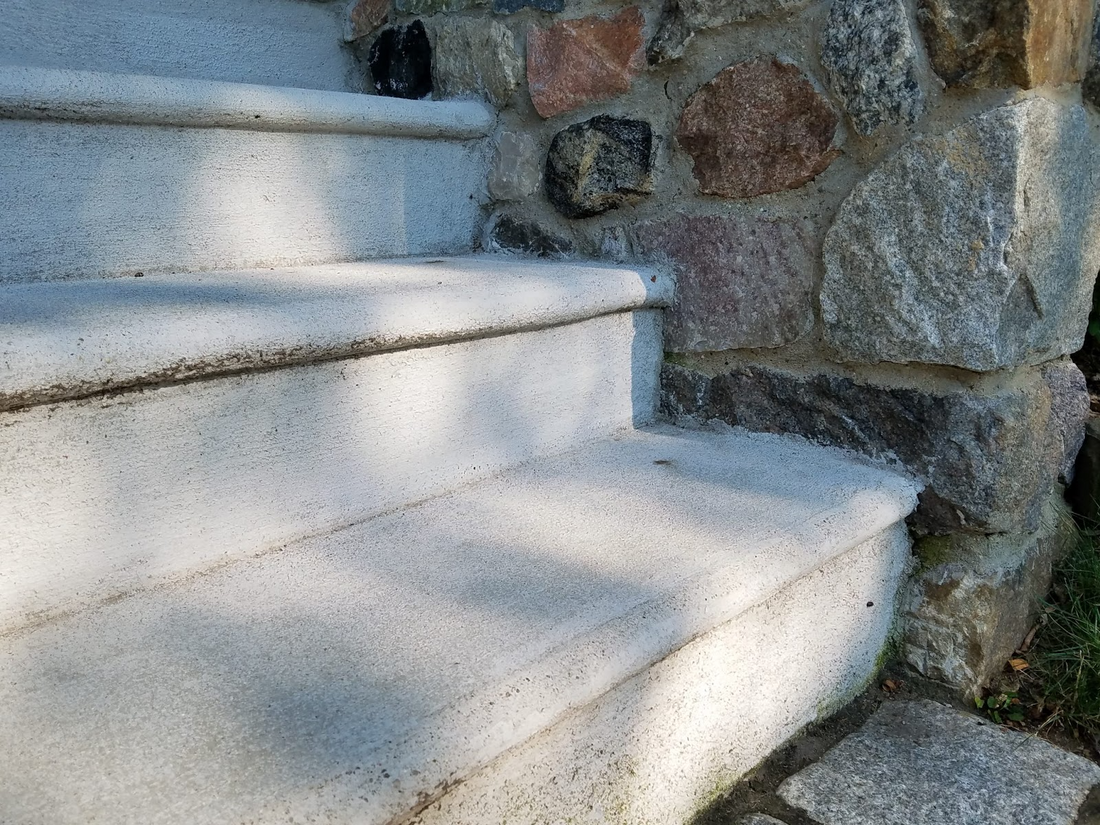
Concrete sidewalk section still perfect after 91 years!

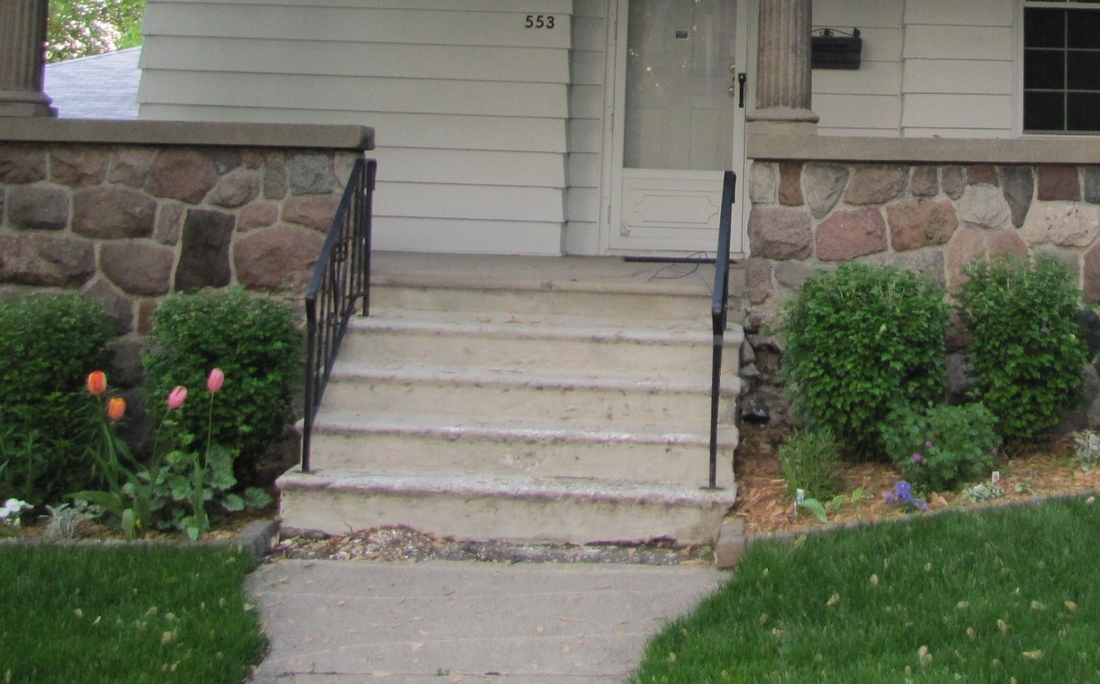
In keeping with our whole house restoration, the goal is to return the porch to its original configuration, which includes the concrete steps and granite stone (wing) walls, with concrete caps.


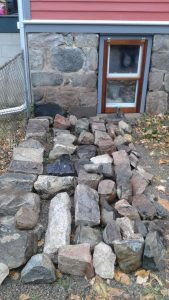
Additionally, this restoration was really made complete, when I scored some granite from a home being demolished nearby. This granite an exact match to our porch stone!
History

c.1920. Ann Arbor Stonemasons – George Eberwein / Chris Seeger
Our house (The Eiting House) was originally built in 1890. It likely had a wooden porch as part of the original configuration. However, as evidenced in the basement, and from other granite porches in the neighborhood, we have traced this particular stonemason (signature flower pattern) to around 1920-25. This is when our second story addition, new coal chamber (under the current porch), and granite/concrete porch was added.
Scope of Work
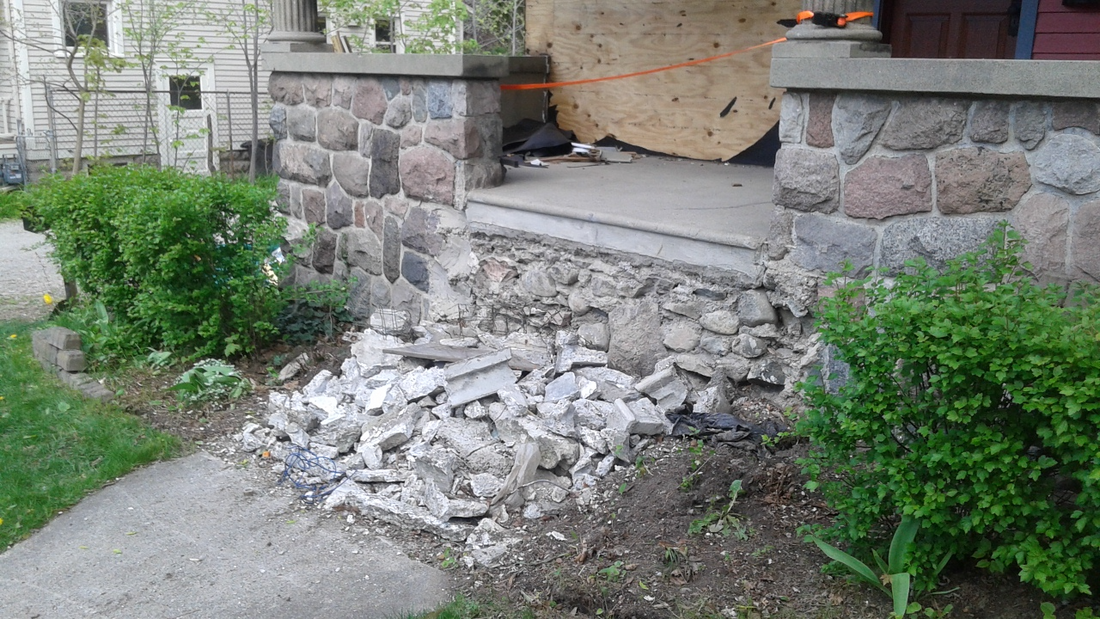
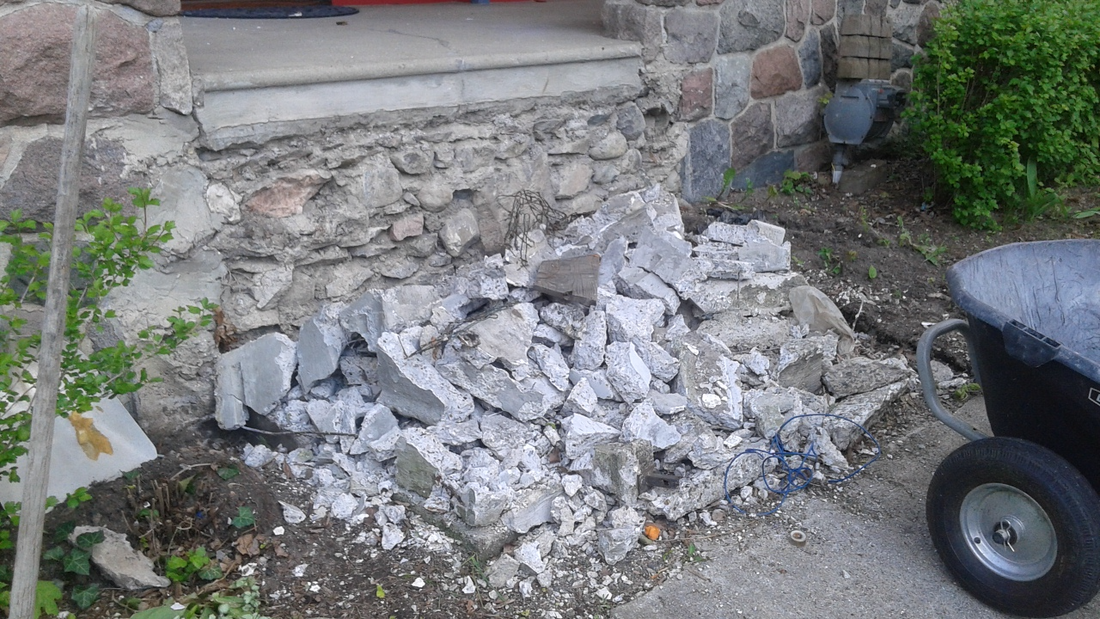
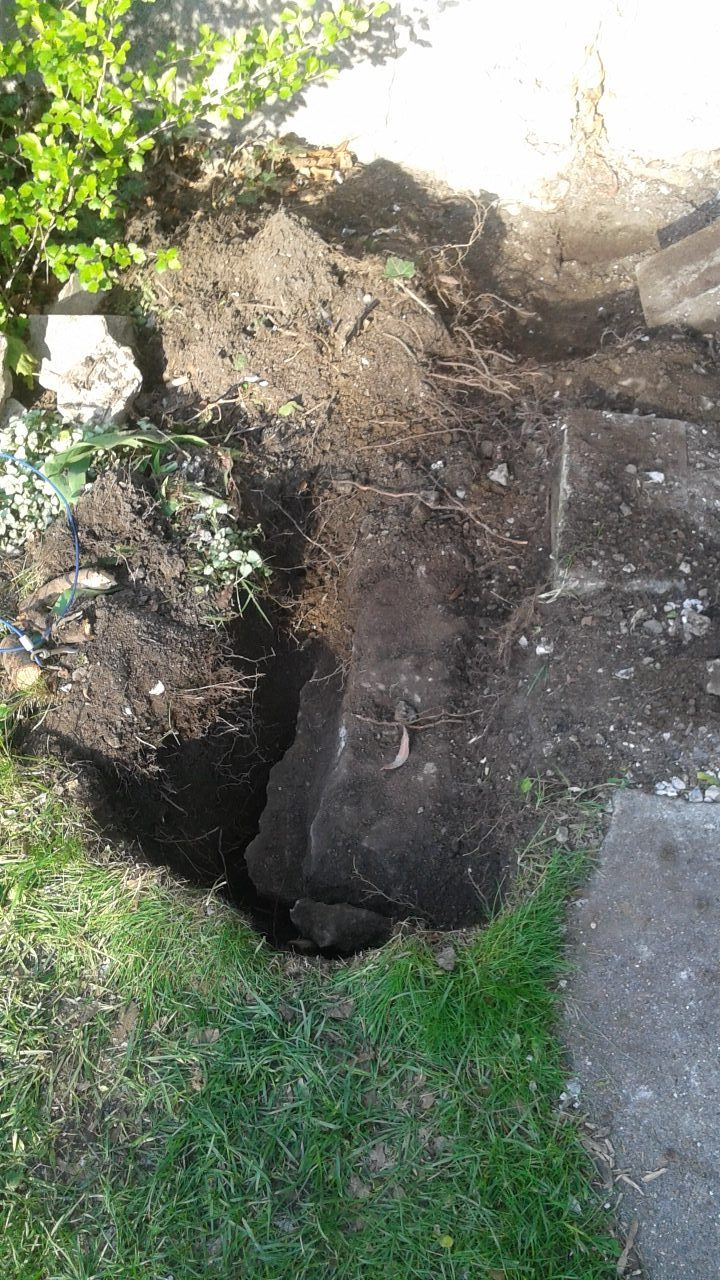
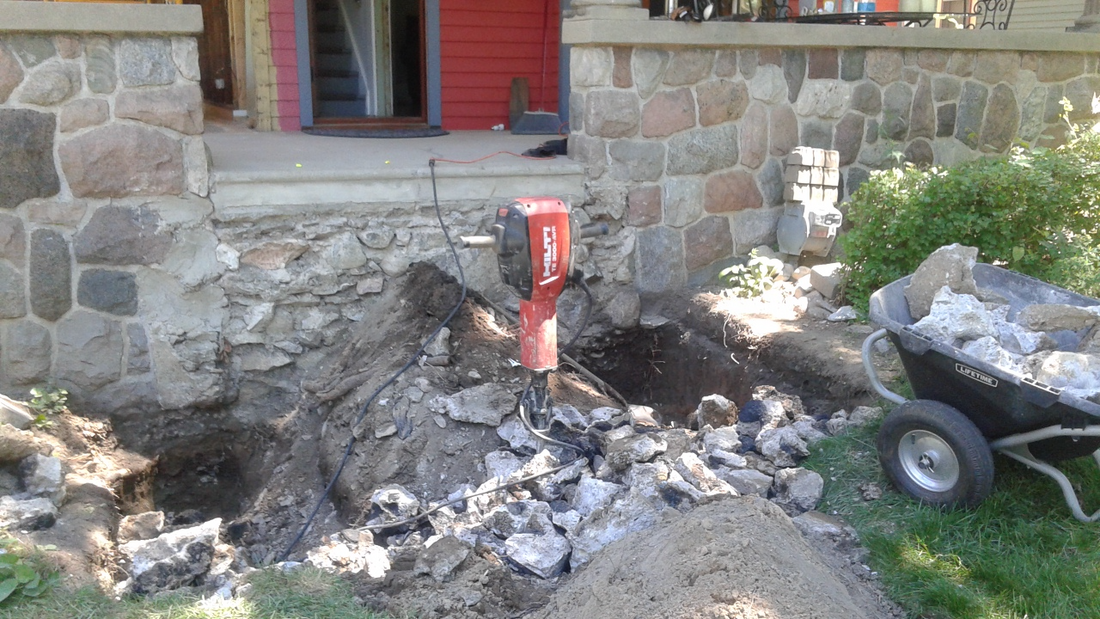
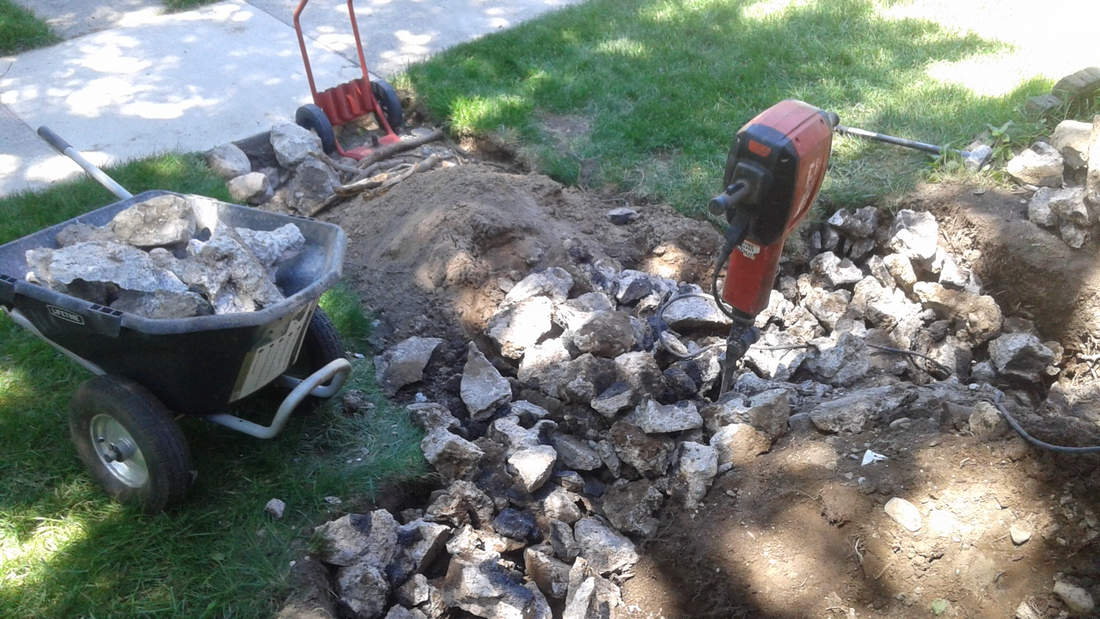
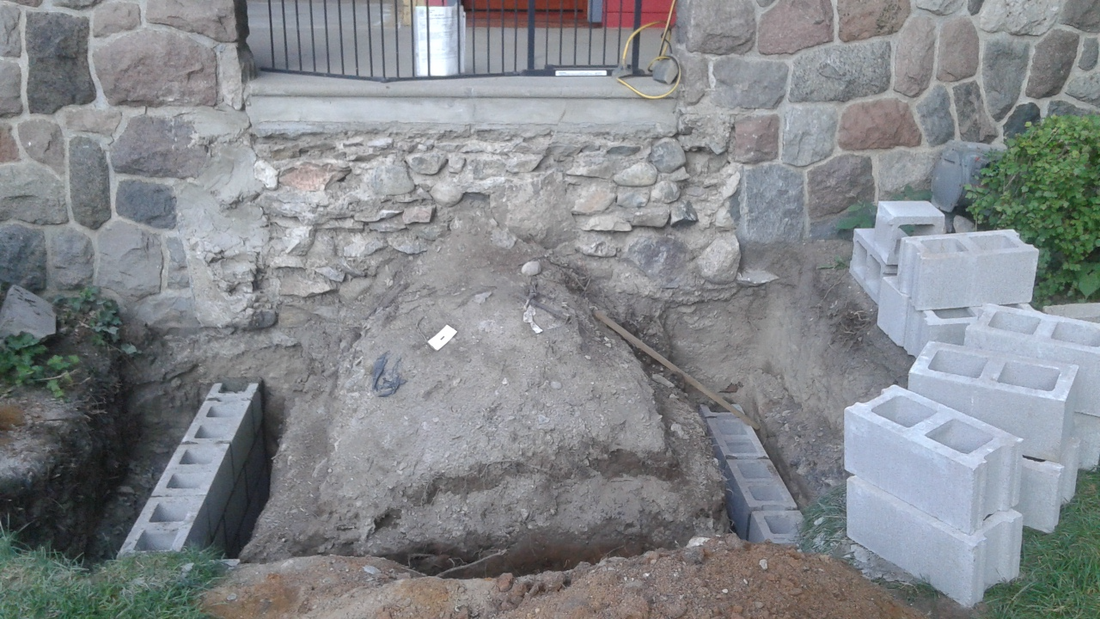
Not everything was built “better” in the Old Days. They weren’t? Nope! So, as a result of the original footings being grossly inadequate (too shallow at 21 inches and built of scrap stone and asphalt), we have to completely start over and reconstruct everything from the ground up – literally! Ugh!!! Demo and removal of original footing, foundation, and pre-cast concrete steps.

So stay tuned, as the fun is about to begin – How to rebuild front porch steps!
12 Step Restoration: Concrete Steps and Stone Walls
Step 1
Demolition and Removal of the Precast Concrete Steps. Precast, by nature, don’t last as long as “poured” concrete, and they just don’t hold up as well, so I try to stay away from precast. Read more on precast steps HERE.

Step 2
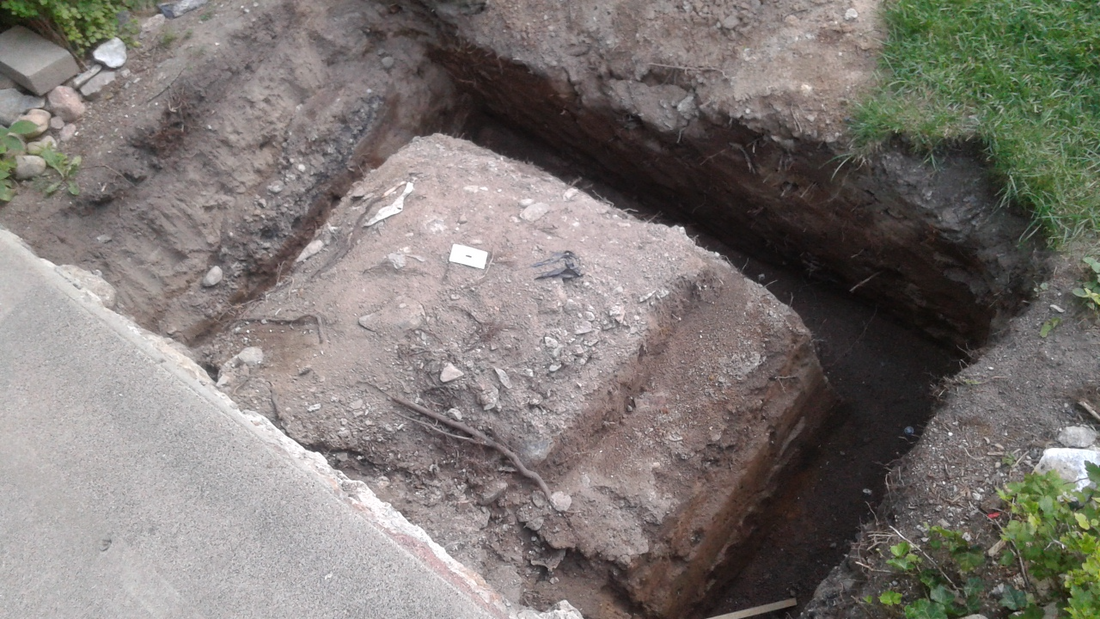
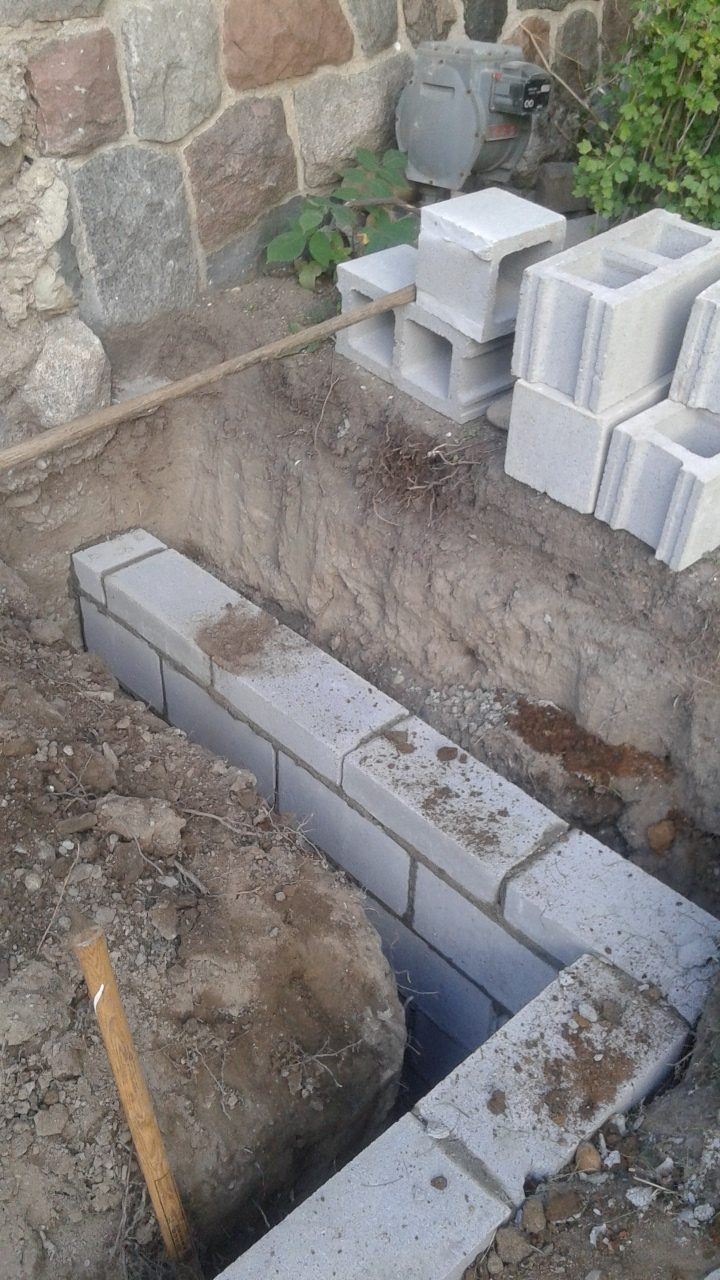
Verify Proper Foundation and Footing. Dig down beside the existing footing (post hole diggers usually do the trick). Due to the weight, city building codes require the same footing/foundation as your house sits on. In our case (Michigan) 42 inches down, below freeze/thaw line.
Step 3
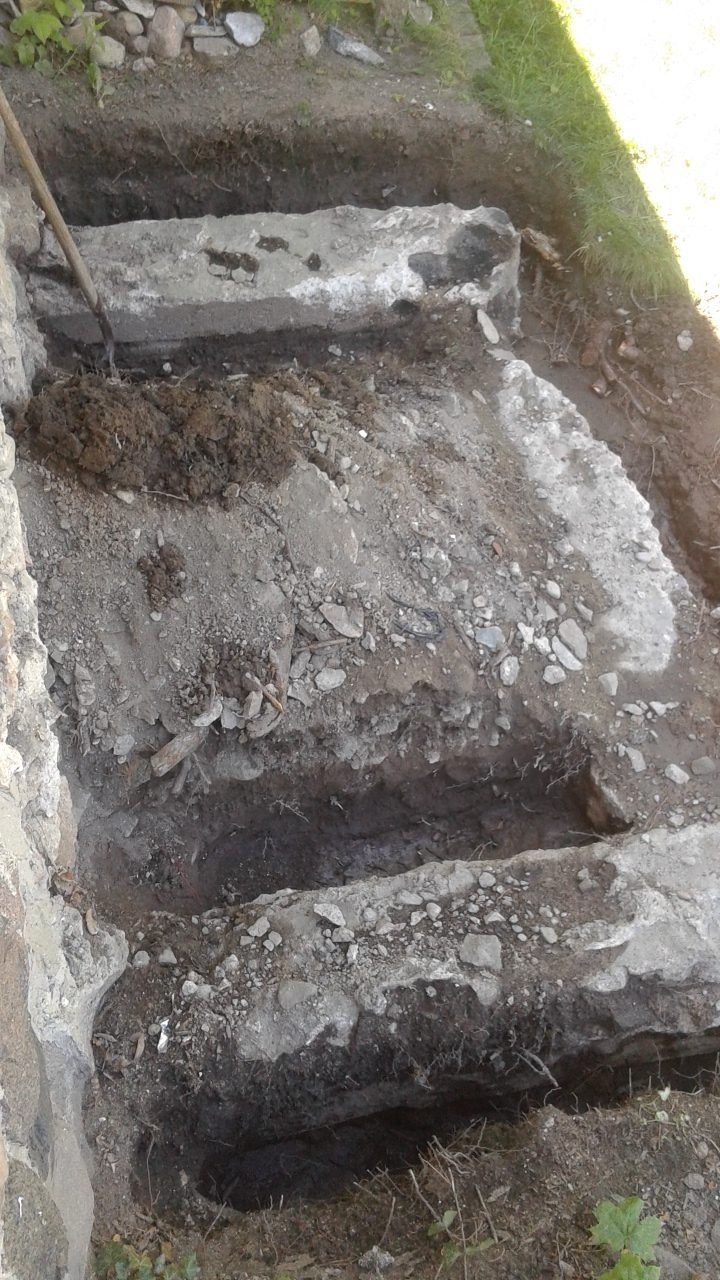
Remove Old Foundation / Dig New Footing to Code (42 inches deep in MI). If required, remove inadequate footing and dig deeper. Refer back to Step 2. We elected to dig a three sided foundation to support all sides of the structure. Read more on footings for poured walls HERE.
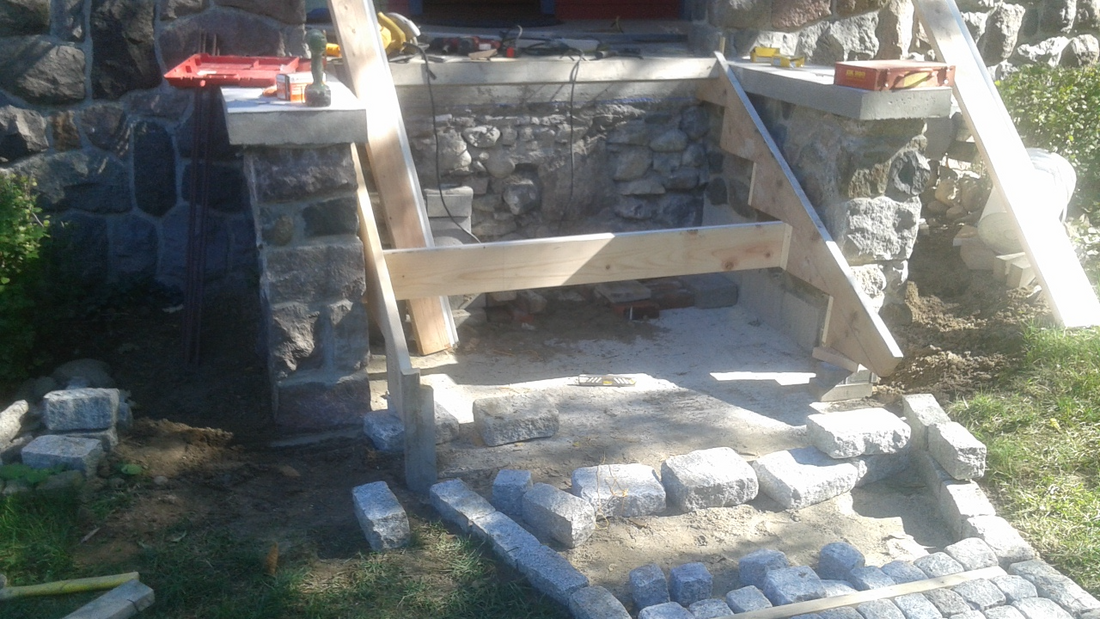
Step 4
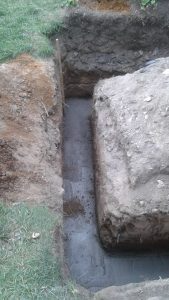
Pour New Footing for the Porch Steps Foundation. Minimum 12 inches wide by 12 inches deep.


Step 5
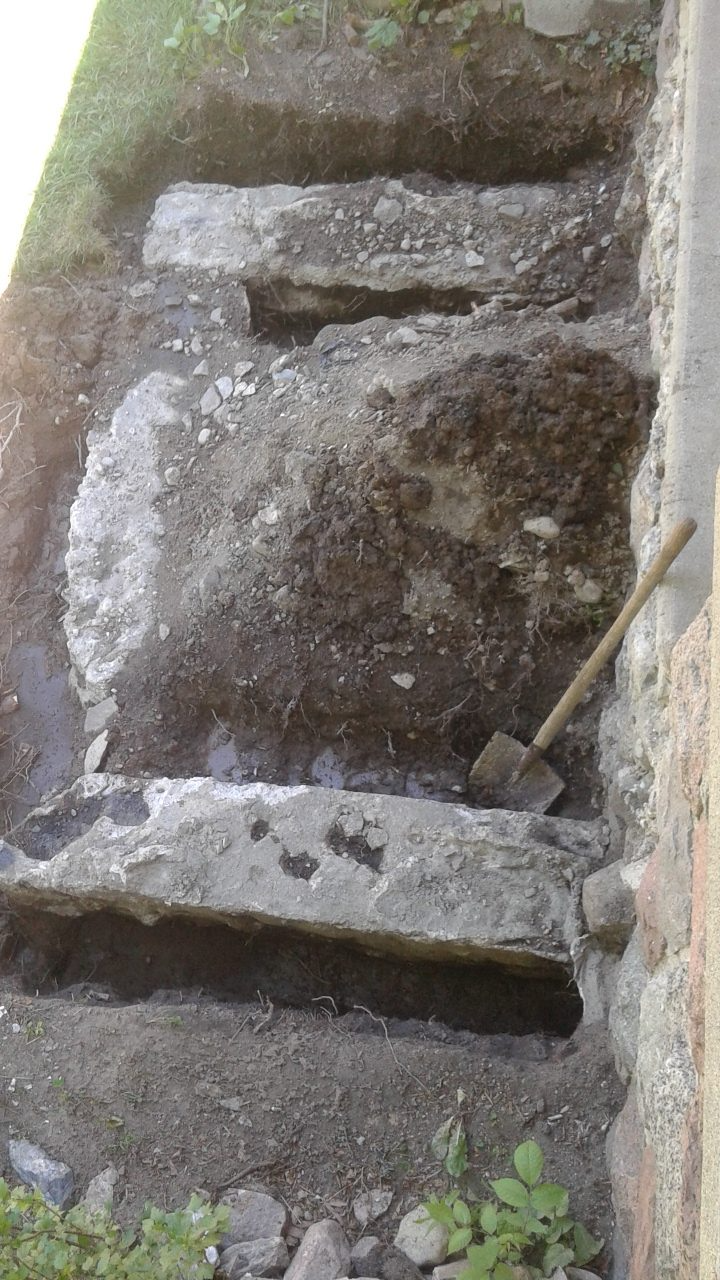
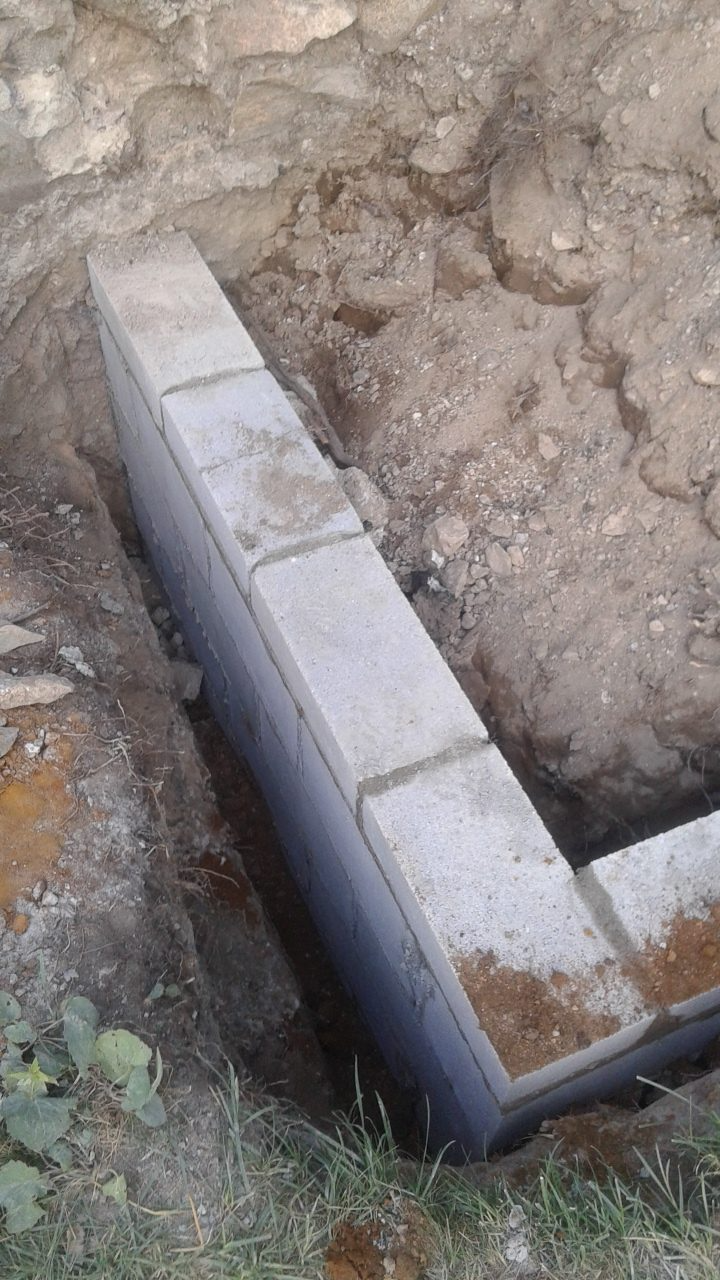
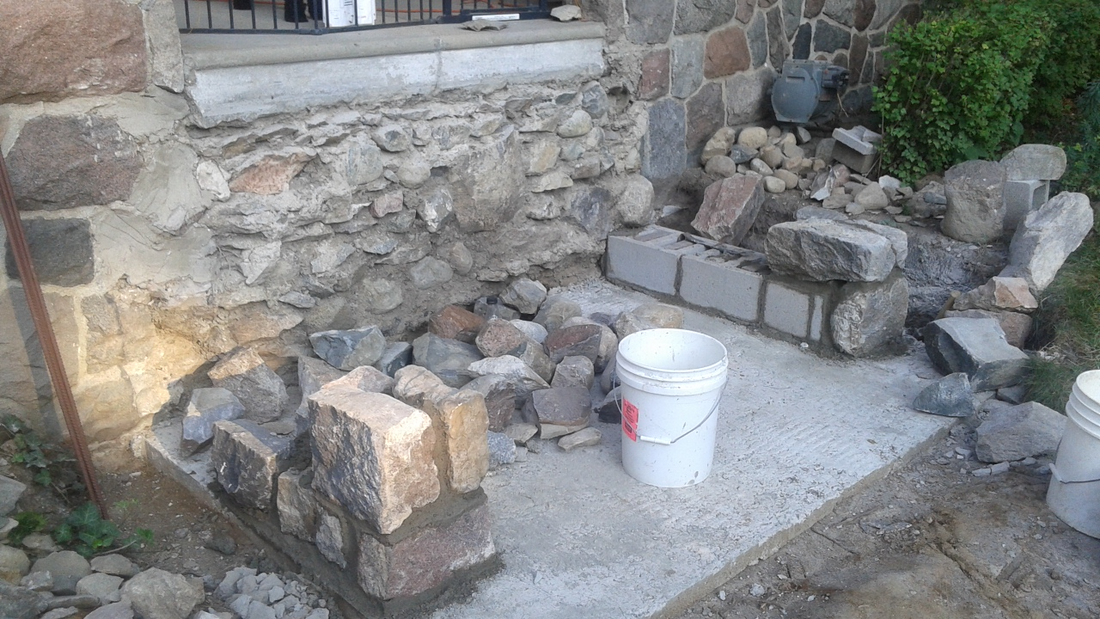
Build Up, and Out of the Footing to Grade. On top of the poured concrete footing, build up to grade with cement block and a solid block on top, to cap it.

Step 6
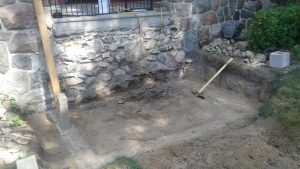
Back-fill, Level the Area, and Prep for Poured Pad. Now the area is built back to grade, we prep for the concrete pad to be poured on top. This provides a level surface for the poured concrete steps to sit on.
Step 7
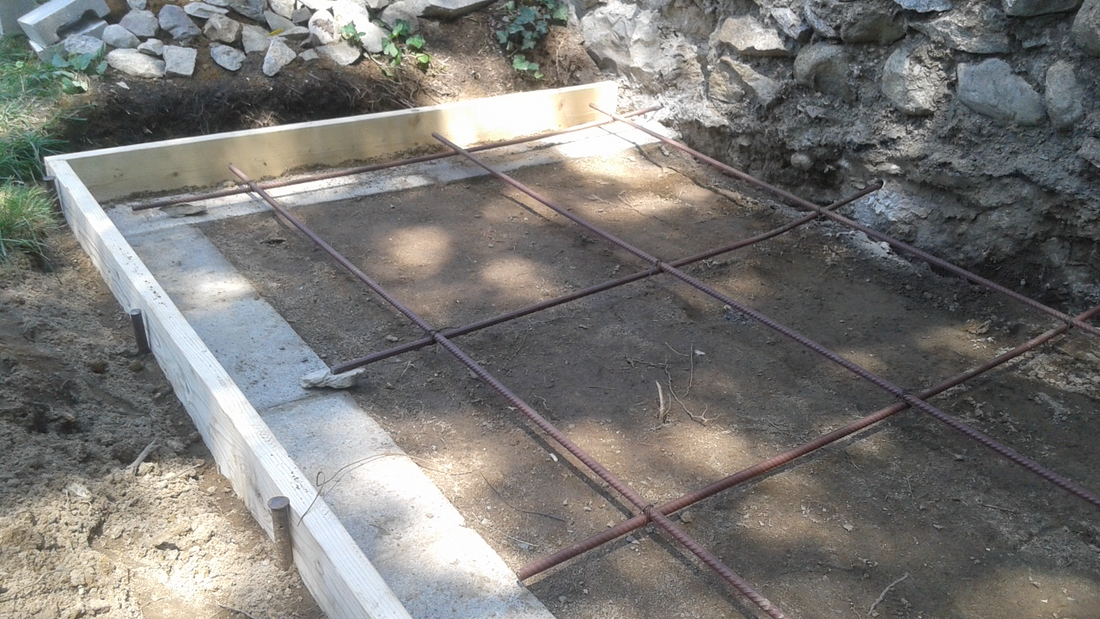
Set up Concrete Pad Forms and Rebar. Form the pad with 2x6s and install rebar for structural support. NOTE: 1) Rebar is primed to prevent rust, which will cause future concrete failure (spalling/cracking)! 2) Rebar is anchored back into the stone (drill holes).

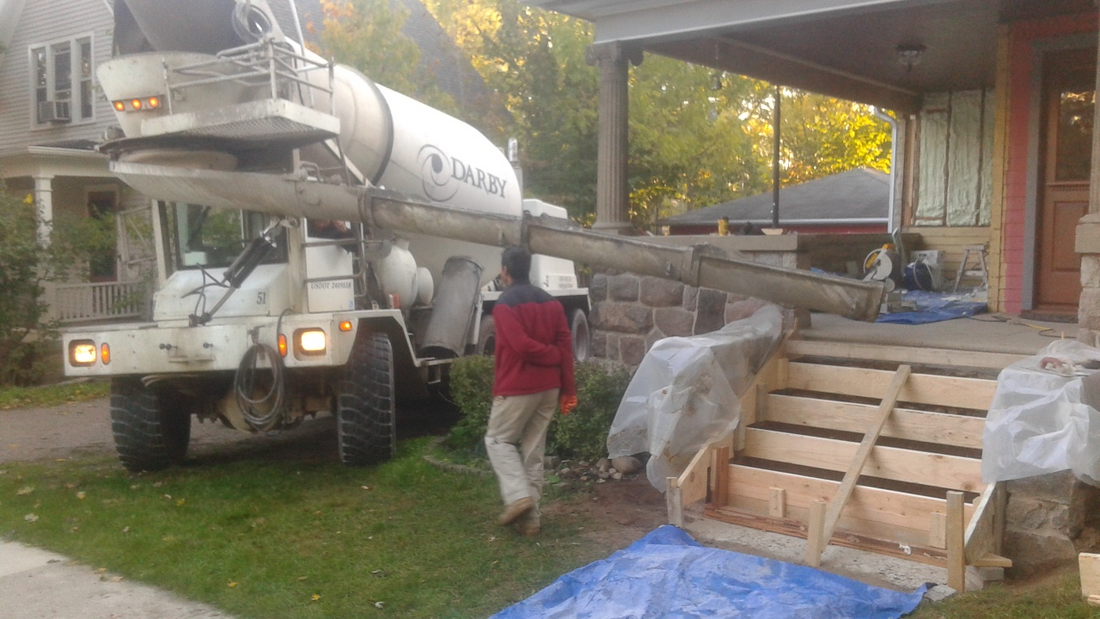
Step 8
Pour the Concrete and Finish the Concrete Pad.
Step 9
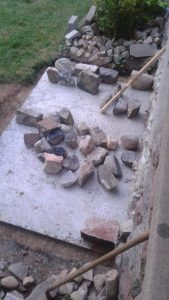
Select Stone and Rebuild the Stone (wing) Walls.


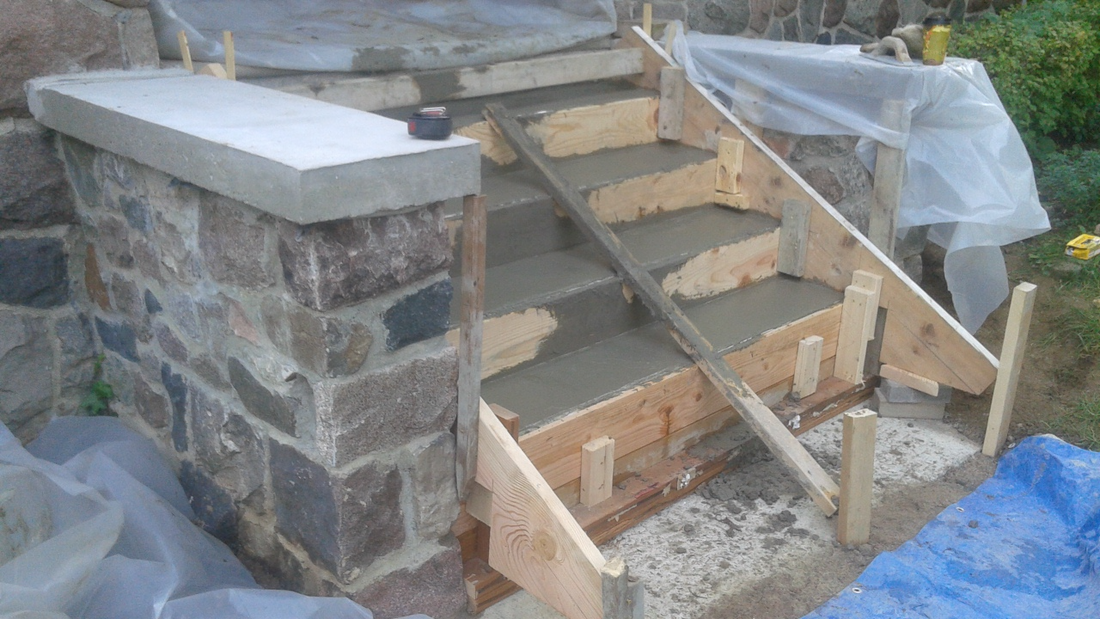
Step 10
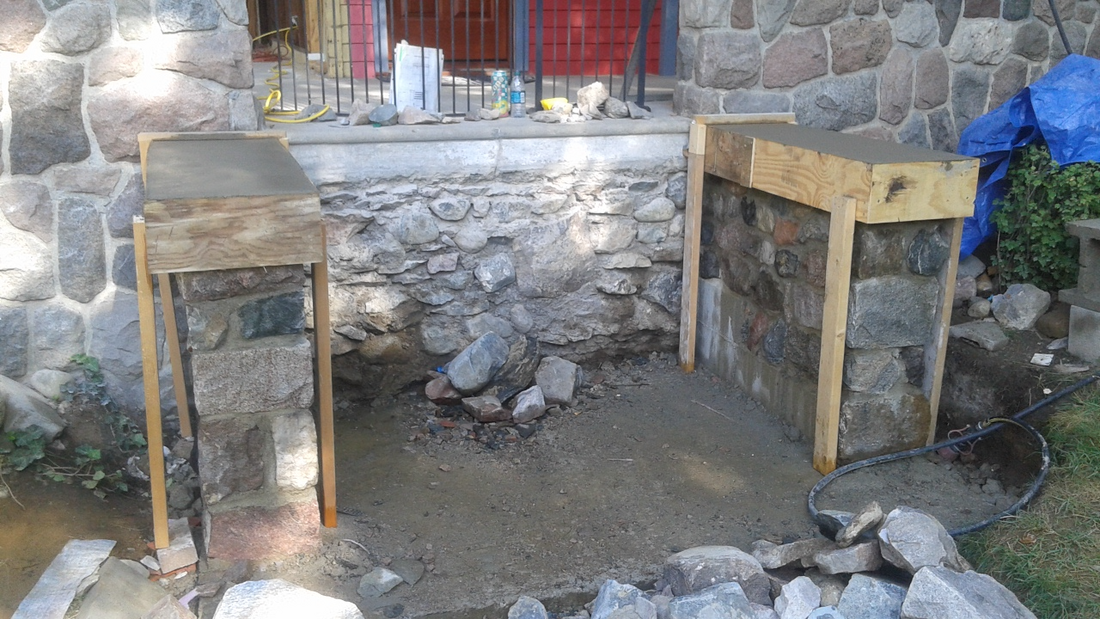
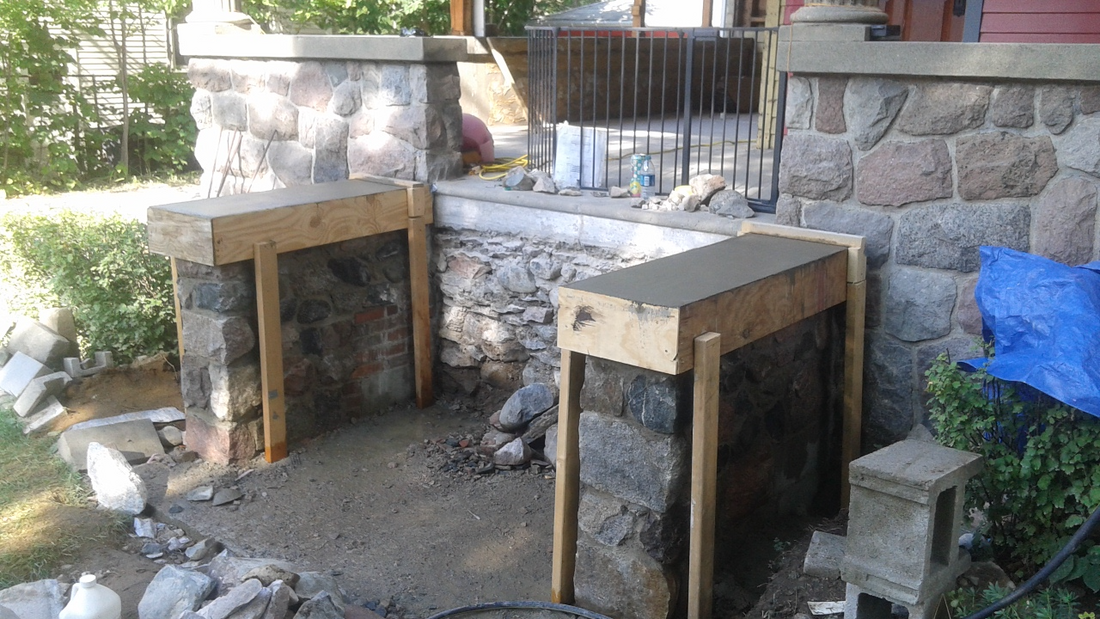
Form Up and Pour the Top Caps. Pour the caps in place, on top of the stone walls. NOTE: Seal up any open gaps (duct tape, foam board, lead strips, etc) on the underside of the forms – between the stone and wood forms, so concrete doesn’t leak out.
Step 11
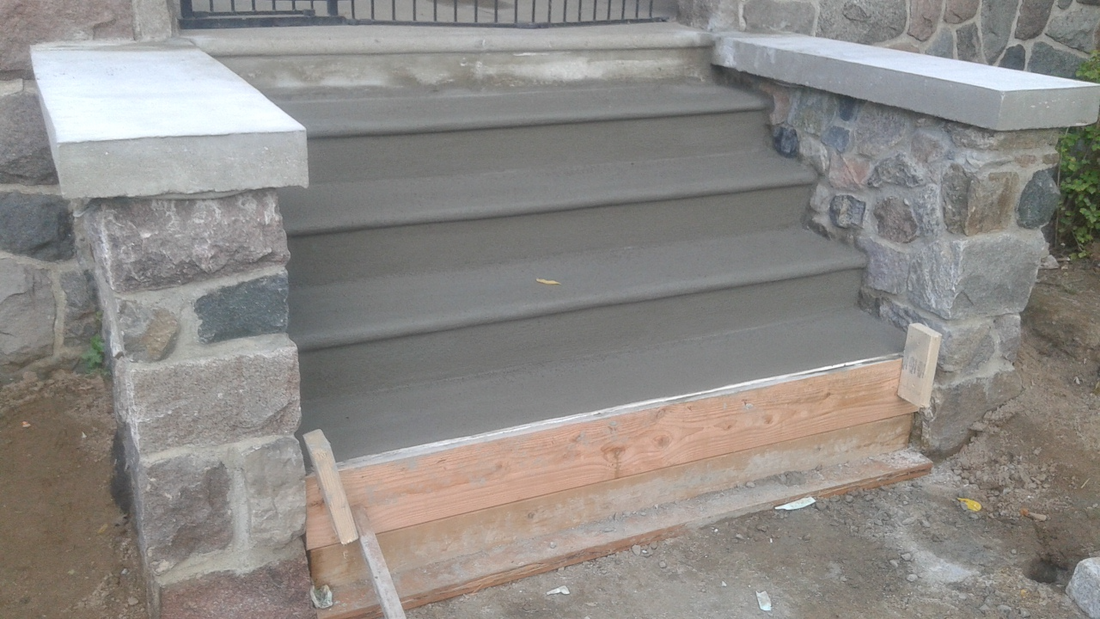
Form Up the Steps and Prep for Concrete Pour. NOTE: City code calls out a min and max for stair treads (rise and run). Rise: 8 ¼” max. Run: 10” min – Ann Arbor. Make sure you are compliant. Check local codes!
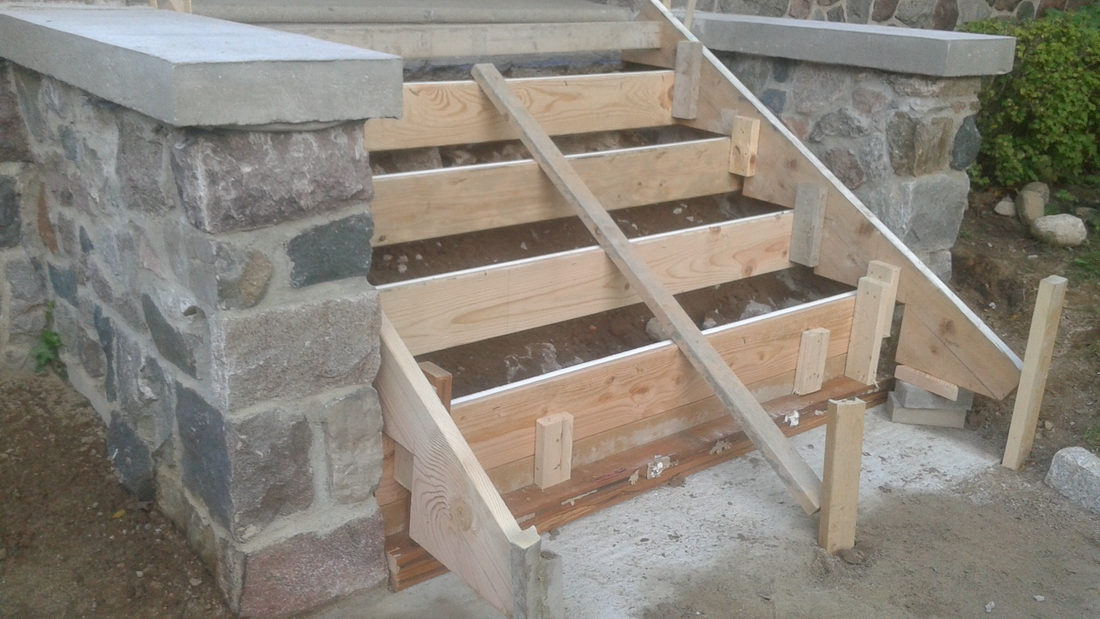
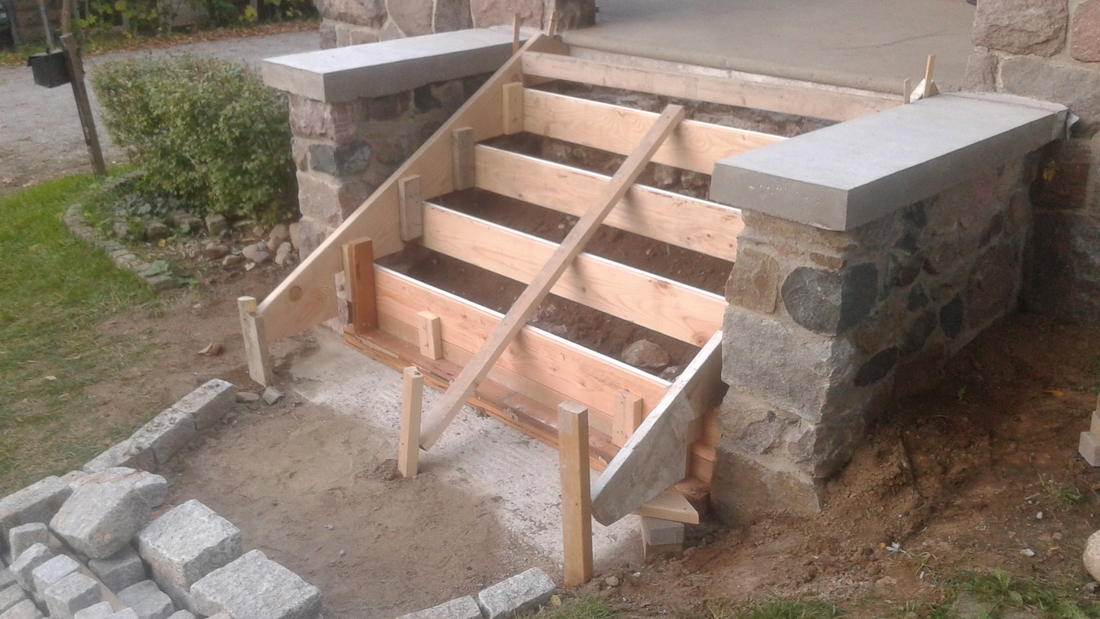
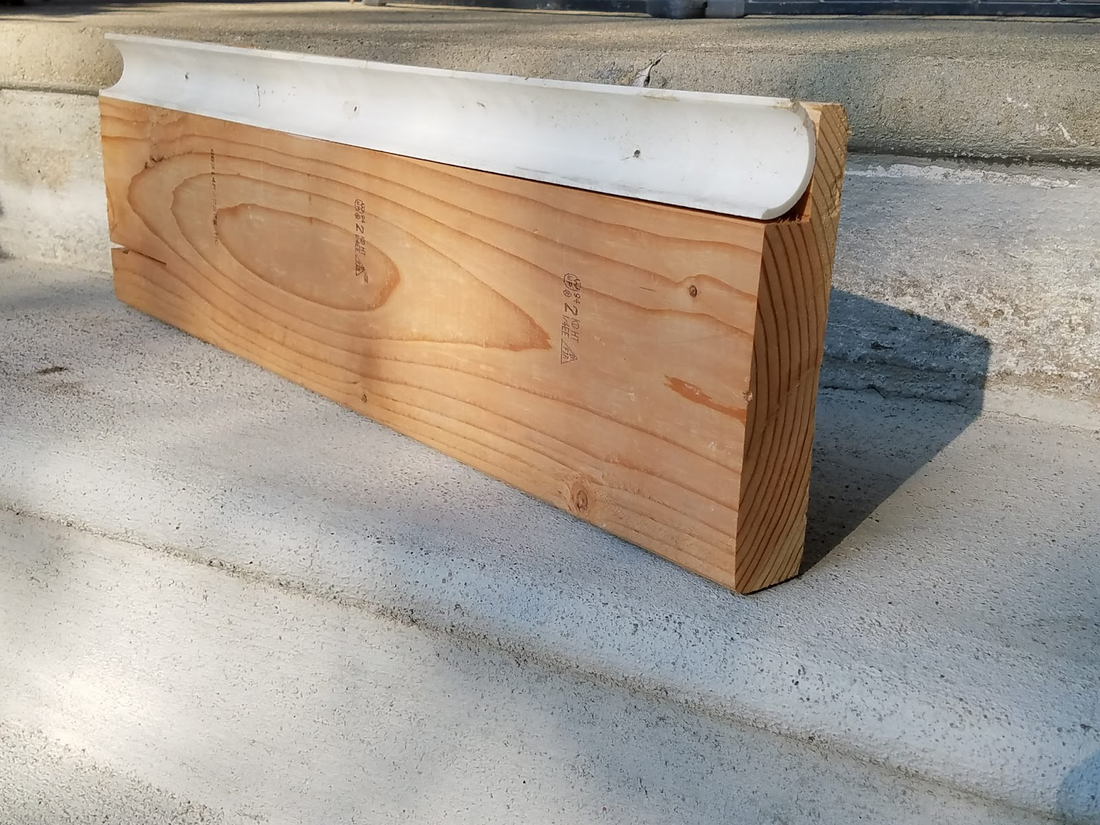
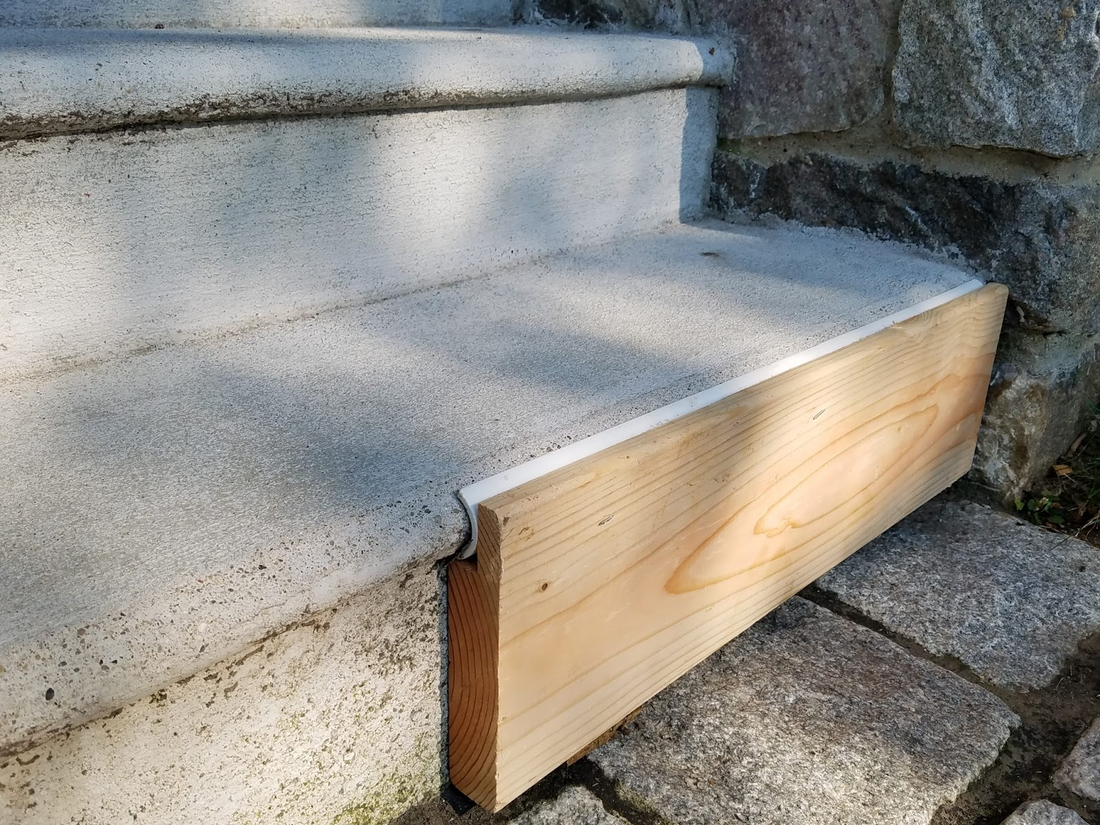
Bullnose detail. As you can tell by our top step, the original profile was a bullnose vs the standard squared off edge. This looks a lot nicer, and adds to the overall house character and charm. If your contractor doesn’t have the forms to do this. Use a 2×8 (notched) and some PVC (split). Just make sure to lubricate the surface, so the bullnose doesn’t pull off with the form – this DID happened to us!!!
Step 12
Pour the Concrete Steps and Finish. Pour the steps, allow the concrete to initially set, then remove form boards before full cure to finish/blend the corners.
Conclusion
Things weren’t always built “better” in the past, as evidenced by the existing foundation (only 21 inches). This allowed the entire structure to degrade and fail over time. But, with the detailed steps taken here, it will ensure that this new, and improved structure should stand the test of time…and hopefully another 100 years. All in all, it looks a bit nicer now, and has returned to its original configuration and appearance!


Best of luck on your concrete steps, stone (wing) wall, and porch restoration!
Best of luck, and keep on Fixing!

For more info visit: www.myoldhousefix.com
![]()
Posts may contain affiliate links. If you use these links to buy something, we may earn a small commission (at no additional cost to you). Full disclaimer HERE.


0 Comment(s)