
Updated: 05/10/2024
So, we left off from Part 1 discussing winter weather tips and maintenance. For Part let’s switch gears and talk about Air Sealing and Insulation .
Air is good, right? It’s good to breathe…keeps us alive! It’s good for your car tires…keeps you from having a flat! Air is also good in the summer…nothing like a strong cool breeze to cool you of, right??? But, air is not “cool” in the wintertime…ok, it really is..but not really…
I get it…you have an old home, you’re just sitting on the couch, trying to stay warm when it’s 25 degrees outside, and it feels like the back door is wide open! What the heck is going on???
Air Sealing and Insulation - The Problem
Well…
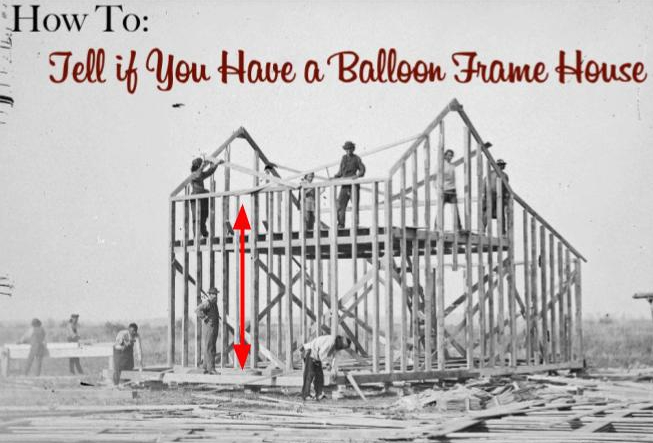
Your “old” house probably has balloon framing(see pic below) – notice the wide open vertical wall cavities from the ground to the roof (red arrow below).
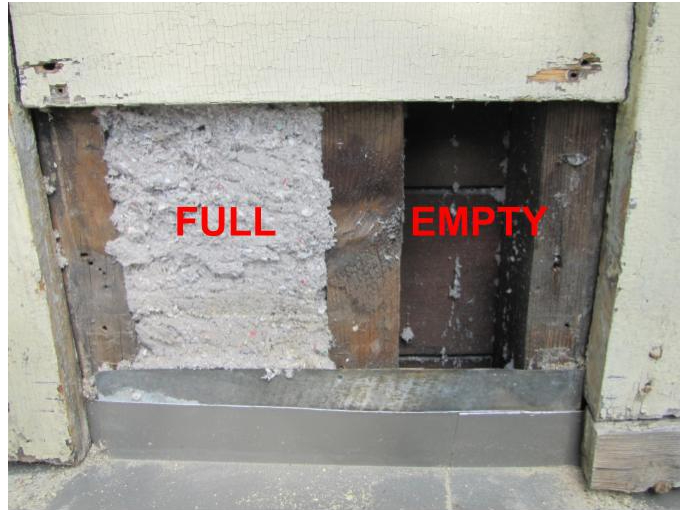
These wall cavities were often left un-insulated when built – sheathing and siding on the outside, and plaster on the inside.
Air creeps in the wall cavities through the siding and the “wind tunnel” is created inside your “chilled” wall. So now you are cold, right???
As if you weren’t having enough fun already, the big gaps at your baseboard/floor [look where the men’s feet are on the second floor] from 100 years of wood settling and shrinking, make your rooms feel like the windows are cracked as the air travels up the long wall cavity and into your room.
Ok, now I’m cold! I’m going to go have a quick coffee to warm up, while y’all check out the photo below…
So we have a problem here! The exterior walls are freezing, the baseboards leak air, you notice the windows are old and drafty, and the house isn’t holding in heat well (probably because there is hardly any insulation in the attic and walls). How do we get a quick win here, so we don’t freeze this winter?
Air Sealing and Insulation - The Solution
It's always a good idea to start/baseline your home’s current performance with an energy audit (blower door test). This test will help identify areas you need to target to make your old house more efficient. Your local utility provider can help steer you in the right direction, if you need recommendations in your area. Your utility company may also provide rebates for insulation, efficient boilers, etc…so do your homework before you make a repair/upgrade to ensure you qualify!!!
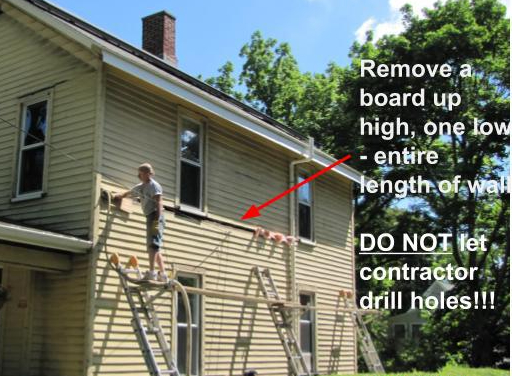
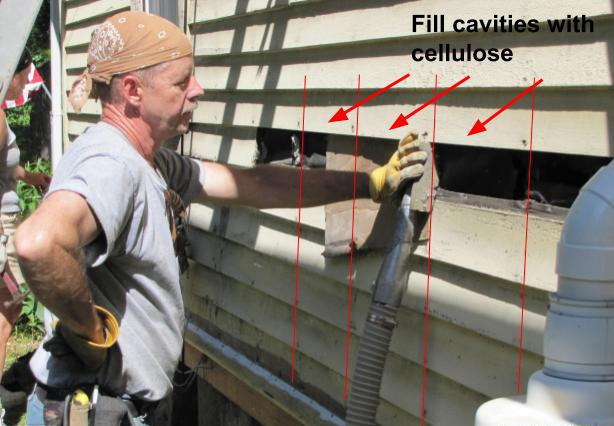
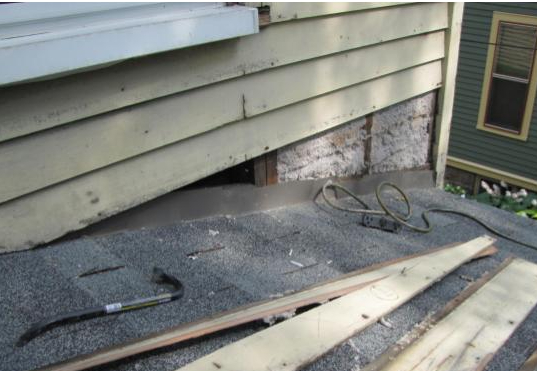
Insulate the wall cavities (between each wall stud) – The roughly four inches thick blown in cellulose will give you an R-value around R-15. A good contractor has a nail removal tool to carefully remove your siding. DO NOT let anyone drill holes along the siding – they will have to be plugged, look horrible, and eventually fall out! Trust me!!! :). This will set you back about $2200 for a 1300 sq ft house.
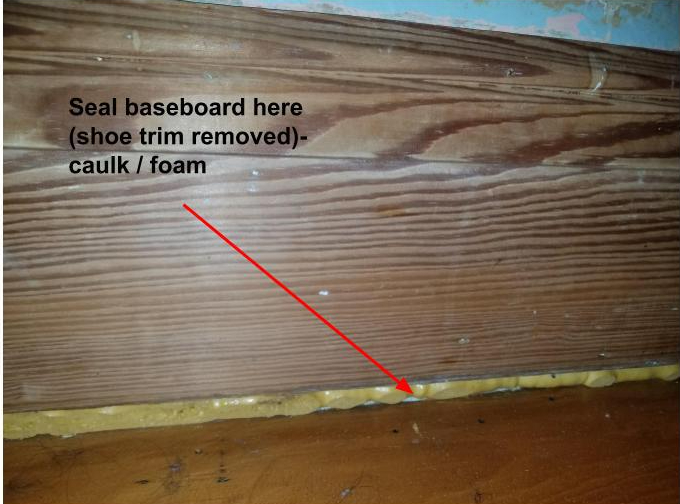
3. Seal exterior wall penetrations – along baseboards (shoe trim removed). Once shoe trim is re-installed, it will completely cover the sealed area.
I use Big Stretch caulk for the smaller cracks at the bottom of the baseboard. Use spray foam for larger gaps (trim off excess after dry).
CLICK HERE
https://m.media-amazon.com/images/I/31W87ld1xyL._AC_AC_SR98,95_.jpg
CLICK HERE
https://m.media-amazon.com/images/I/41vli2if6jL._AC_AC_SR98,95_.jpg
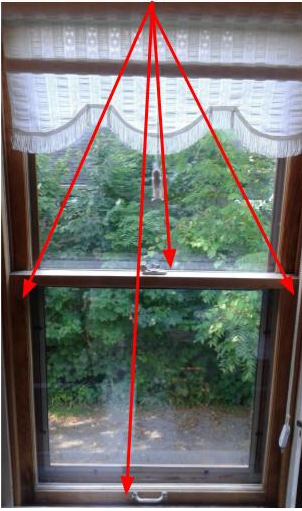
4. Use a cheap removable/peelable caulk or window insulator kit to seal your old leaky windows until they can be properly rebuilt with new ropes, gaskets and weather seals.
https://m.media-amazon.com/images/I/315I-y2cc1L._AC_AC_SR98,95_.jpg
CLICK HERE if you just need a temporary seal around the window edges. DAP Seal N Peel is just like caulk, EXCEPT it easily peels away like tape, once winter is over. See RED arrows below.
*Special Tools: Caulk gun.
CLICK HERE if you need to cover an entire leaky/drafty window. *Special Tools: Razor knife/scissors, measuring tape, hair dryer
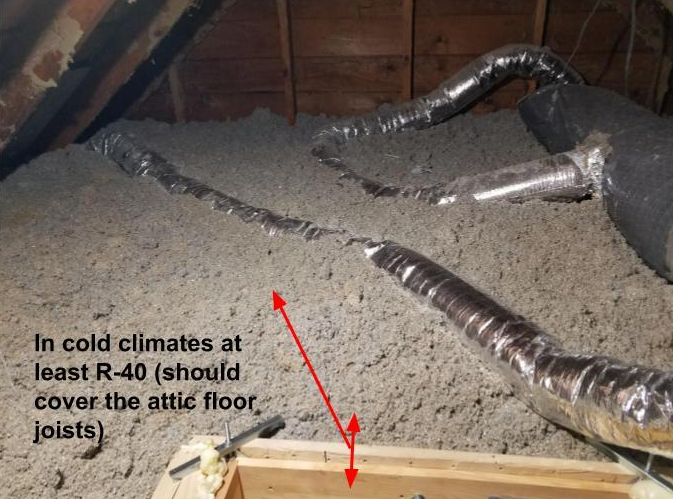
5. Pop up in your attic and see what your insulation situation looks like! If you can see the attic floor stud framing, then chances are you don’t have enough insulation. R-40 to R-49 is usually recommended in cold climates – that’s around 12 inches thick. Already have a thin layer of fiberglass down? Don’t worry, just blow in the cellulose insulation right over the top and you are good to go. This will set you back about $800 for a 1300 sq ft house attic.
TIP: Please learn from MY mistakes! Perform all new wiring, air sealing, new roofing, attic service platforms, and HVAC (includes bathroom exhaust fans) work FIRST! This way you don’t disturb the insulation once blown in and perfectly in place!
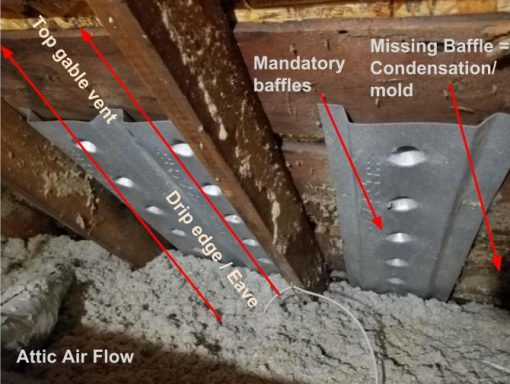
Heads-up!!!: Make sure to install the baffles in the corners at the roof eaves, so attic air flow is not blocked from packed in insulation (drip edge/eave to top gable vent).
Insulation facts: Can’t decide between fiberglass and cellulose? Did you know that cellulose beats the pants off of fiberglass insulation? In hot AND cold weather! Fiberglass can lose UP TO 50% of its R-Value in clod climated below 20 degrees.
Read more here: Comparing the Pros and Cons of Cellulose and Fiberglass Insulation
More Insulation Resources From This Old House – Which Insulation Do I Use? Vapor Barrier or Not?
How to Choose and Use Insulation | This Old House
How to Insulate an Attic | This Old House
Additional Air Sealing Ideas Often Overlook
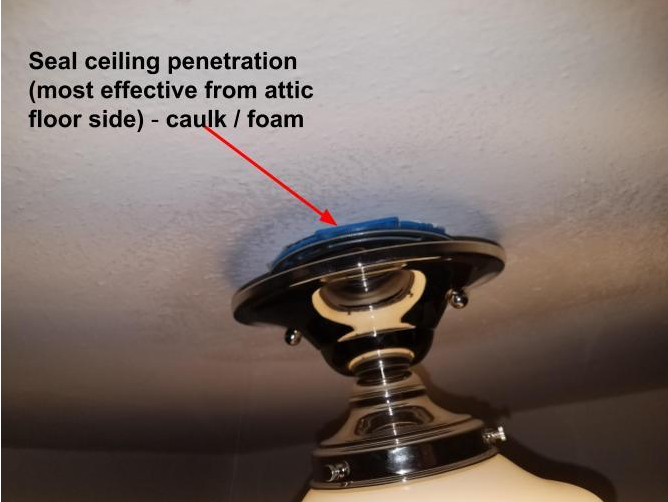
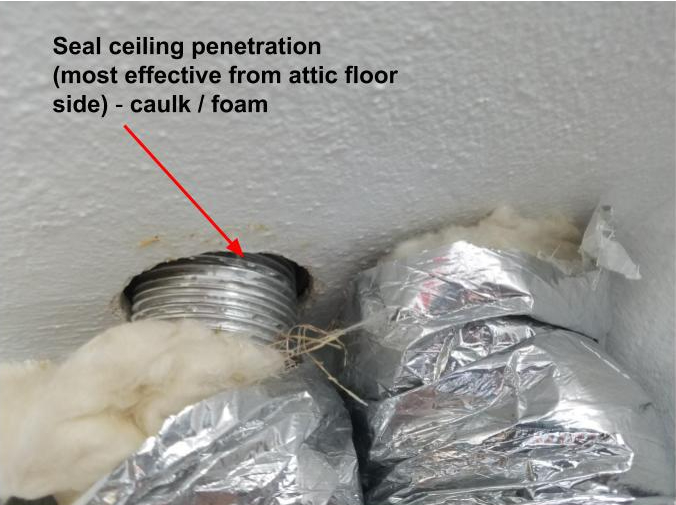
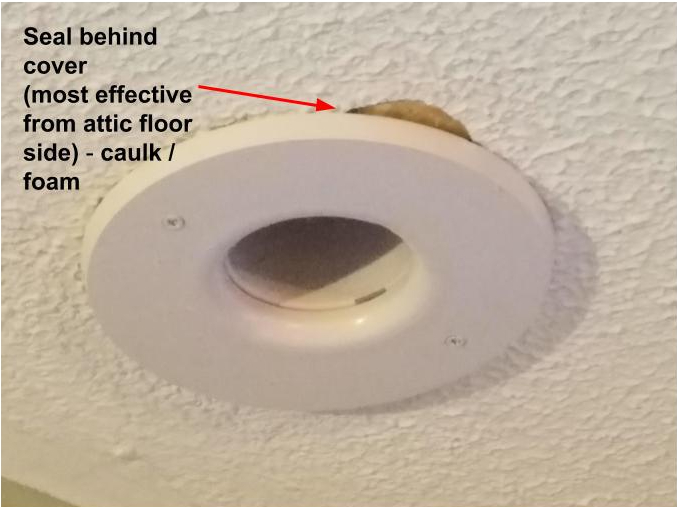
Caulk/seal/ insulate ceiling penetrations – lights, HVAC registers, etc
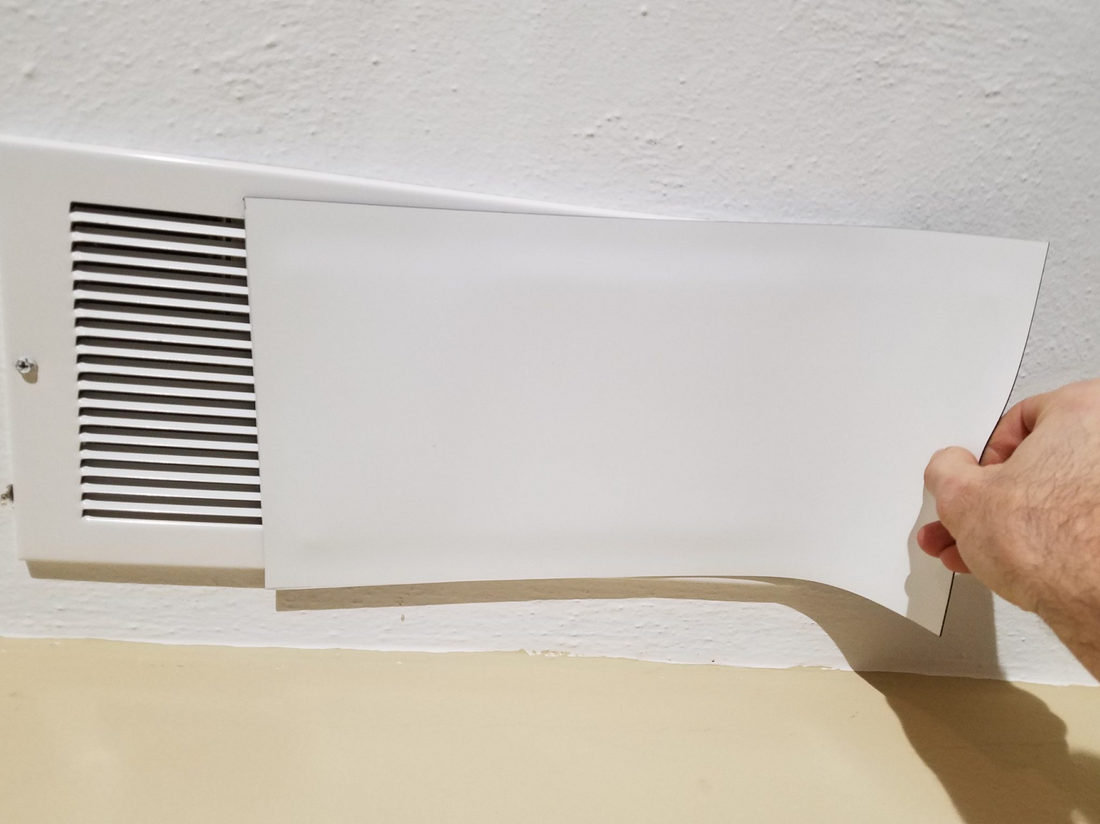
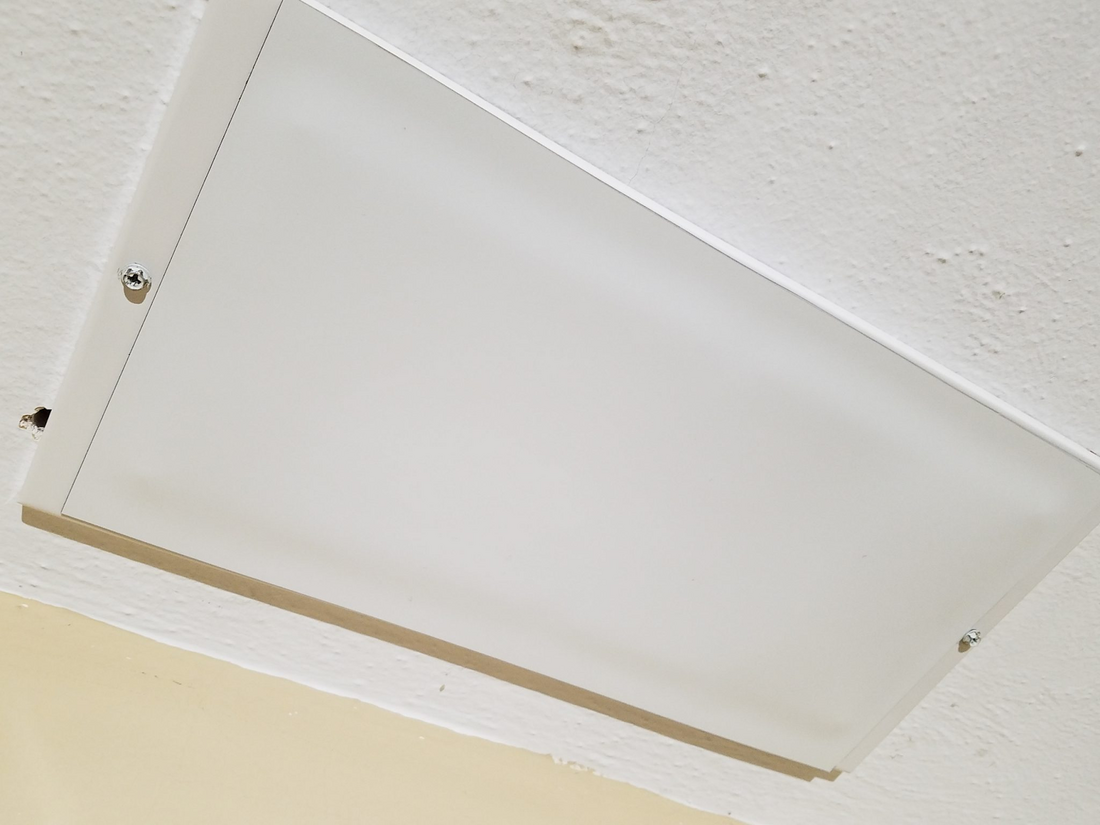
Do you have drafty HVAC cold air returns and registers? IF you have separate heating and A/C systems (like a hot water boiler/radiators for heat and a Unico for AC), and your cold air returns ARE NOT used in winter – Cover them! It's easy! The magnetic sheet rolls from Amazon are available here in 3′ – 25′ rolls (cut to size). This roll should be enough to cover all your returns.
https://m.media-amazon.com/images/I/21V3wvNfJLS._AC_AC_SR98,95_.jpg
CLICK HERE to get your magnetic sheet roll. I just cut them to size, popped them up on the metal return, and BAM…done! No more drafts! * Special Tools: Scissors, tape measure.
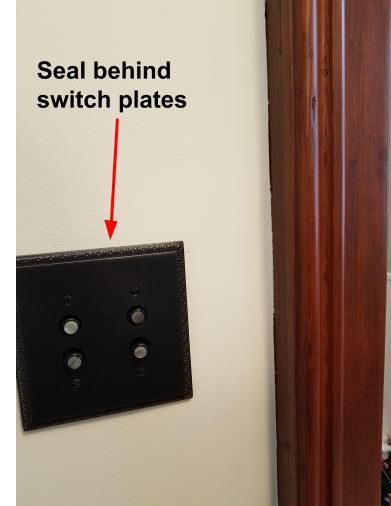
And finally, seal exterior wall penetrations – Light switch,plugs, and electrical box covers. This will keep outside air and drafts out!
CLICK HERE to get your cover plate seals if they are allowing cold air in! * SpecialTools: Screwdriver.
I hope this helps y’all out a bit to keep your house a little more comfortable! Questions/comments? Hit me up below in the comments section!
Best of luck, and keep on Fixing!

For more info visit: www.myoldhousefix.com

Posts may contain affiliate links. If you use these links to buy something, we may earn a small commission (at no additional cost to you). Full disclaimer HERE.








0 Comment(s)